CLI
The CLI helps you manage your SST apps.
If you are using SST as a part of your Node project, we recommend installing it locally.
npm install sstIf you are not using Node, you can install the CLI globally.
curl -fsSL https://sst.dev/install | bashTo install a specific version.
curl -fsSL https://sst.dev/install | VERSION=0.0.403 bashWith a package manager
You can also use a package manager to install the CLI.
-
macOS
The CLI is available via a Homebrew Tap, and as downloadable binary in the releases.
Terminal window brew install sst/tap/sst# Upgradebrew upgrade sstYou might have to run
brew upgrade sst, before the update. -
Linux
The CLI is available as downloadable binaries in the releases. Download the
.debor.rpmand install withsudo dpkg -iandsudo rpm -i.For Arch Linux, it’s available in the aur.
Usage
Once installed you can run the commands using.
sst [command]The CLI takes a few global flags. For example, the deploy command takes the --stage flag
sst deploy --stage productionEnvironment variables
You can access any environment variables set in the CLI in your sst.config.ts file. For example, running:
ENV_VAR=123 sst deployWill let you access ENV_VAR through process.env.ENV_VAR.
Global Flags
stage
Type string
Set the stage the CLI is running on.
sst [command] --stage productionThe stage is a string that is used to prefix the resources in your app. This allows you to have multiple environments of your app running in the same account.
You can also use the SST_STAGE environment variable.
SST_STAGE=dev sst [command]This can also be declared in a .env file or in the CLI session.
If the stage is not passed in, then the CLI will:
- Use the username on the local machine.
- If the username is
root,admin,prod,dev,production, then it will prompt for a stage name.
- If the username is
- Store this in the
.sst/stagefile and reads from it in the future.
This stored stage is called your personal stage.
verbose
Type boolean
Prints extra information to the log files in the .sst/ directory.
sst [command] --verboseTo also view this on the screen, use the --print-logs flag.
print-logs
Type boolean
Print the logs to the screen. These are logs that are written to the .sst/ directory.
sst [command] --print-logsIt can also be set using the SST_PRINT_LOGS environment variable.
SST_PRINT_LOGS=1 sst [command]This is useful when running in a CI environment.
config
Type string
Optionally, pass in a path to the SST config file. This default to
sst.config.ts in the current directory.
sst --config path/to/config.ts [command]This is useful when your monorepo has multiple SST apps in it. You can run the SST CLI for a specific app by passing in the path to its config file.
help
Type boolean
Prints help for the given command.
sst [command] --helpOr the global help.
sst --helpCommands
init
sst initFlags
-
yesbooleanSkip interactive confirmation for detected framework.
Initialize a new project in the current directory. This will create a sst.config.ts and sst install your providers.
If this is run in a Next.js, Remix, Astro, or SvelteKit project, it’ll init SST in drop-in mode.
To skip the interactive confirmation after detecting the framework.
sst init --yesdev
sst dev [command]Args
-
command?The command to run
Flags
-
modestringDefaults to using
multimode. Usemonoto get a single stream of all child process logs orbasicto not spawn any child processes. -
policystringRun policy pack validation against the preview changes.
Run your app in dev mode. By default, this starts a multiplexer with processes that deploy your app, run your functions, and start your frontend.
Each process is run in a separate tab that you can click on in the sidebar.
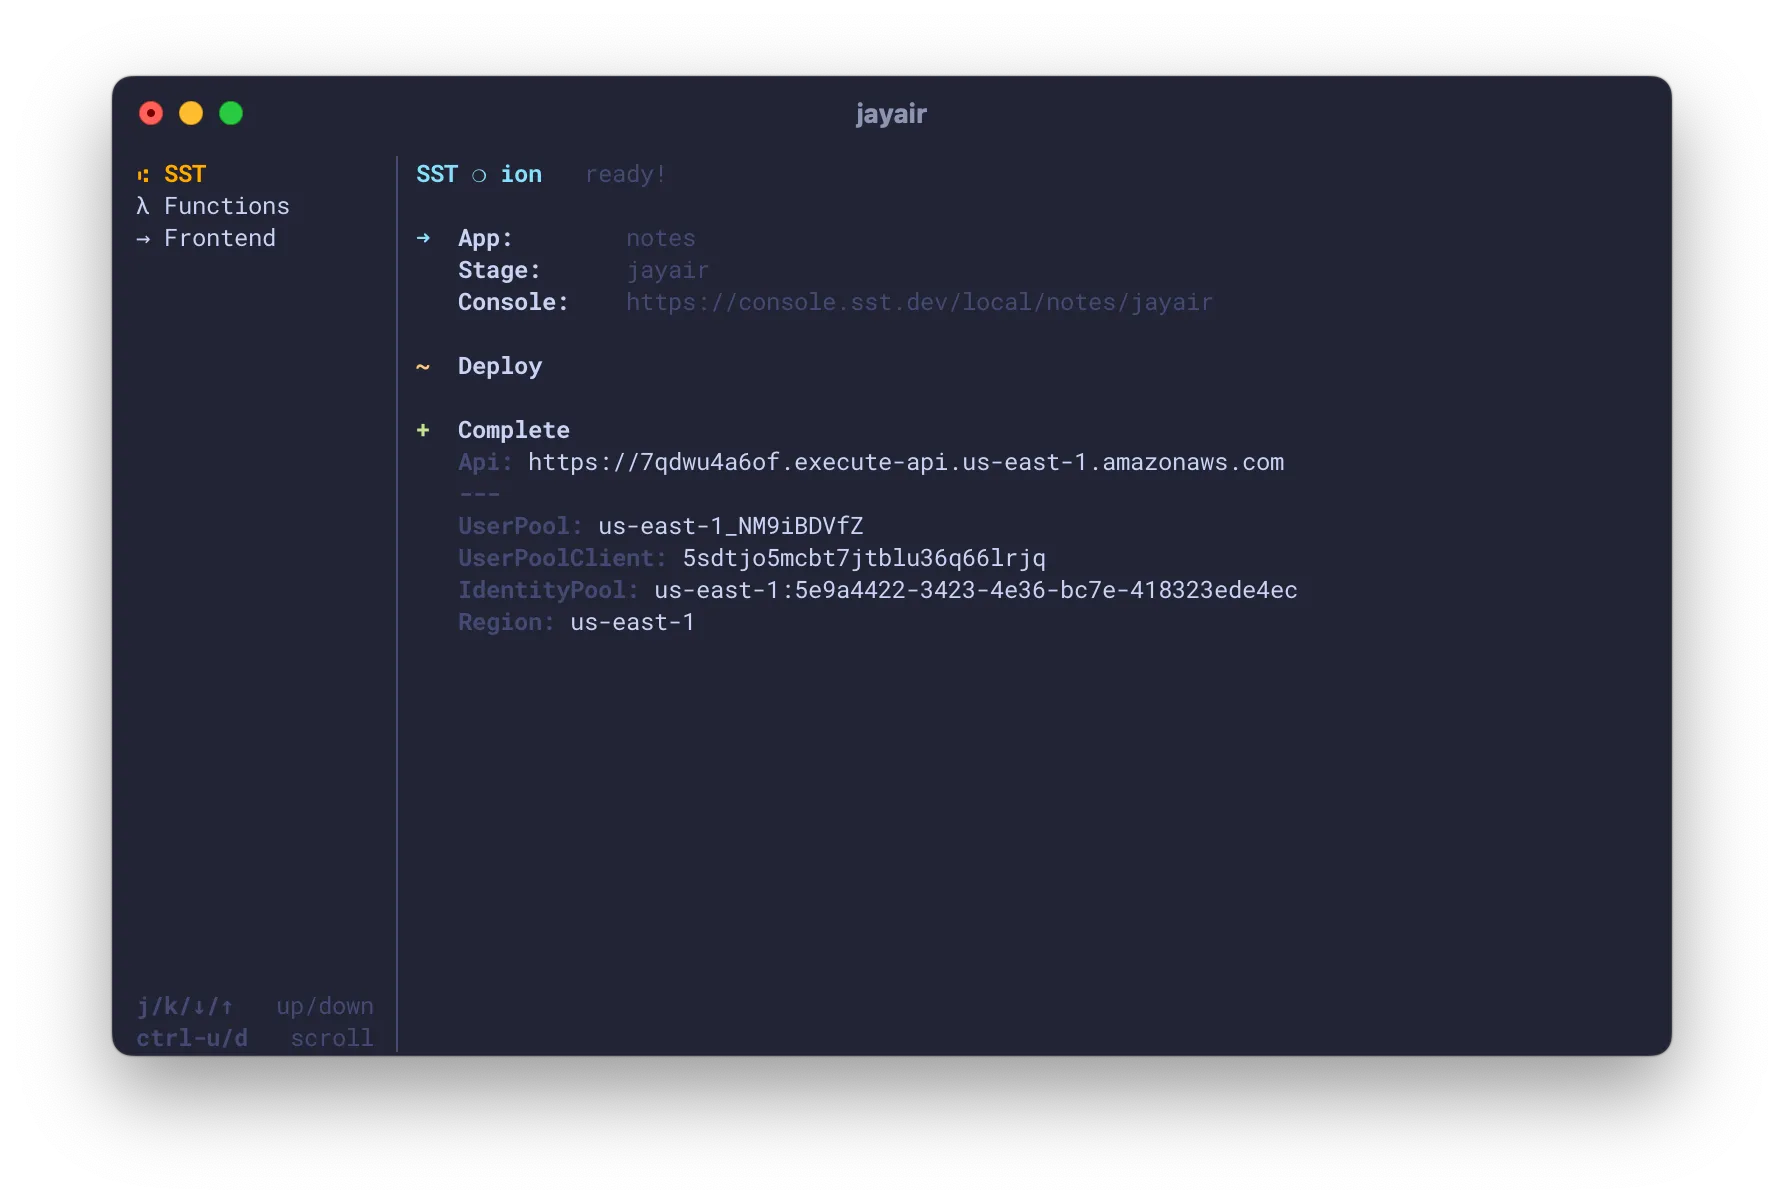
The multiplexer makes it so that you won’t have to start your frontend or your container applications separately.
Here’s what happens when you run sst dev.
- Deploy most of your resources as-is.
- Except for components that have a
devprop.Functioncomponents are run Live in the Functions tab.Taskcomponents have their stub versions deployed that proxy the task and run theirdev.commandin the Tasks tab.- Frontends like
Nextjs,Remix,Astro,StaticSite, etc. have their dev servers started in a separate tab and are not deployed. Servicecomponents are not deployed, and instead theirdev.commandis started in a separate tab.Postgres,Aurora, andRedislink to a local database if thedevprop is set.
- Start an
sst tunnelsession in a new tab if your app has aVpcwithbastionenabled. - Load any linked resources in the environment.
- Start a watcher for your
sst.config.tsand redeploy any changes.
Optionally, you can disable the multiplexer and not spawn any child
processes by running sst dev in basic mode.
sst dev --mode=basicThis will only deploy your app and run your functions. If you are coming from SST
v2, this is how sst dev used to work.
However in basic mode, you’ll need to start your frontend separately by running
sst dev in a separate terminal session by passing in the command. For example:
sst dev next devBy wrapping your command, it’ll load your linked resources in the environment.
To pass in a flag to the command, use --.
sst dev -- next dev --turboYou can also disable the tabbed terminal UI by running sst dev in
mono mode.
sst dev --mode=monoUnlike basic mode, this’ll spawn child processes. But instead of
a tabbed UI it’ll show their outputs in a single stream.
This is used by default in Windows.
deploy
sst deployFlags
-
targetOnly run it for the given component.
-
excludestringExclude the specified component from the operation.
-
continuebooleanContinue on error and try to deploy as many resources as possible.
-
devbooleanDeploy resources like
sst devwould. -
policystringRun policy pack validation against the preview changes.
Deploy your application. By default, it deploys to your personal stage. You typically want to deploy it to a specific stage.
sst deploy --stage productionOptionally, deploy a specific component by passing in the name of the component from your sst.config.ts.
sst deploy --target MyComponentAlternatively, exclude a specific component from the deploy.
sst deploy --exclude MyComponentAll the resources are deployed as concurrently as possible, based on their dependencies. For resources like your container images, sites, and functions; it first builds them and then deploys the generated assets.
Since the build processes for some of these resources take a lot of memory, their concurrency is limited by default. However, this can be configured.
| Resource | Concurrency | Flag |
|---|---|---|
| Sites | 1 | SST_BUILD_CONCURRENCY_SITE |
| Functions | 4 | SST_BUILD_CONCURRENCY_FUNCTION |
| Containers | 1 | SST_BUILD_CONCURRENCY_CONTAINER |
So only one site is built at a time, 4 functions are built at a time, and only 1 container is built at a time.
You can set the above environment variables to change this when you run sst deploy. This is useful for CI
environments where you want to control this based on how much memory your CI machine has.
For example, to build a maximum of 2 sites concurrently.
SST_BUILD_CONCURRENCY_SITE=2 sst deployOr to configure all these together.
SST_BUILD_CONCURRENCY_SITE=2 SST_BUILD_CONCURRENCY_CONTAINER=2 SST_BUILD_CONCURRENCY_FUNCTION=8 sst deployTypically, this command exits when there’s an error deploying a resource.
But sometimes you want to be able to --continue deploying as many resources as possible;
sst deploy --continueThis is useful when deploying a new stage with a lot of resources. You want to be able to deploy as many resources as possible and then come back and fix the errors.
The sst dev command deploys your resources a little differently. It skips
deploying resources that are going to be run locally. Sometimes you want to
deploy a personal stage without starting sst dev.
sst deploy --devThe --dev flag will deploy your resources as if you were running sst dev.
diff
sst diffFlags
-
targetOnly run it for the given component.
-
excludestringExclude the specified component from the operation.
-
devbooleanCompare to the dev version of this stage.
-
policystringRun policy pack validation against the preview changes.
-
jsonbooleanOutput the diff result as JSON to stdout. Useful for CI pipelines and scripting.
Builds your app to see what changes will be made when you deploy it.
It displays a list of resources that will be created, updated, or deleted. For each of these resources, it’ll also show the properties that are changing.
This is useful for cases when you pull some changes from a teammate and want to see what will be deployed; before doing the actual deploy.
Optionally, you can diff a specific component by passing in the name of the component from your sst.config.ts.
sst diff --target MyComponentAlternatively, exclude a specific component from the diff.
sst diff --exclude MyComponentBy default, this compares to the last deploy of the given stage as it would be
deployed using sst deploy. But if you are working in dev mode using sst dev,
you can use the --dev flag.
sst diff --devThis is useful because in dev mode, you app is deployed a little differently.
add
sst add <provider>Args
-
providerThe provider to add.
Adds and installs the given provider. For example,
sst add awsThis command will:
- Installs the package for the AWS provider.
- Add
awsto the globals in yoursst.config.ts. - And, add it to your
providers.
{ providers: { aws: "6.27.0" }}You can use any provider listed in the Directory.
By default, the latest version of the provider is installed. If you want to use a specific version, you can change it in your config.
{ providers: { aws: { version: "6.26.0" } }}You’ll need to run sst install if you update the providers in your config.
By default, these packages are fetched from the NPM registry. If you want to use a different registry, you can set the NPM_REGISTRY environment variable.
NPM_REGISTRY=https://my-registry.com sst add awsYou can also set the registry in your .npmrc file. If your registry requires authentication, SST supports _authToken, _auth, and username/_password from .npmrc.
install
sst installInstalls the providers in your sst.config.ts. You’ll need this command when:
- You add a new provider to the
providersorhomein your config. - Or, when you want to install new providers after you
git pullsome changes.
Behind the scenes, it installs the packages for your providers and adds the providers to your globals.
If you don’t have a version specified for your providers in your sst.config.ts, it’ll install their latest versions.
secret
Flags
-
fallbackbooleanManage the fallback values of secrets.
Subcommands
Manage the secrets in your app defined with sst.Secret.
The --fallback flag can be used to manage the fallback values of a secret.
Applies to all the sub-commands in sst secret.
secret set
sst secret set <name> [value]Args
-
nameThe name of the secret.
-
valueThe value of the secret.
Set the value of the secret.
The secrets are encrypted and stored in an S3 Bucket in your AWS account. They are also stored in the package of the functions using the secret.
For example, set the sst.Secret called StripeSecret to 123456789.
sst secret set StripeSecret dev_123456789Optionally, set the secret in a specific stage.
sst secret set StripeSecret prod_123456789 --stage productionYou can also set a fallback value for a secret with --fallback.
sst secret set StripeSecret dev_123456789 --fallbackSo if the secret is not set for a specific stage, it’ll use the fallback instead. This only works for stages that are in the same AWS account.
This is useful for preview environments that are automatically deployed. You won’t have to set the secret for the stage after it’s deployed.
To set something like an RSA key, you can first save it to a file.
cat > tmp.txt <<EOF-----BEGIN RSA PRIVATE KEY-----MEgCQQCo9+BpMRYQ/dL3DS2CyJxRF+j6ctbT3/Qp84+KeFhnii7NT7fELilKUSnxS30WAvQCCo2yU1orfgqr41mM70MBAgMBAAE=-----END RSA PRIVATE KEY-----EOFThen set the secret from the file.
sst secret set Key < tmp.txtAnd make sure to delete the temp file.
secret remove
sst secret remove <name>Args
-
nameThe name of the secret.
Remove a secret.
For example, remove the sst.Secret called StripeSecret.
sst secret remove StripeSecretOptionally, remove a secret in a specific stage.
sst secret remove StripeSecret --stage productionRemove the fallback value of the secret.
sst secret remove StripeSecret --fallbacksecret load
sst secret load <file>Args
-
fileThe file to load the secrets from.
Load all the secrets from a file and set them.
sst secret load ./secrets.envThe file needs to be in the dotenv or bash format of key-value pairs.
KEY_1=VALUE1KEY_2=VALUE2Optionally, set the secrets in a specific stage.
sst secret load --stage production ./prod.envSet these secrets as fallback values.
sst secret load ./secrets.env --fallbackThis command can be paired with the secret list command to get all the
secrets from one stage and load them into another.
sst secret list > ./secrets.envsst secret load --stage production ./secrets.envThis works because secret list outputs the secrets in the right format.
secret list
sst secret listLists all the secrets.
Optionally, list the secrets in a specific stage.
sst secret list --stage productionList only the fallback secrets.
sst secret list --fallbackshell
sst shell [command]Args
-
command?A command to run.
Flags
-
targetOnly run it for the given component.
Run a command with all the resources linked to the environment. This is useful for running scripts against your infrastructure.
For example, let’s say you have the following resources in your app.
new sst.aws.Bucket("MyMainBucket");new sst.aws.Bucket("MyAdminBucket");We can now write a script that’ll can access both these resources with the JS SDK.
import { Resource } from "sst";
console.log(Resource.MyMainBucket.name, Resource.MyAdminBucket.name);
And run the script with sst shell.
sst shell node my-script.jsThis’ll have access to all the buckets from above.
To pass arguments into the script, you’ll need to prefix it using --.
sst shell -- node my-script.js --arg1 --arg2If no command is passed in, it opens a shell session with the linked resources.
sst shellThis is useful if you want to run multiple commands, all while accessing the resources in your app.
Optionally, you can run this for a specific component by passing in the name of the component.
sst shell --target MyComponentHere the linked resources for MyComponent and its environment variables are available.
remove
sst removeFlags
-
targetstringOnly run it for the given component.
Removes your application. By default, it removes your personal stage.
This does not remove the SST state and bootstrap resources in your account as these might still be in use by other apps. You can remove them manually if you want to reset your account, learn more.
Optionally, remove your app from a specific stage.
sst remove --stage productionYou can also remove a specific component by passing in the name of the component from your sst.config.ts.
sst remove --target MyComponentunlock
sst unlockWhen you run sst deploy, it acquires a lock on your state file to prevent concurrent deploys.
However, if something unexpectedly kills the sst deploy process, or if you manage to run sst deploy concurrently, the lock might not be released.
This should not usually happen, but it can prevent you from deploying. You can run sst unlock to release the lock.
version
sst versionPrints the current version of the CLI.
upgrade
sst upgrade [version]Args
-
version?A version to upgrade to.
Upgrade the CLI to the latest version. Or optionally, pass in a version to upgrade to.
sst upgrade 0.10telemetry
Subcommands
Manage telemetry settings.
SST collects completely anonymous telemetry data about general usage. We track:
- Version of SST in use
- Command invoked,
sst dev,sst deploy, etc. - General machine information, like the number of CPUs, OS, CI/CD environment, etc.
This is completely optional and can be disabled at any time.
You can also opt-out by setting an environment variable: SST_TELEMETRY_DISABLED=1 or DO_NOT_TRACK=1.
telemetry enable
sst telemetry enableEnable telemetry.
telemetry disable
sst telemetry disableDisable telemetry.
refresh
sst refreshFlags
-
targetstringOnly run it for the given component.
-
excludestringExclude the specified component from the operation.
-
devbooleanRefresh the dev version of this stage.
Compares your local state with the state of the resources in the cloud provider. Any changes that are found are adopted into your local state. It will:
- Go through every single resource in your state.
- Make a call to the cloud provider to check the resource.
- If the configs are different, it’ll update the state to reflect the change.
- If the resource doesn’t exist anymore, it’ll remove it from the state.
By default, this refreshes the stage as it would be deployed using sst deploy. If the stage was deployed using sst dev, use the --dev flag.
sst refresh --devYou can also refresh a specific component by passing in the name of the component.
sst refresh --target MyComponentAlternatively, exclude a specific component from the refresh.
sst refresh --exclude MyComponentThis is useful for cases where you want to ensure that your local state is in sync with your cloud provider. Learn more about how state works.
state
state edit
sst state editEdit the raw state of your app directly.
This opens your state file in your local editor ($EDITOR, or vim by default).
When you save and exit, SST pushes those changes back to your backend.
state export
sst state exportFlags
-
decryptDecrypt the state before printing it out.
Prints the state of your app.
This pull the state of your app from the cloud provider and then prints it out. You can write this to a file or view it directly in your terminal.
This can be run for specific stages as well.
sst state export --stage productionBy default, it runs on your personal stage.
state list
sst state listLists all the stages of your app for the current set of credentials.
This pulls the state of your app from the cloud provider and then prints out all the stages that are listed in the state.
state remove
sst state remove <target>Args
-
targetThe name of the resource to remove.
Removes the reference for the given resource from the state.
This does not remove the resource itself, it only edits the state of your app.
sst state remove MyBucketHere, MyBucket is the name of the resource as defined in your sst.config.ts.
new sst.aws.Bucket("MyBucket");This command will:
- Find the resource with the given name in the state.
- Remove that from the state. It does not remove the children of this resource.
- Runs a
repairto remove any dependencies to this resource.
You can run this for specific stages as well.
sst state remove MyBucket --stage productionBy default, it runs on your personal stage.
state repair
sst state repairRepairs the state of your app if it’s corrupted.
Sometimes, if something goes wrong with your app, or if the state was directly
edited, the state can become corrupted. This will cause your sst deploy command
to fail.
This command looks for the following issues and fixes them.
-
Since the state is a list of resources, if one resource depends on another, it needs to be listed after the one it depends on. This command finds resources that depend on each other but are not ordered correctly and reorders them.
-
If resource B depends on resource A, but resource A is not listed in the state, it’ll remove the dependency.
This command does this by going through all the resources in the state, fixing the issues and updating the state.
You can run this for specific stages as well.
sst state repair --stage productionBy default, it runs on your personal stage.
cert
sst certGenerate a locally-trusted certificate to connect to the Console.
The Console can show you local logs from sst dev by connecting to your CLI. Certain browsers like Safari and Brave require the local connection to be running on HTTPS.
This command uses mkcert internally to generate a locally-trusted certificate for localhost and 127.0.0.1.
You’ll only need to do this once on your machine.
tunnel
Subcommands
Start a tunnel.
sst tunnelIf your app has a VPC with bastion enabled, you can use this to connect to it.
This will forward traffic from the following ranges over SSH:
10.0.4.0/2210.0.12.0/2210.0.0.0/2210.0.8.0/22
The tunnel allows your local machine to access resources that are in the VPC.
If you are running sst dev, this tunnel will be started automatically under the
Tunnel tab in the sidebar.
You can start this manually if you want to connect to a different stage.
sst tunnel --stage productionThis needs a network interface on your local machine. You can create this
with the sst tunnel install command.
tunnel install
sst tunnel installInstall the tunnel.
To be able to create a tunnel, SST needs to create a network interface on your local
sudo sst tunnel installYou only need to run this once on your machine.
diagnostic
sst diagnosticGenerates a diagnostic report based on the last command that was run.
This takes the state of your app, its log files, and generates a zip file in the .sst/ directory. This is for debugging purposes.