


How to Add Google Login to Your Serverless App with SST Auth
In this example, we will look at how to add Google Login to your serverless app using SST Auth.
Requirements
- Node.js 16 or later
- We’ll be using TypeScript
- An AWS account with the AWS CLI configured locally
Create an SST app
 Let’s start by creating an SST app.
$ npx create-sst@latest --template=base/example api-sst-auth-google
$ cd api-sst-auth-google
$ npm install
By default, our app will be deployed to the us-east-1 AWS region. This can be changed in the sst.config.ts in your project root.
import { SSTConfig } from "sst";
export default {
config(_input) {
return {
name: "api-sst-auth-google",
region: "us-east-1",
};
},
} satisfies SSTConfig;
Project layout
An SST app is made up of three parts.
-
stacks/— Infrastructure codeThe code that describes the infrastructure of your serverless app is placed in the
stacks/directory of your project. SST uses AWS CDK, to create the infrastructure. -
packages/functions/— Application codeThe code that’s run when your API is invoked is placed in the
packages/functions/directory of your project.
Auth flow
Before we start let’s first take a look at the auth flow at a high level.

-
The user clicks on “Sign in with Google” in the frontend, and gets redirected to an Authorize URL to initiate the auth flow.
-
This will redirect the user to Google and they login to their Google account.
-
Google redirects the user back to a Callback URL with the user’s details.
-
In the Callback URL we:
Store the user data in our database, create a session token for the user, and redirect to the frontend with the session token.
The session token is then stored in the cookie or local storage. At this point, the user is authenticated.
-
From now on, when the user makes API requests, the session token gets passed in through the request header.
-
The backend API verifies the session token, decodes the user id from it, and looks up the user in the database.
In this tutorial, we will be implementing each of the above steps.
Create a Google project
Before we start, make sure you have a Google Project with OAuth client credentials. You can follow the steps below to create a new project and a new OAuth client.
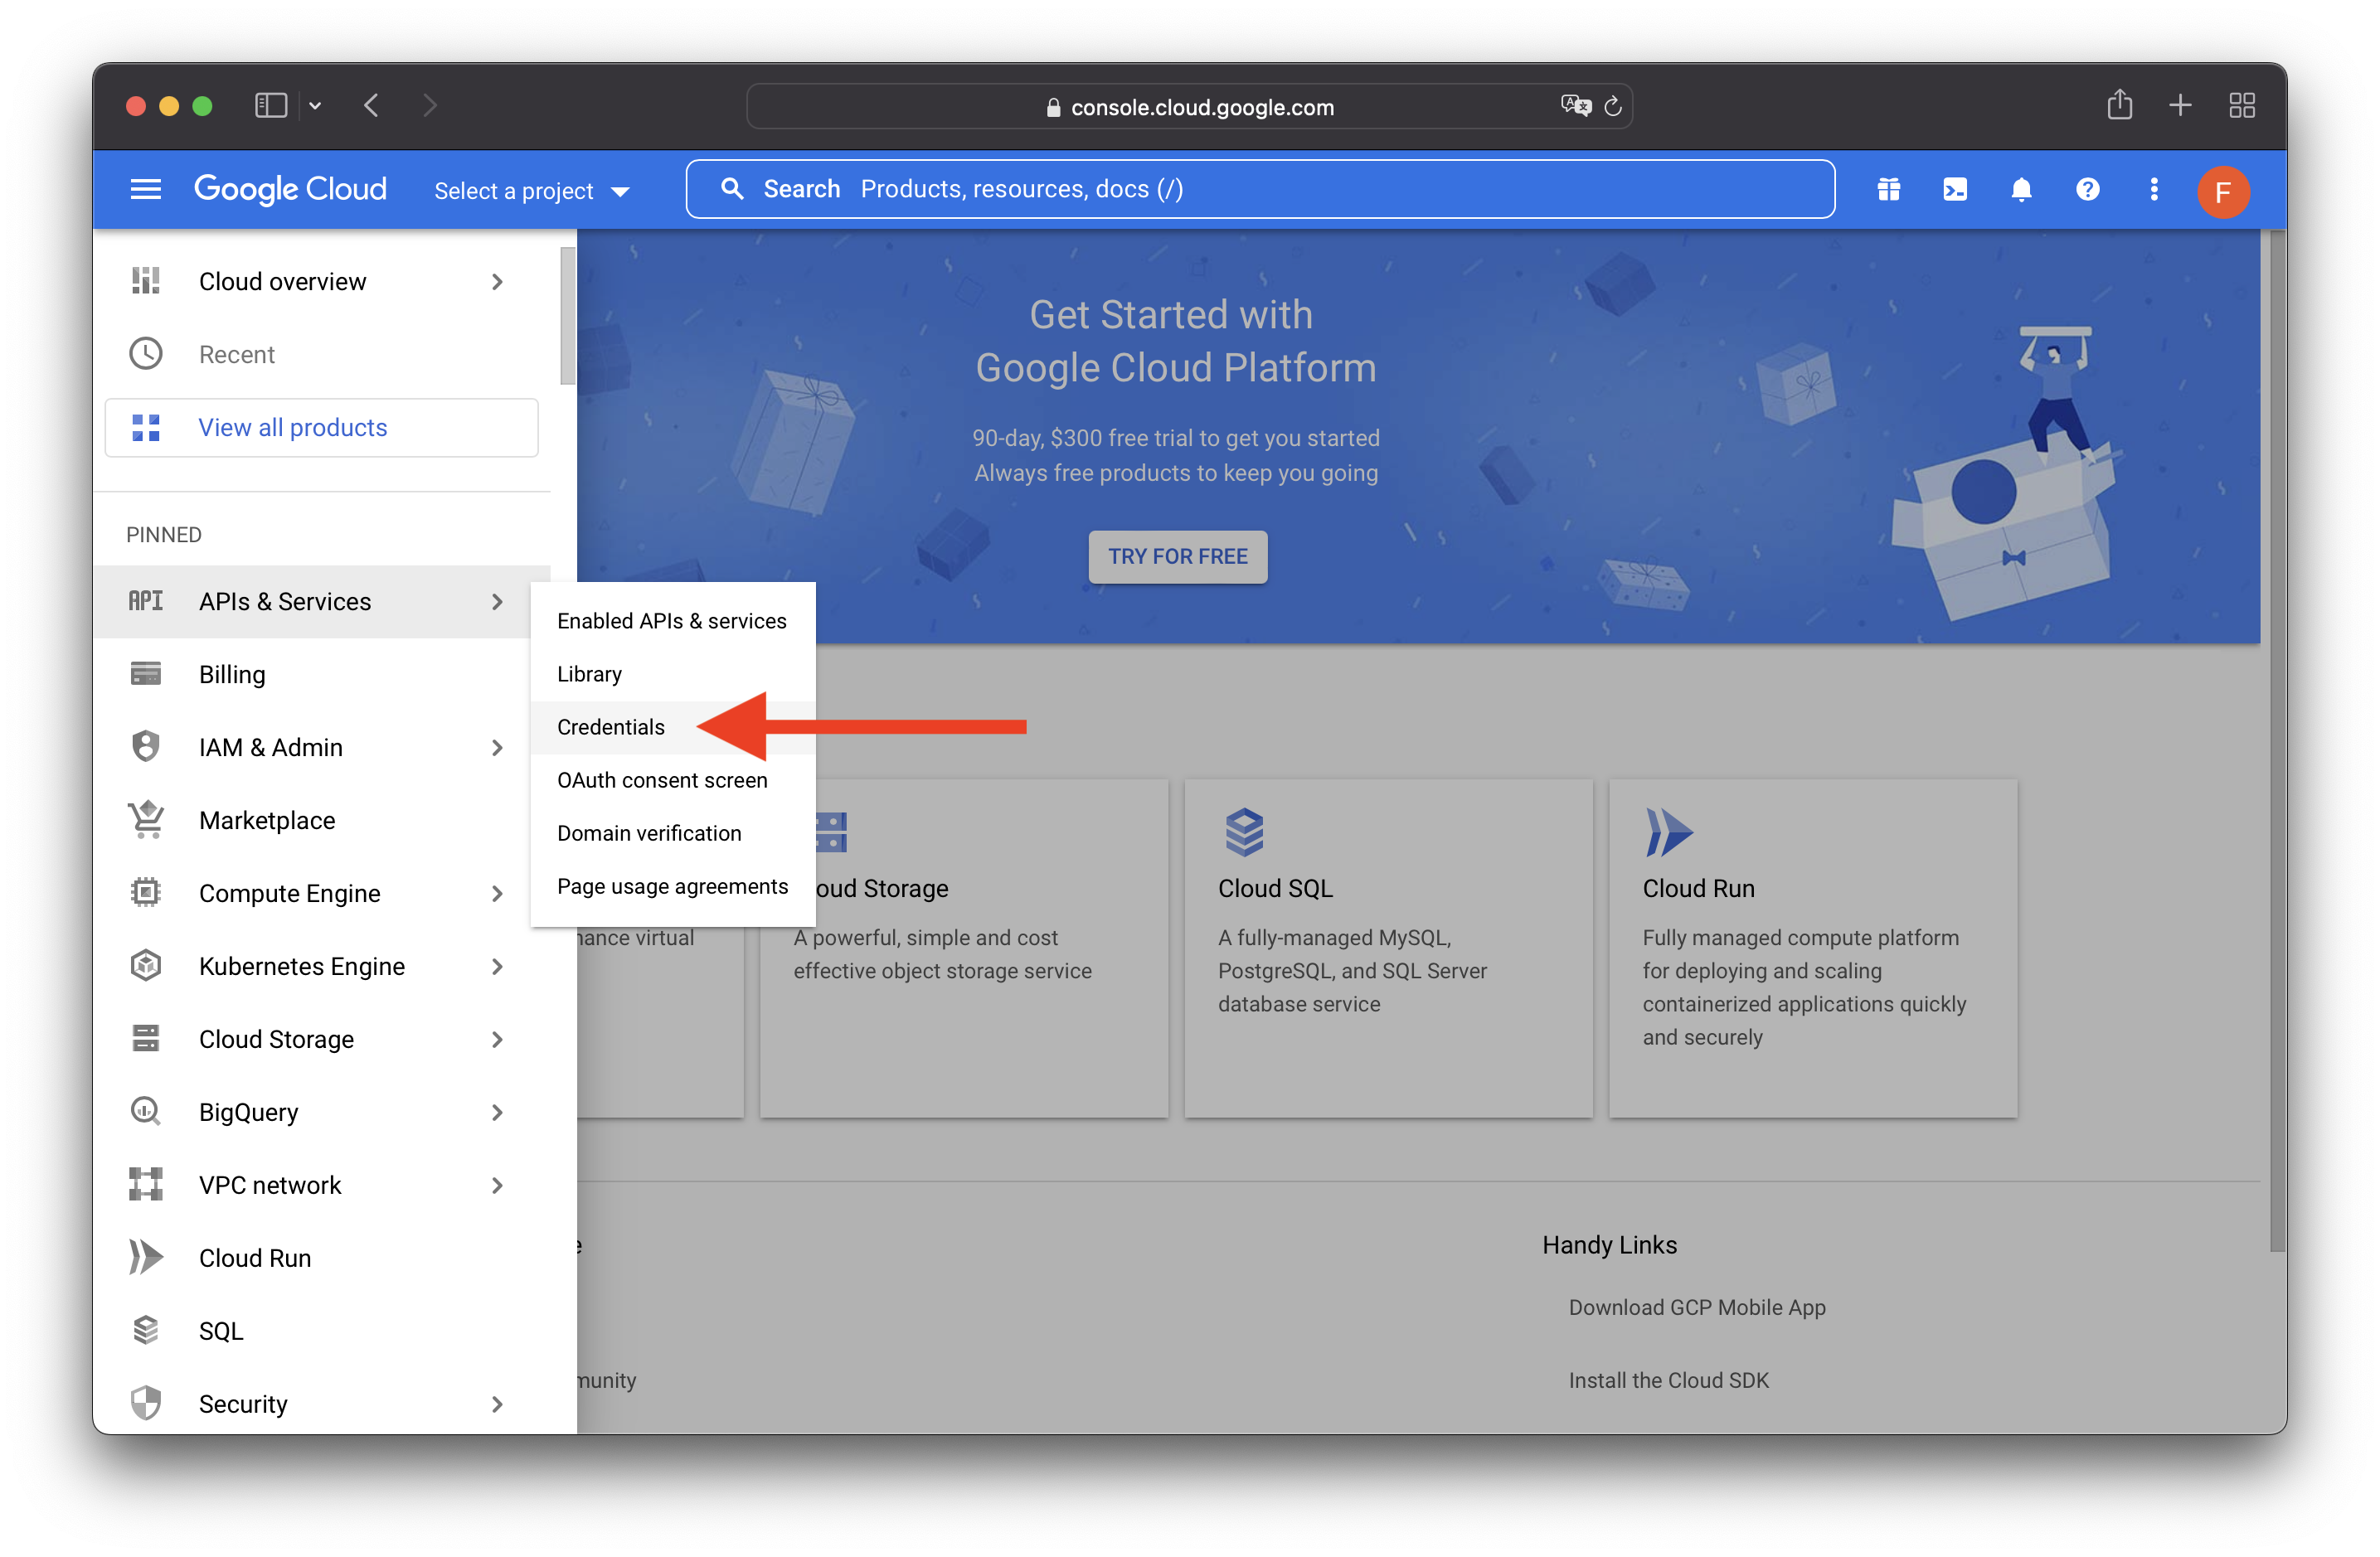
Head over to the Google Cloud console, select the navigation menu on the top left, then APIs & Services, and then Credentials.
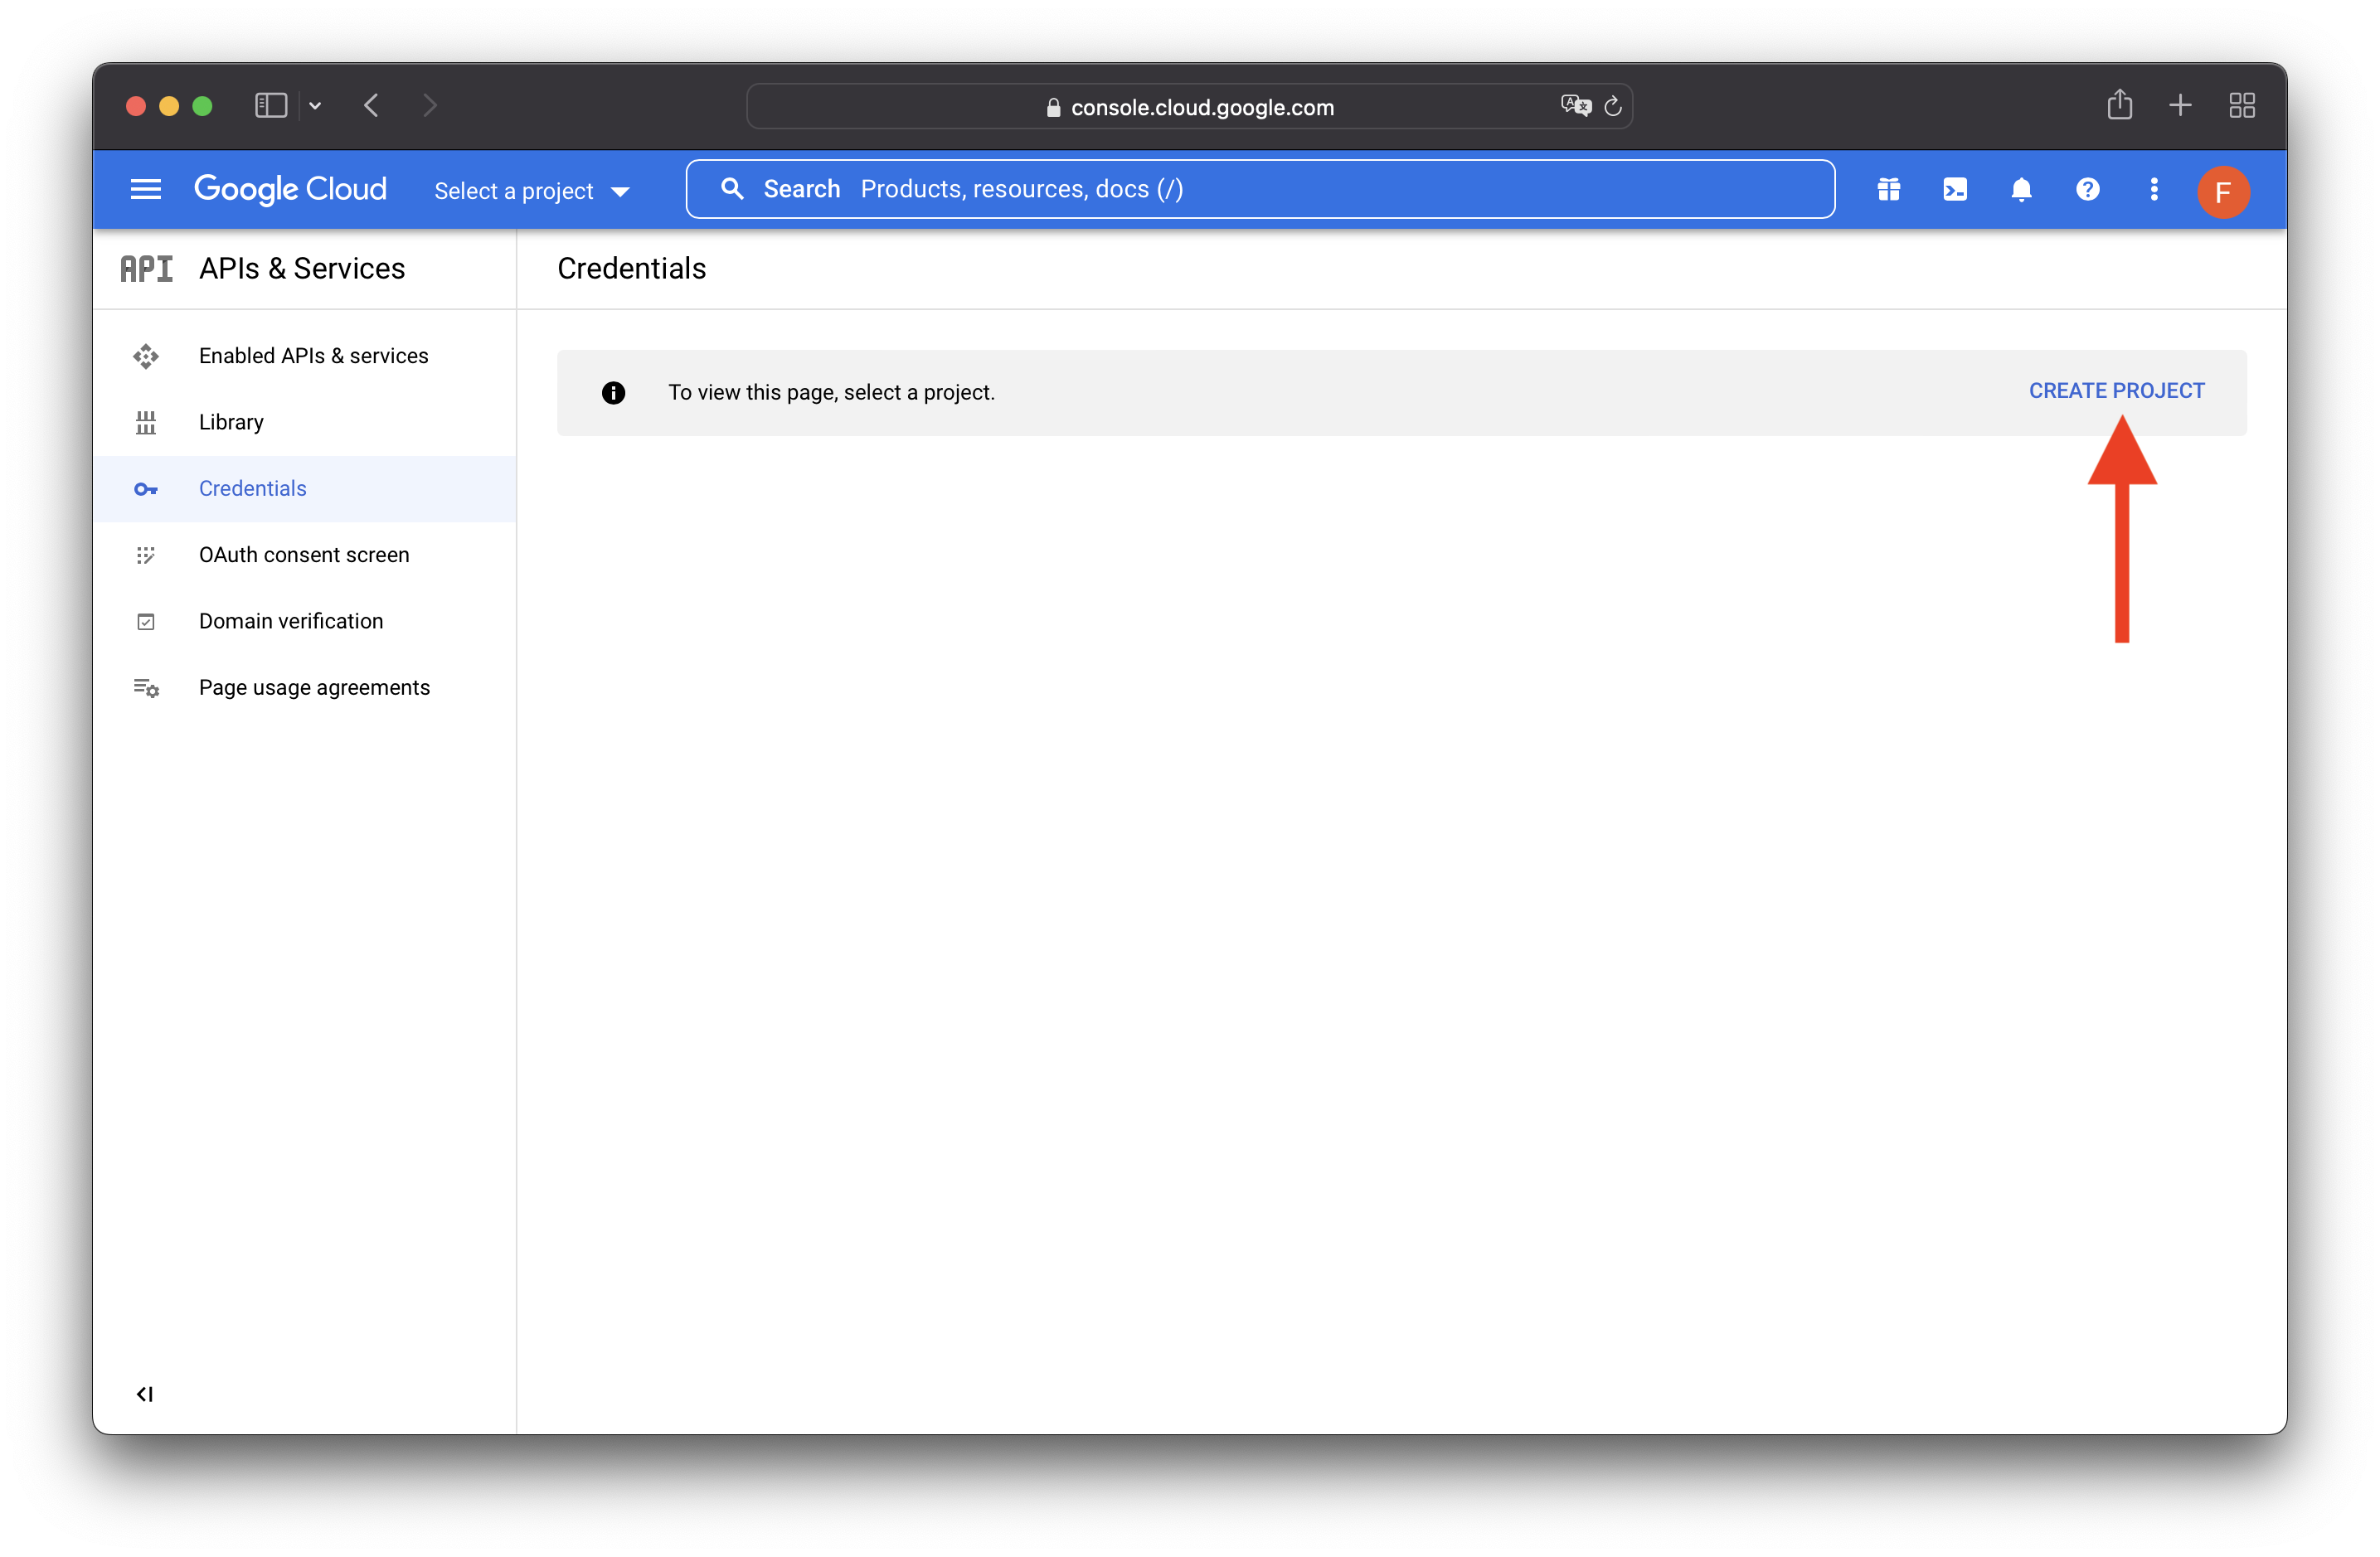
If you don’t have an existing Google project, click CREATE PROJECT.
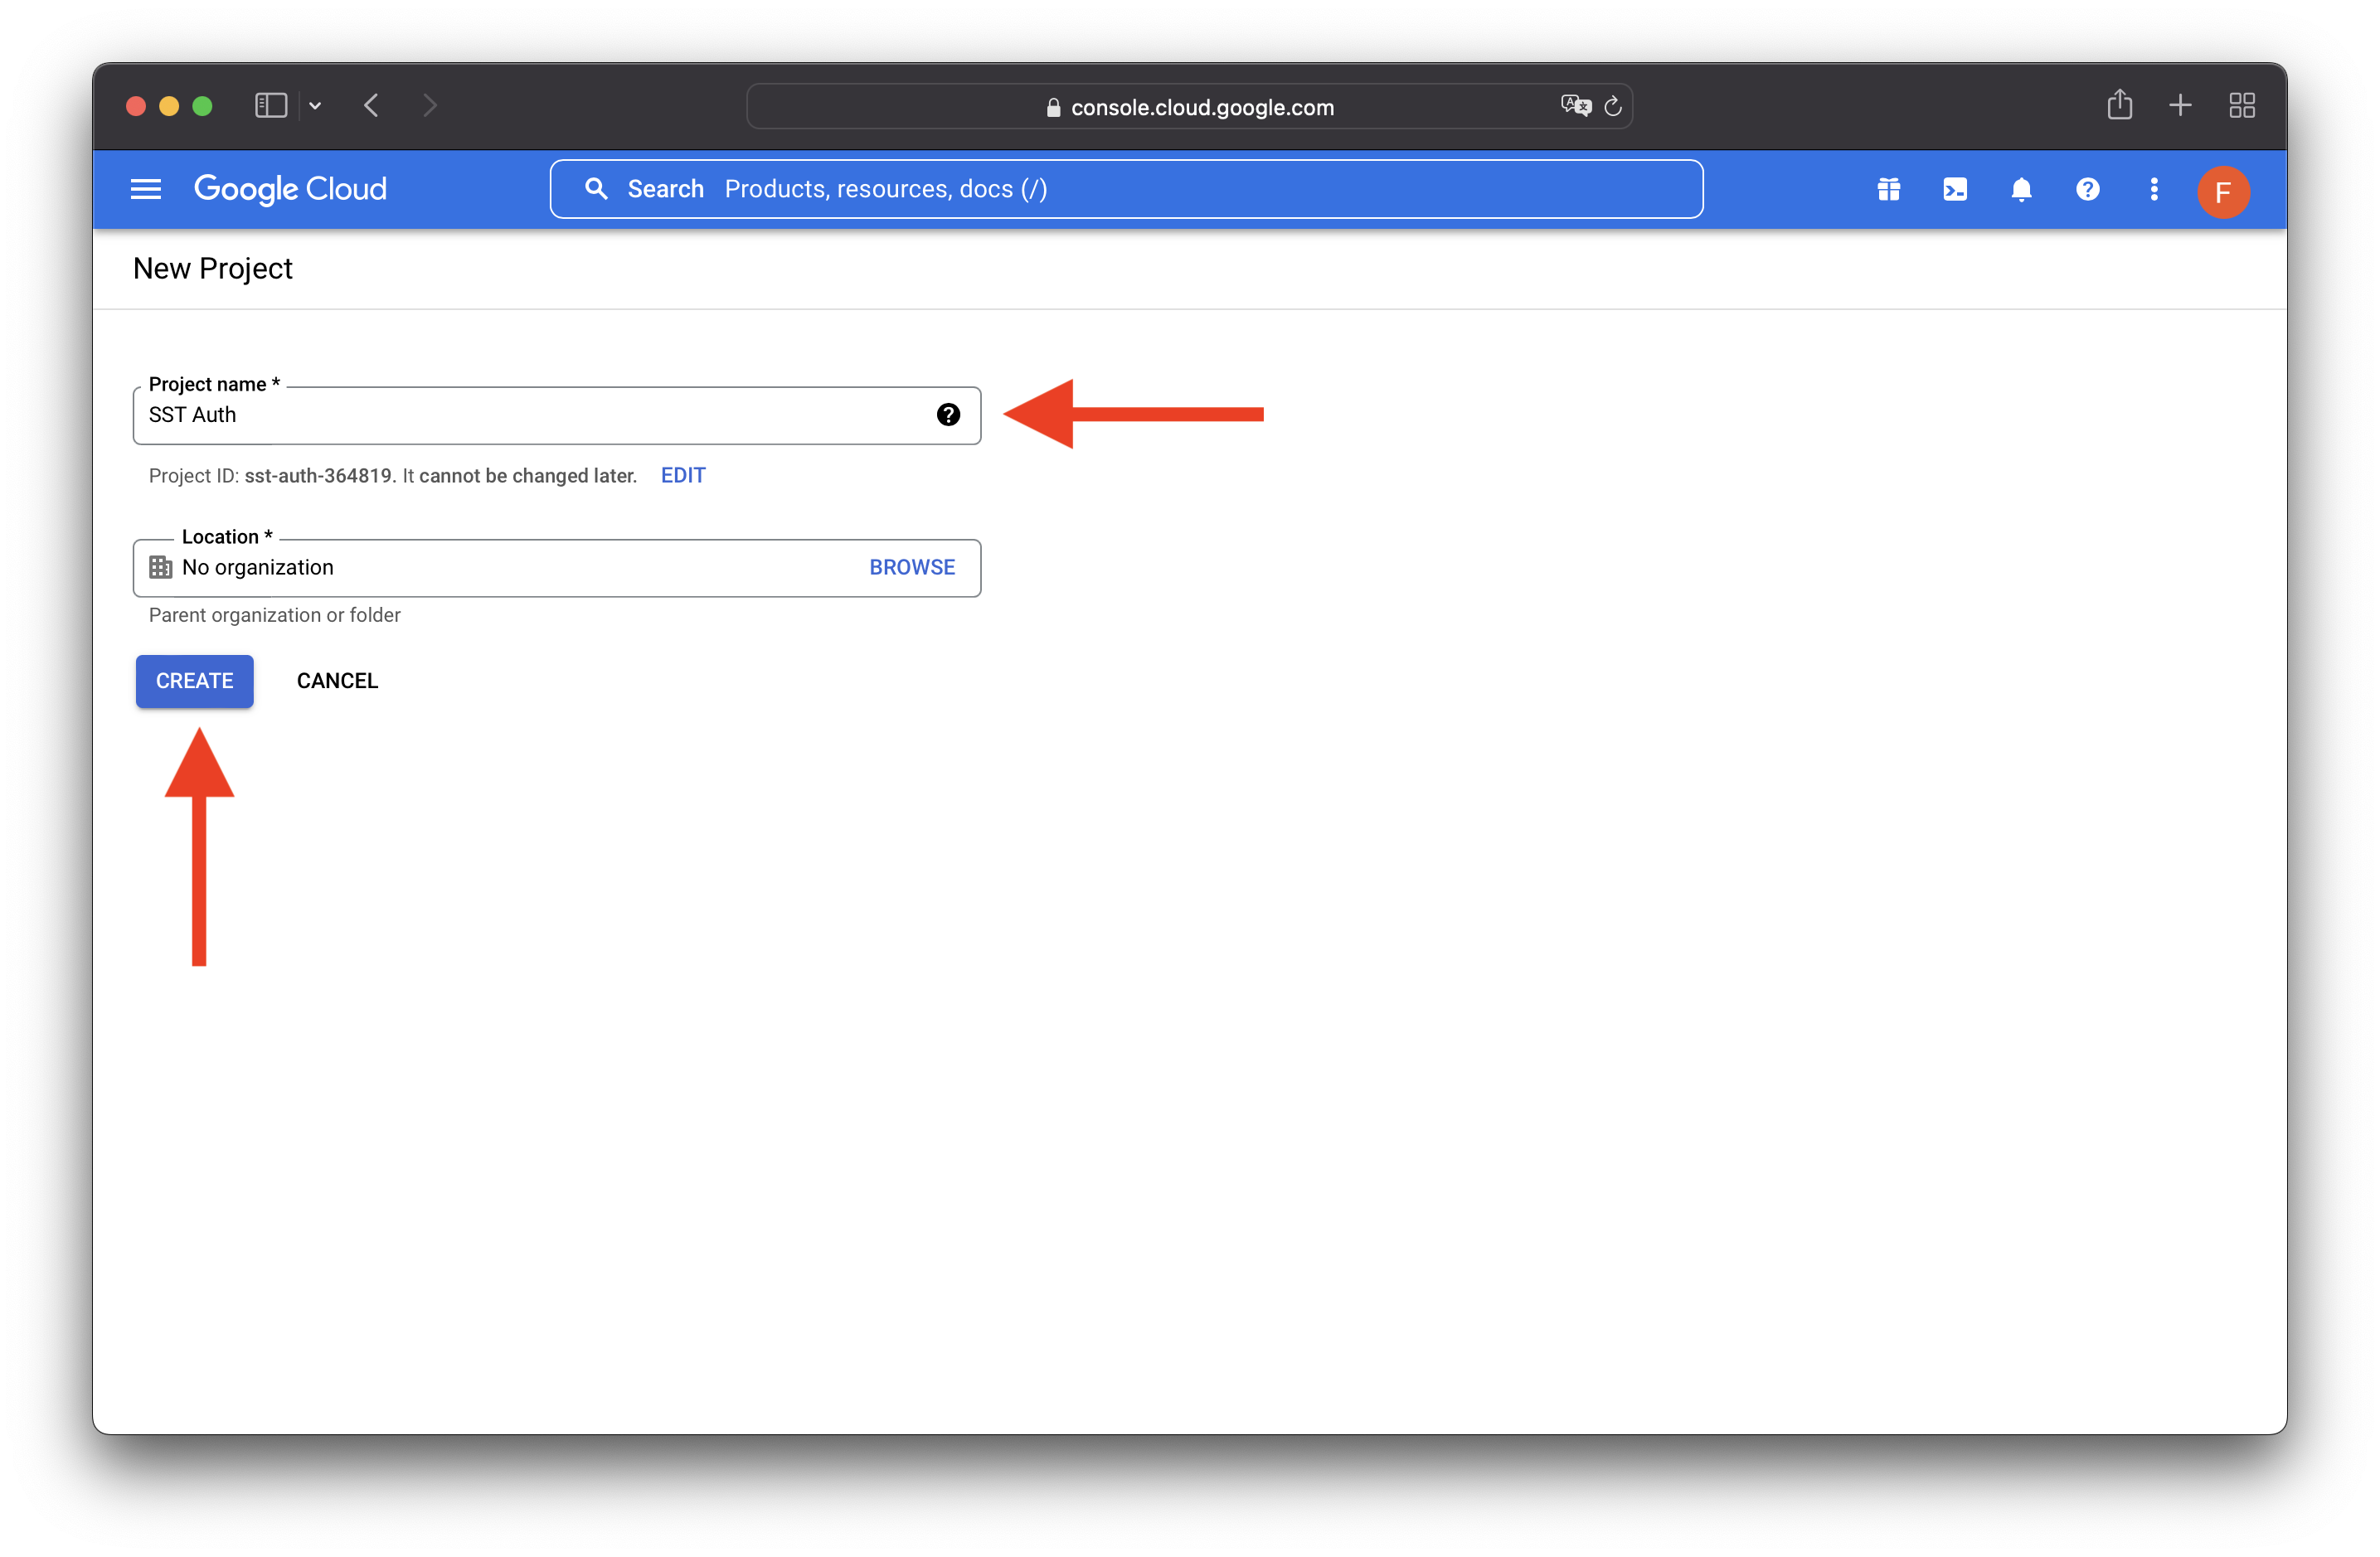
Enter a project name, then click CREATE.
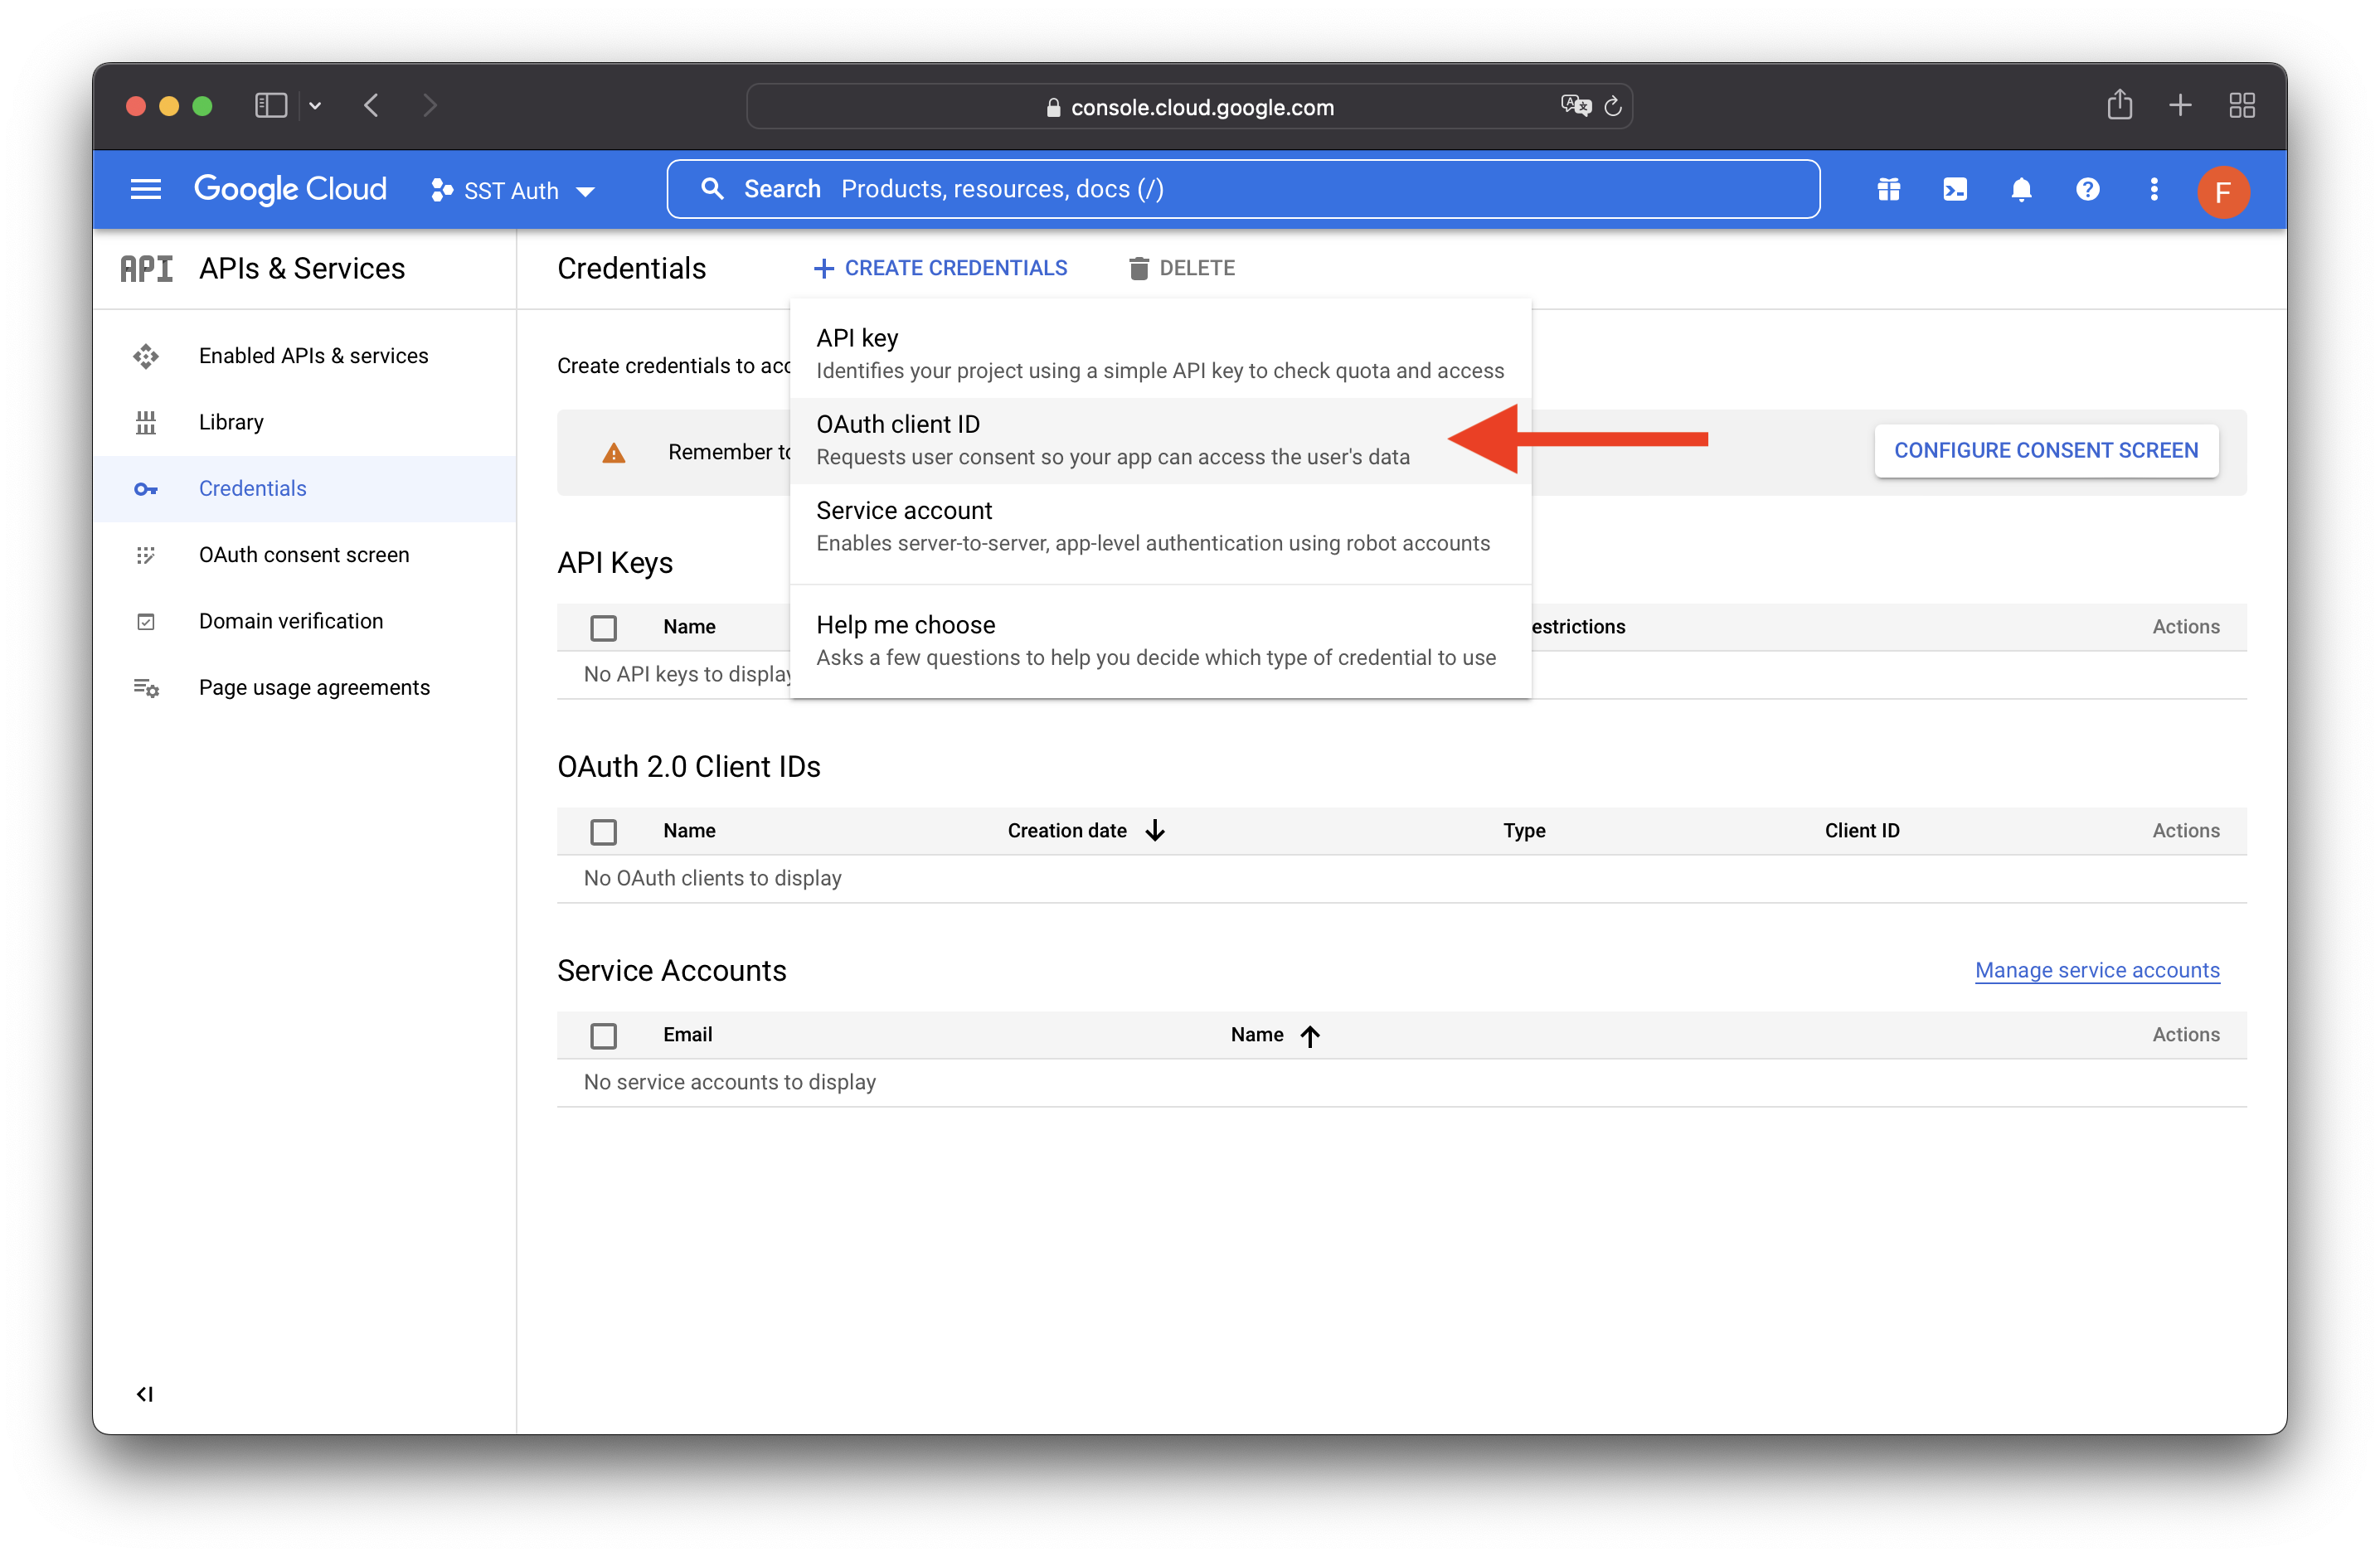
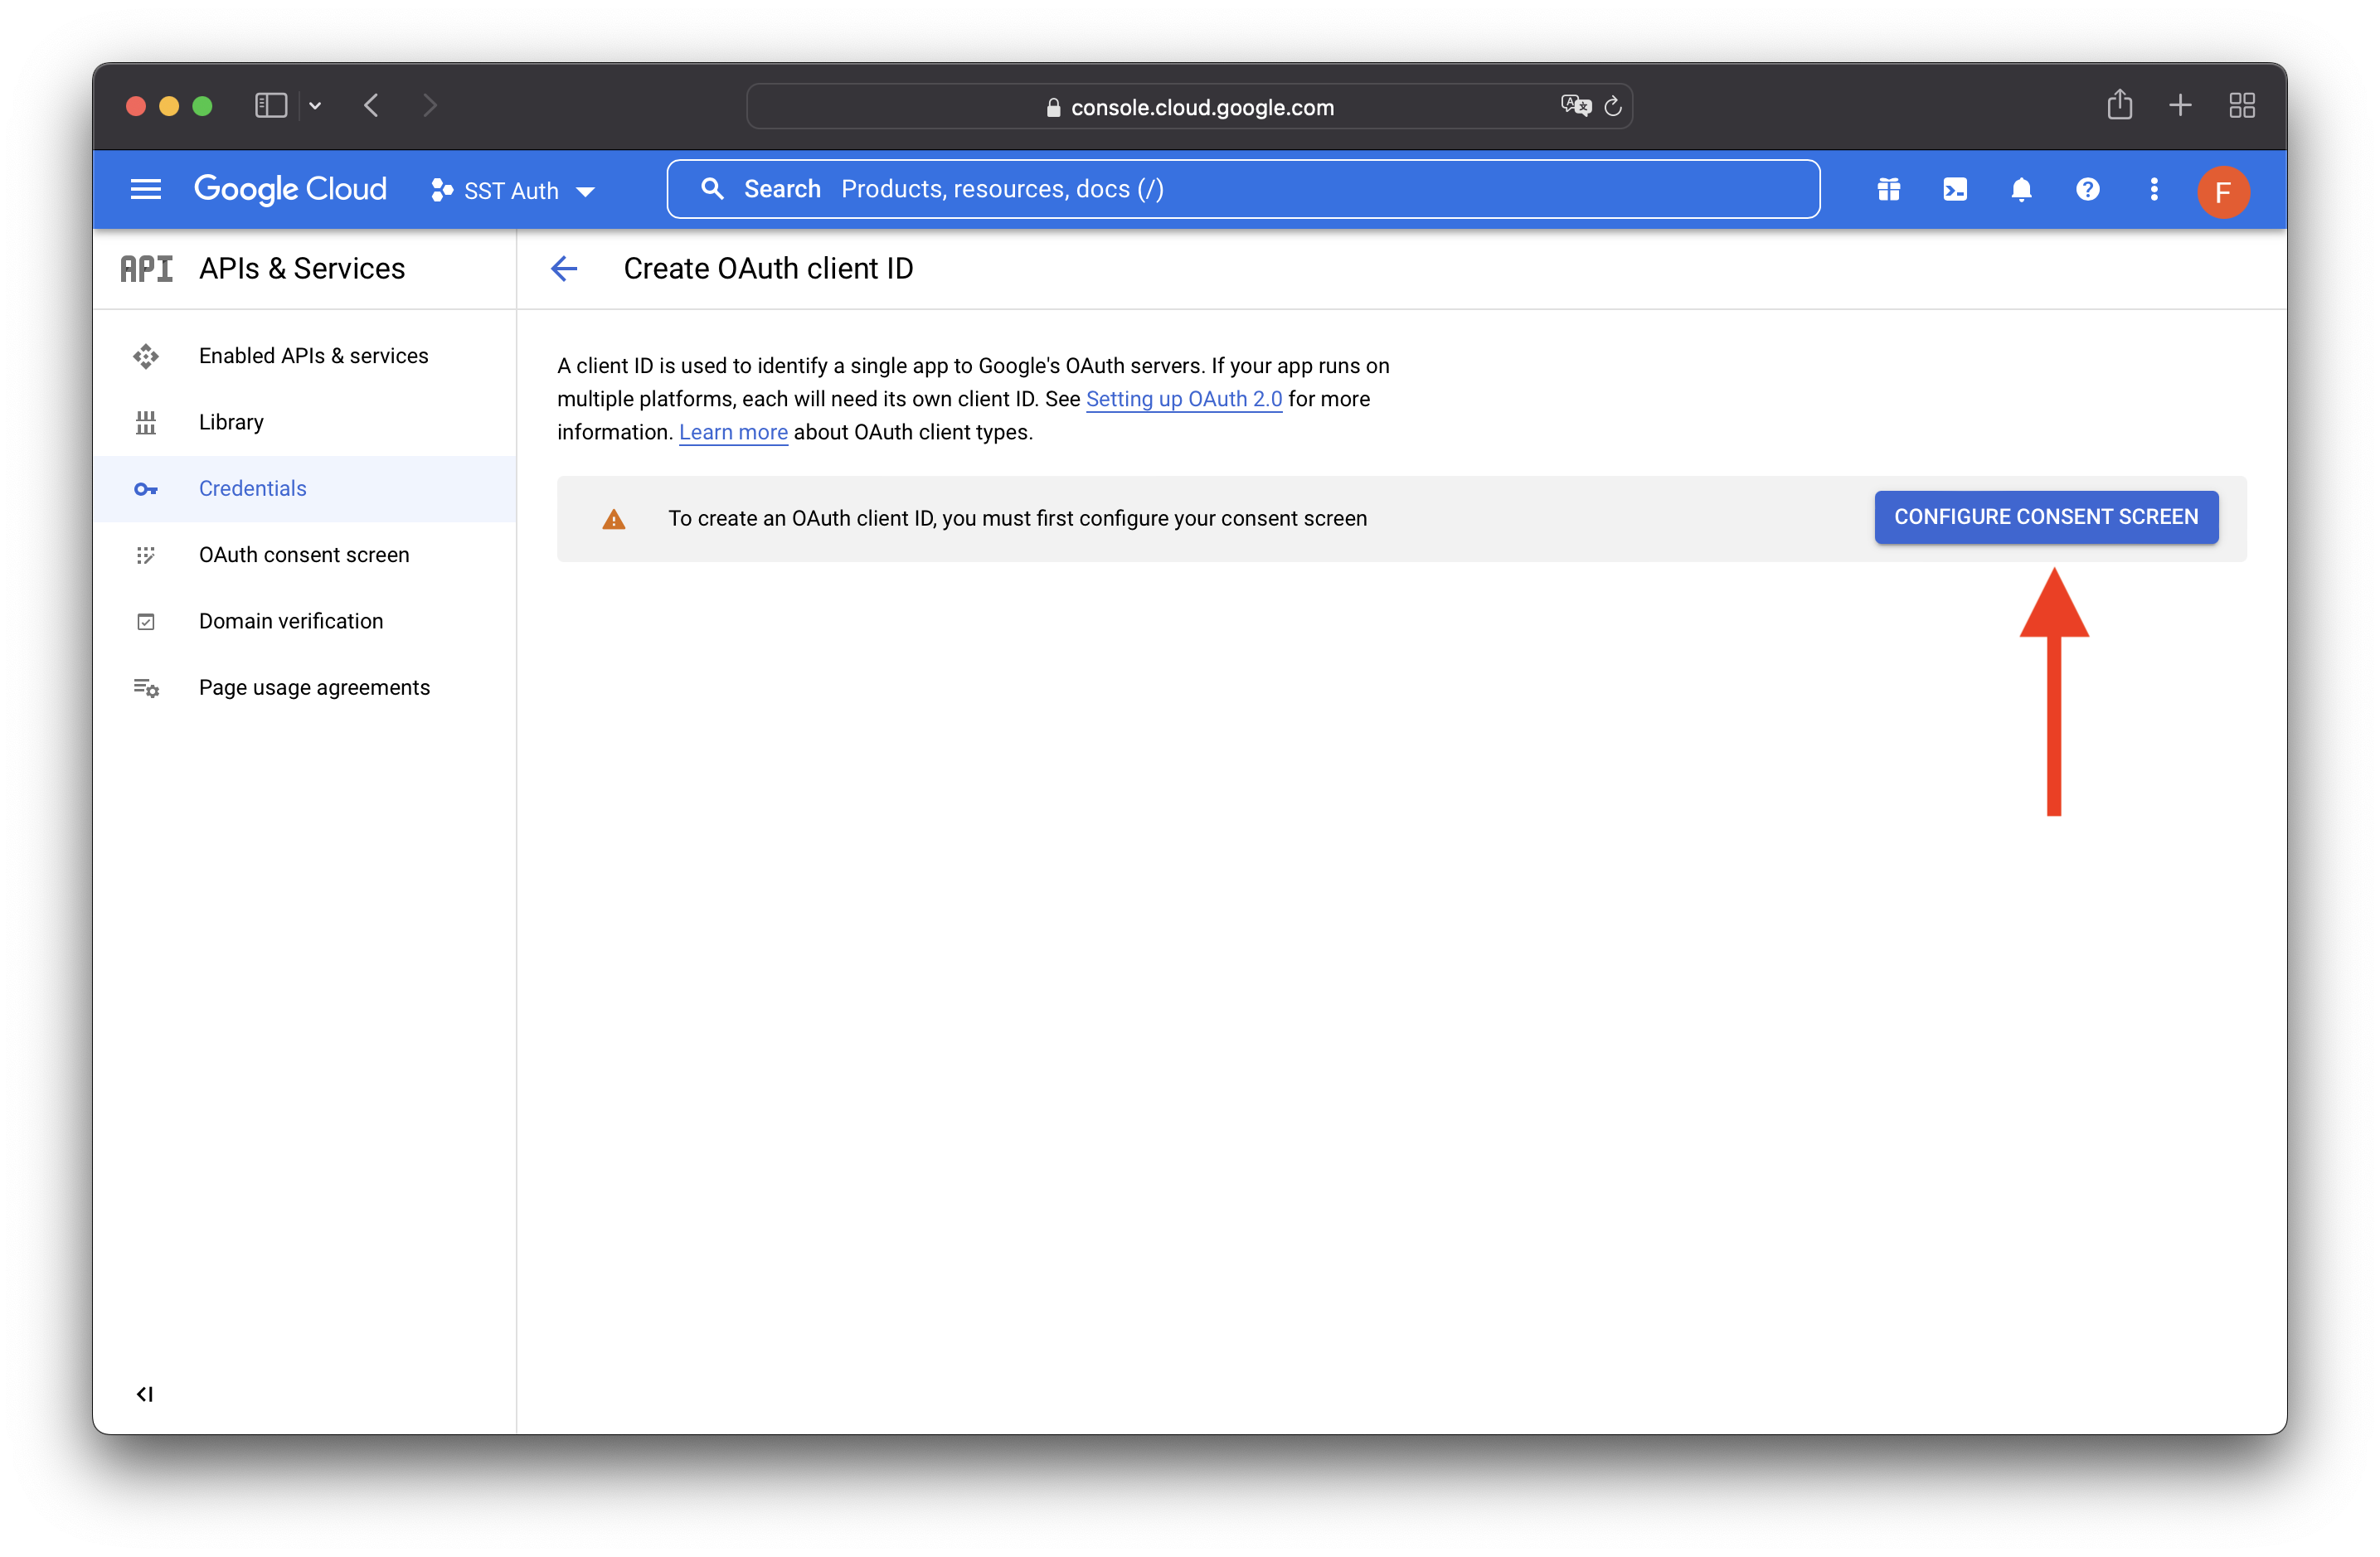
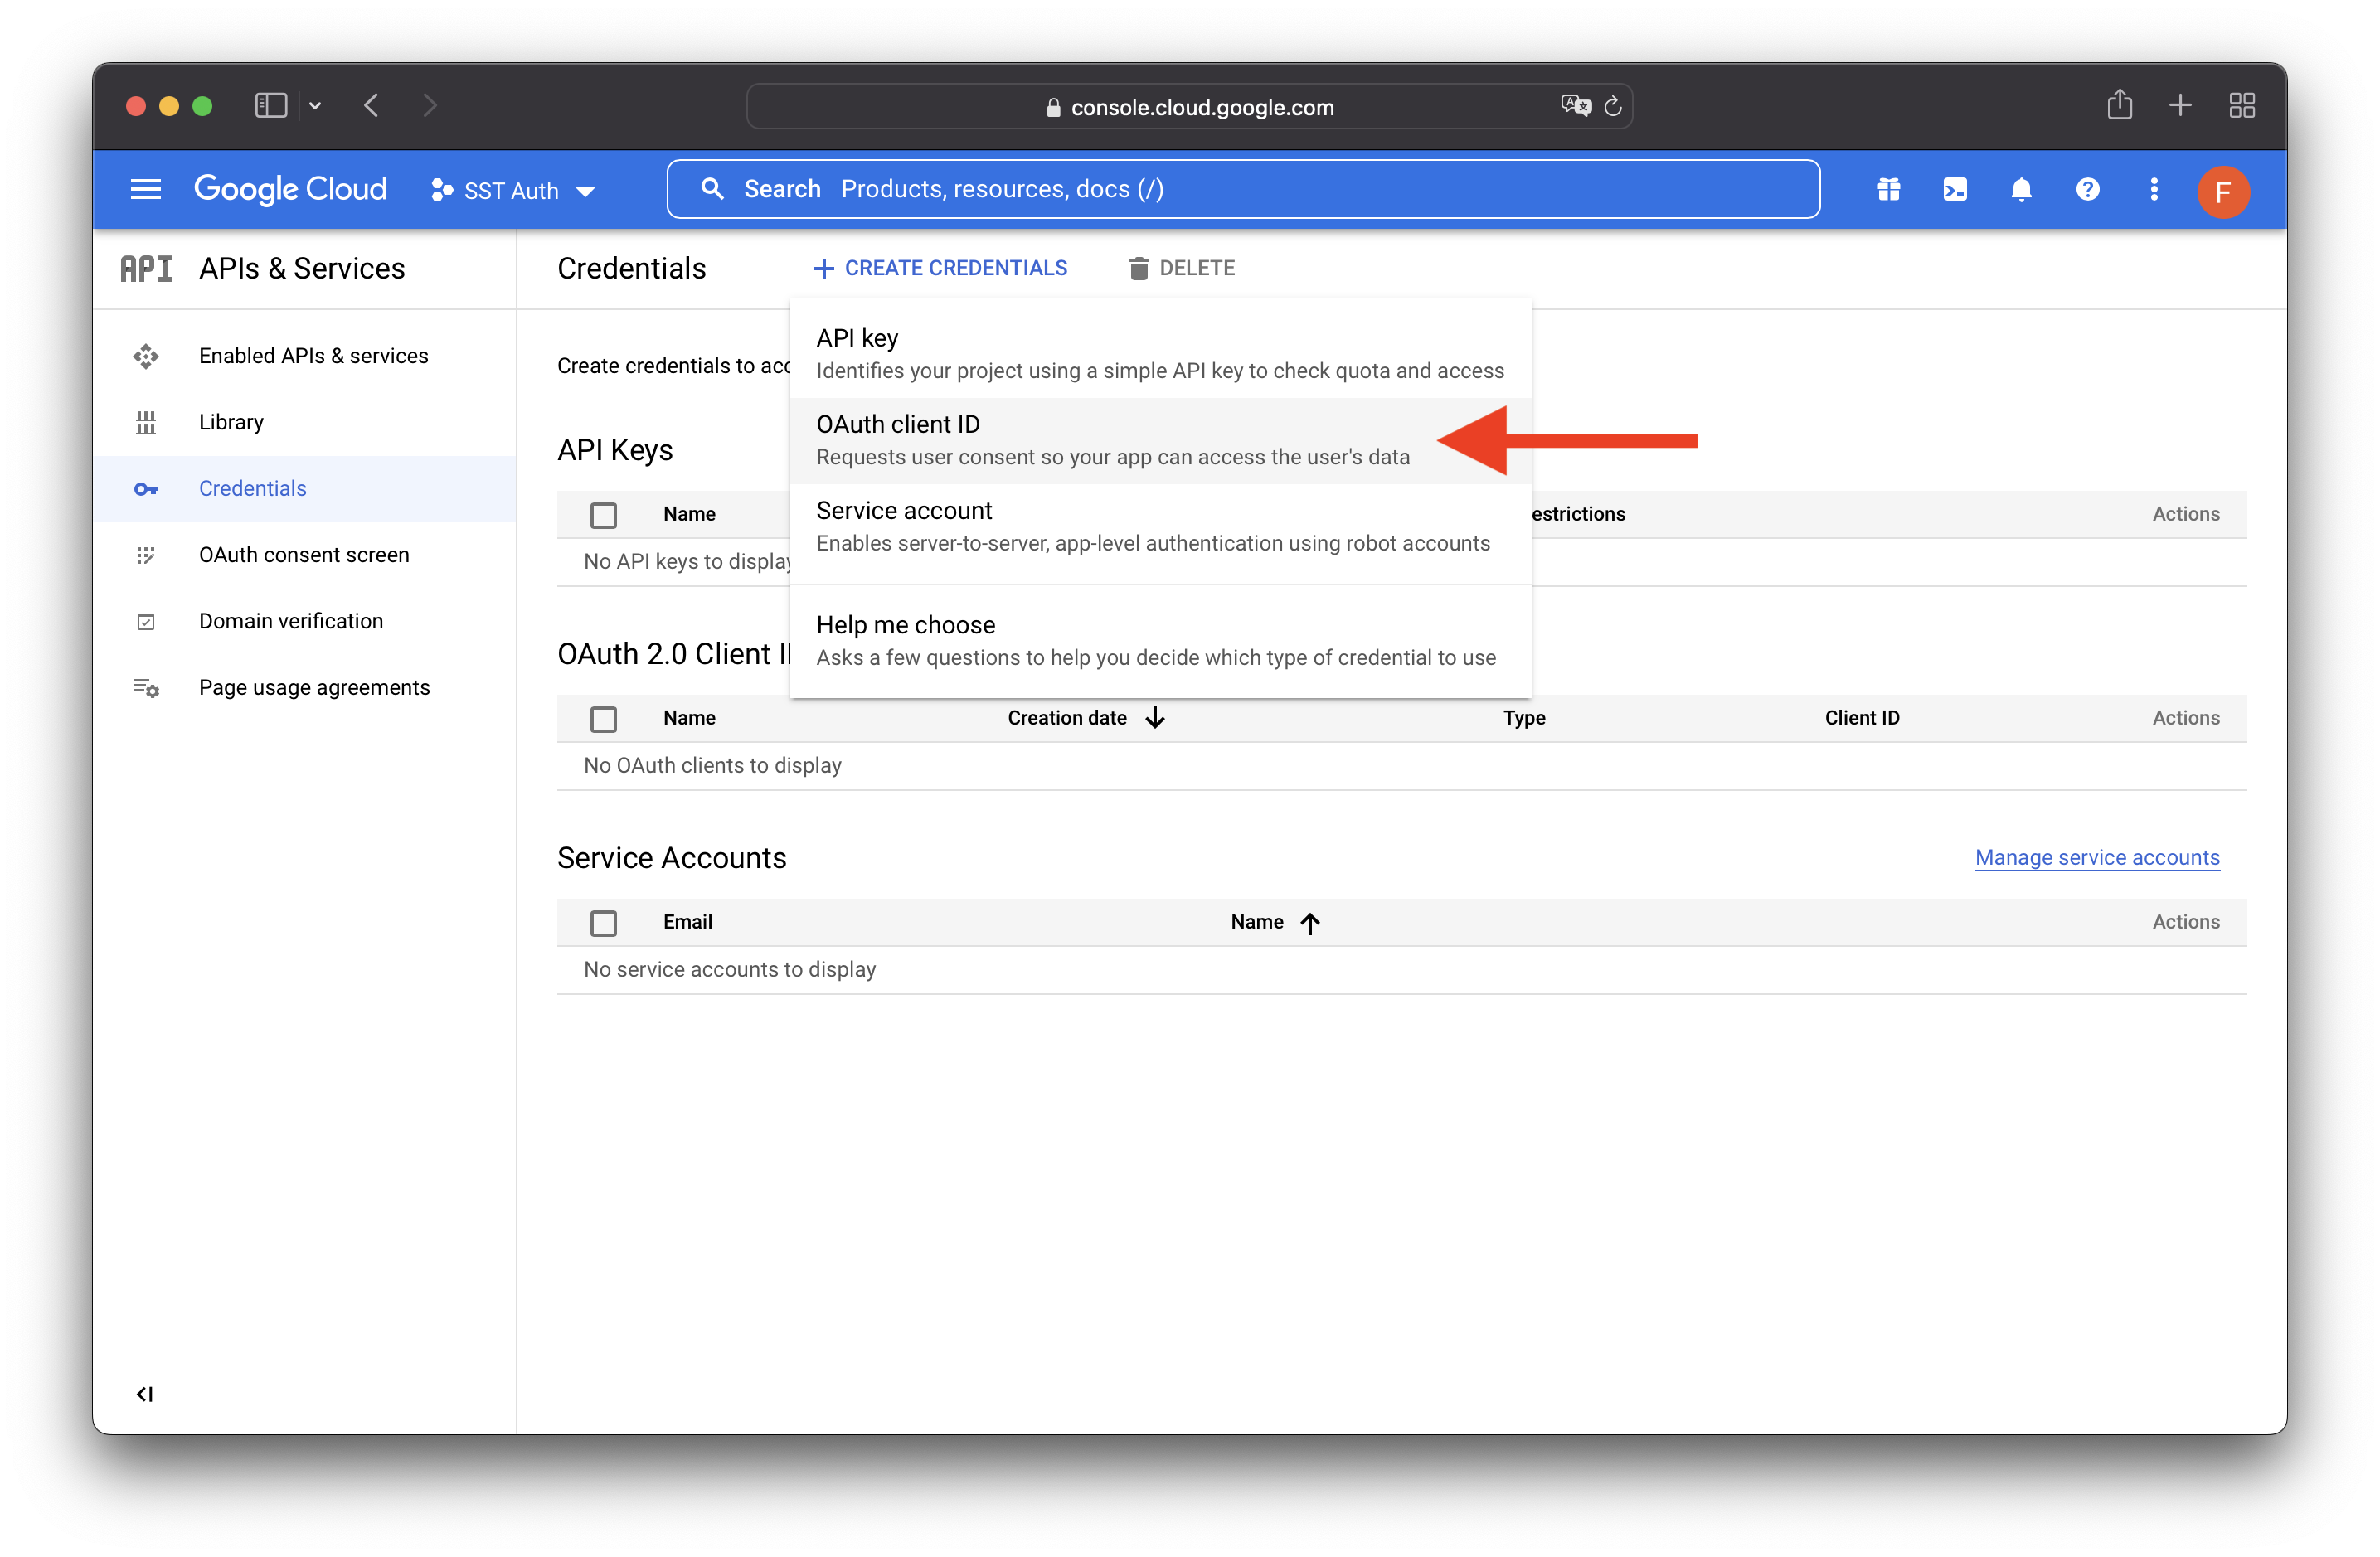
After the project is created, select CREATE CREDENTIALS, then OAuth client ID.
Select CONFIGURE CONSENT SCREEN.
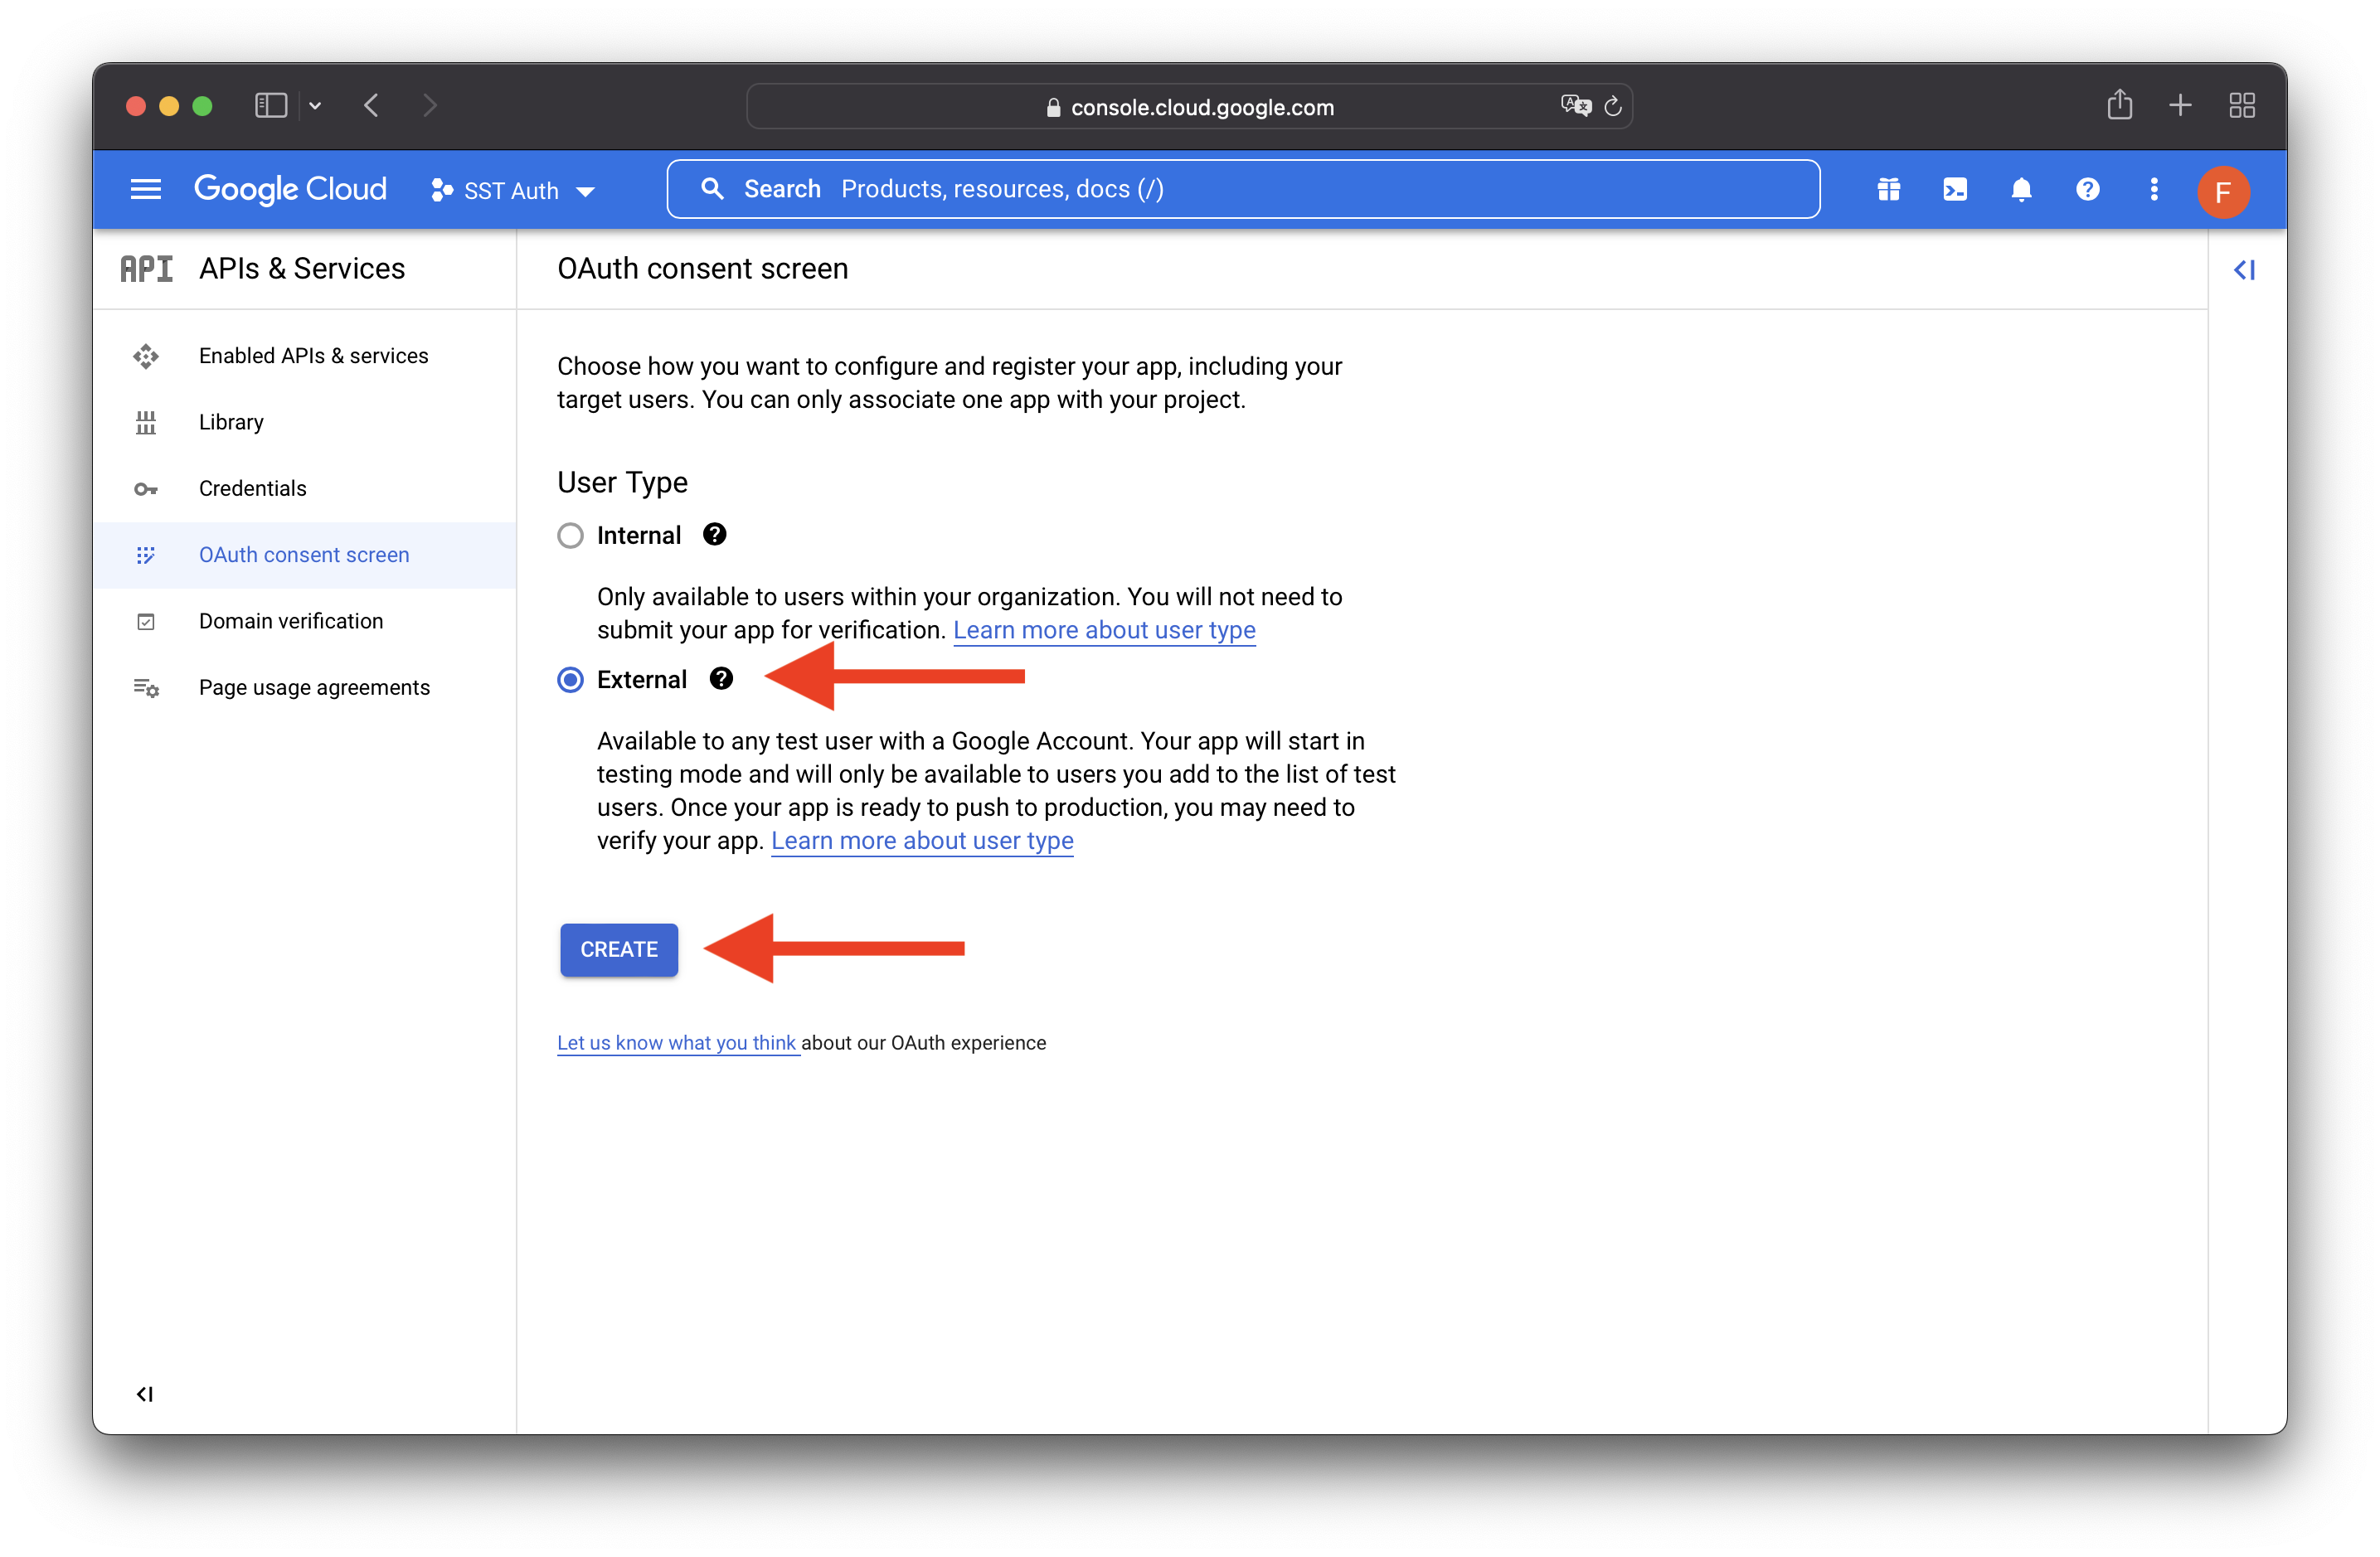
Select External, and hit CREATE.
Enter the following details:
- App name: the name of your app, here we picked
SST Auth - User support email: select your email address in the drop-down
- Developer contact information: enter your email address again
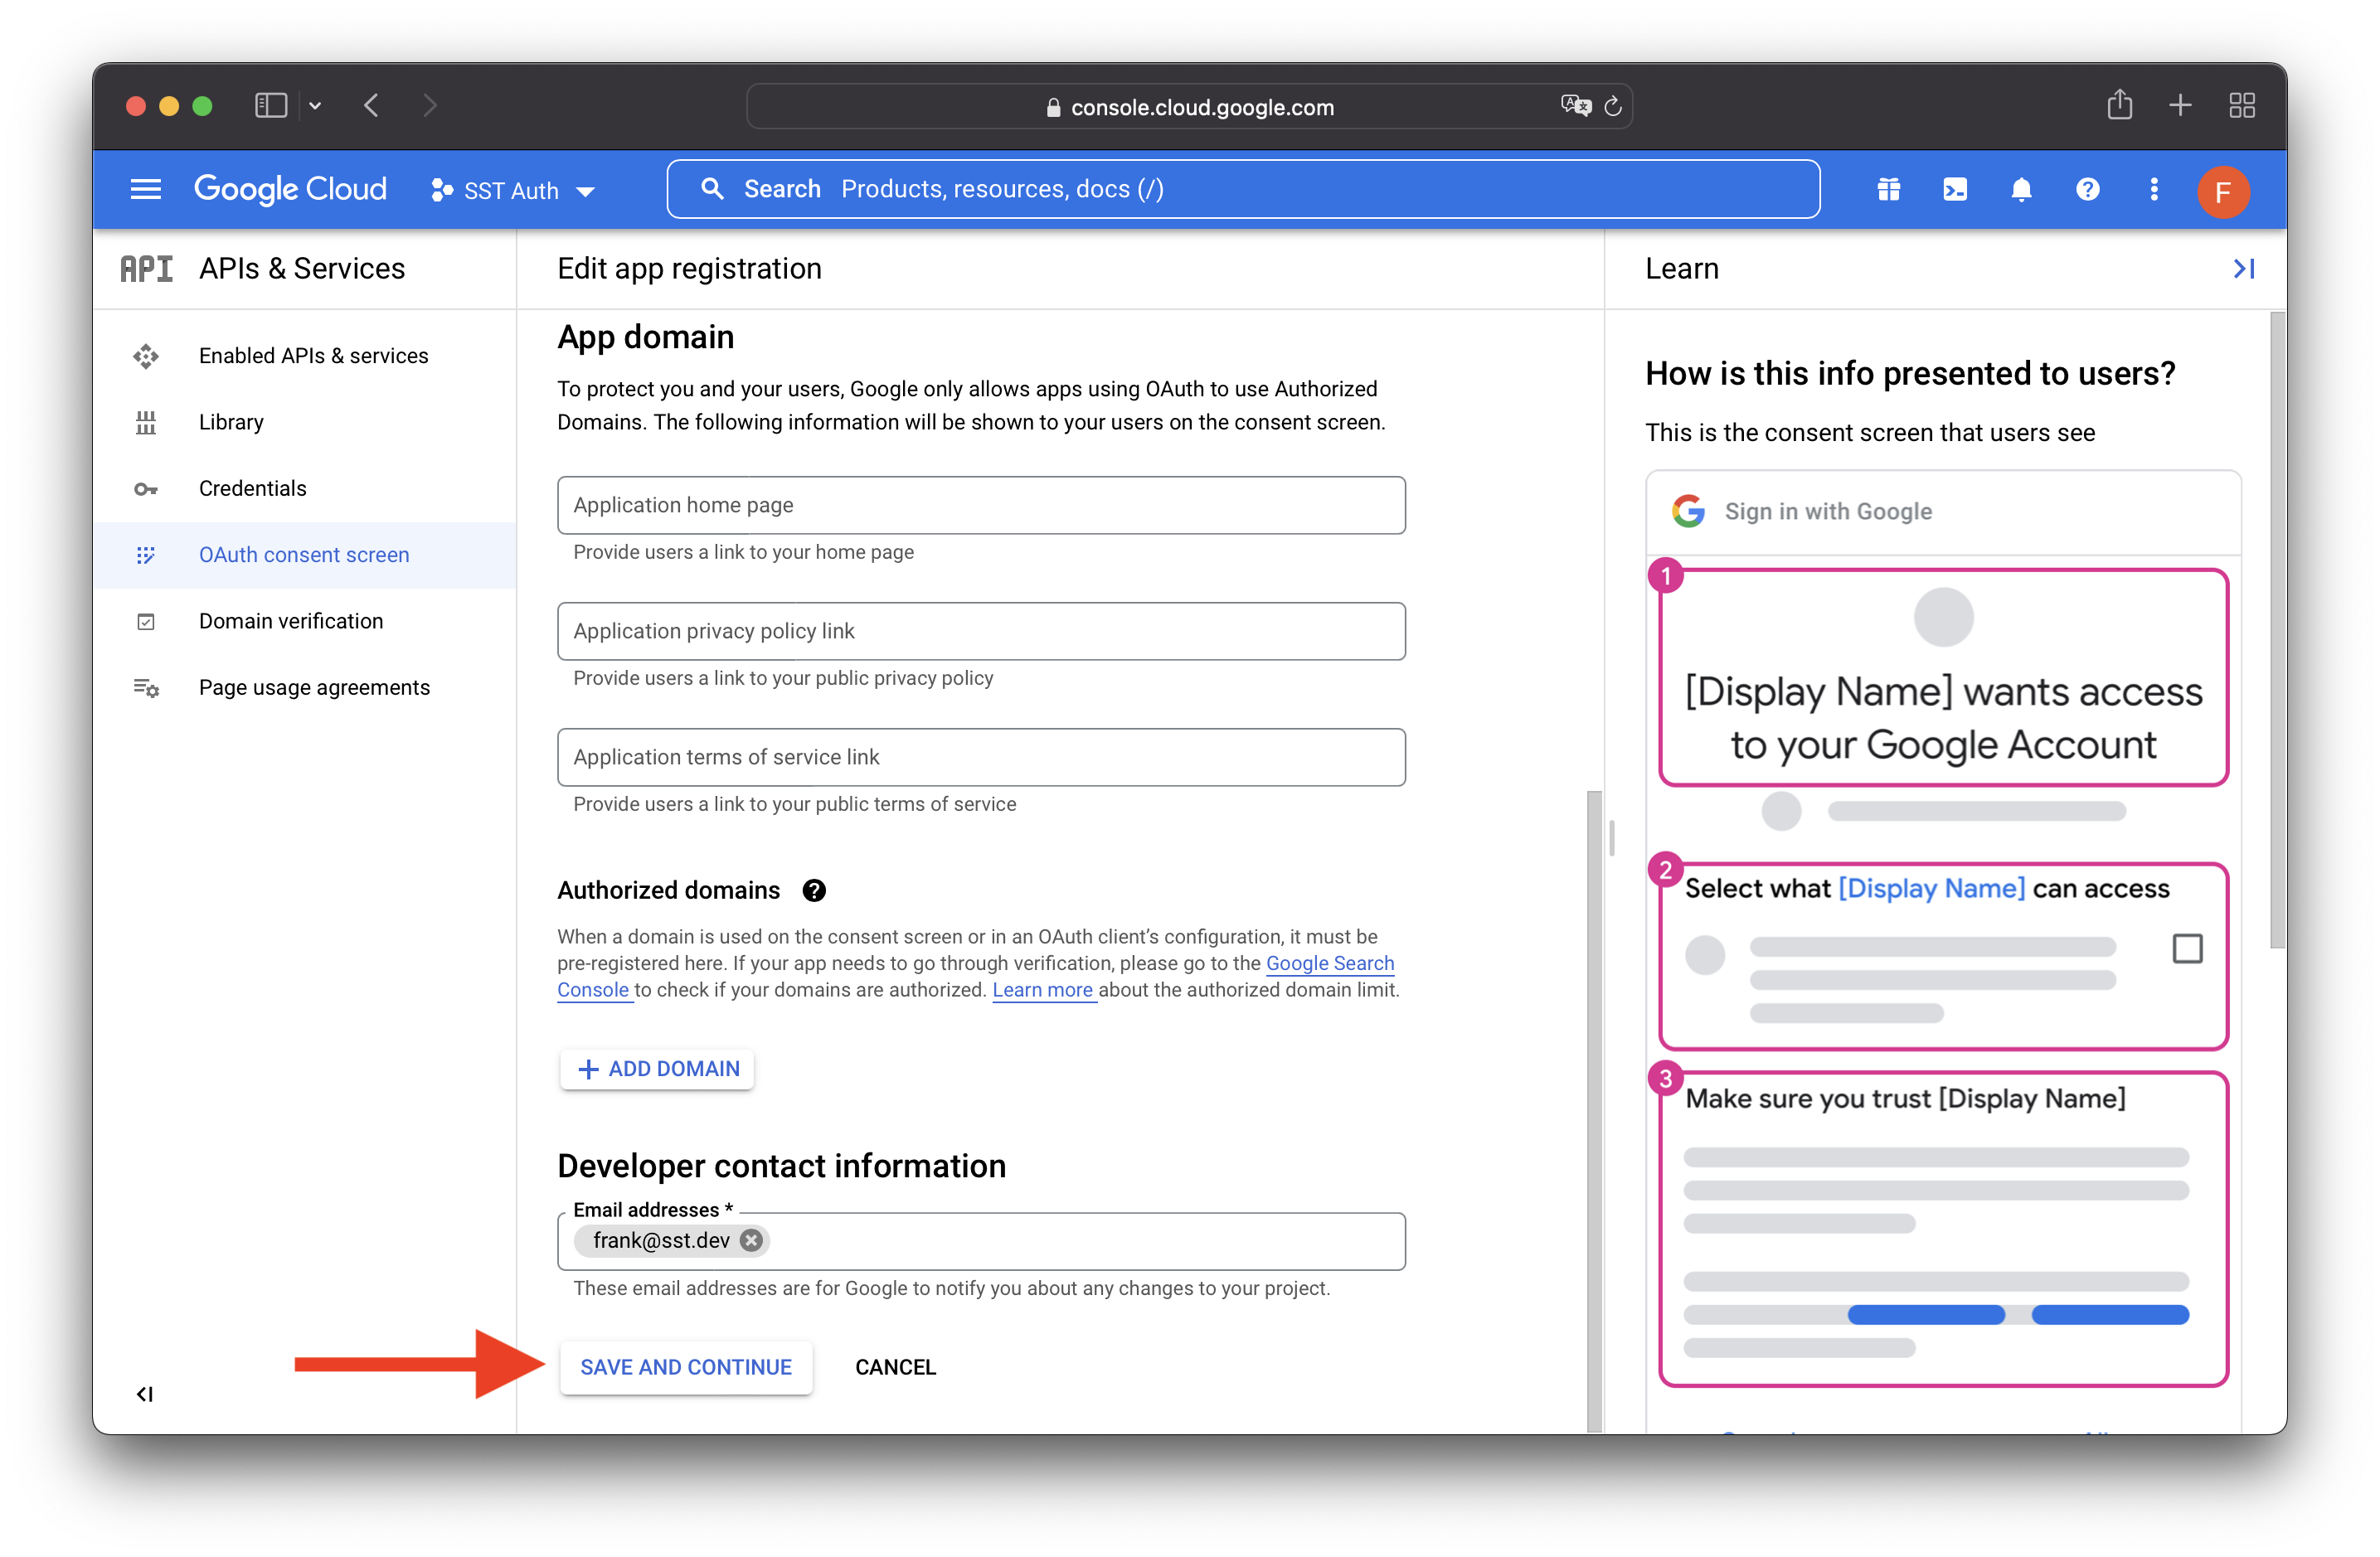
Click SAVE AND CONTINUE for the rest of the steps. And on the last step hit BACK TO DASHBOARD.
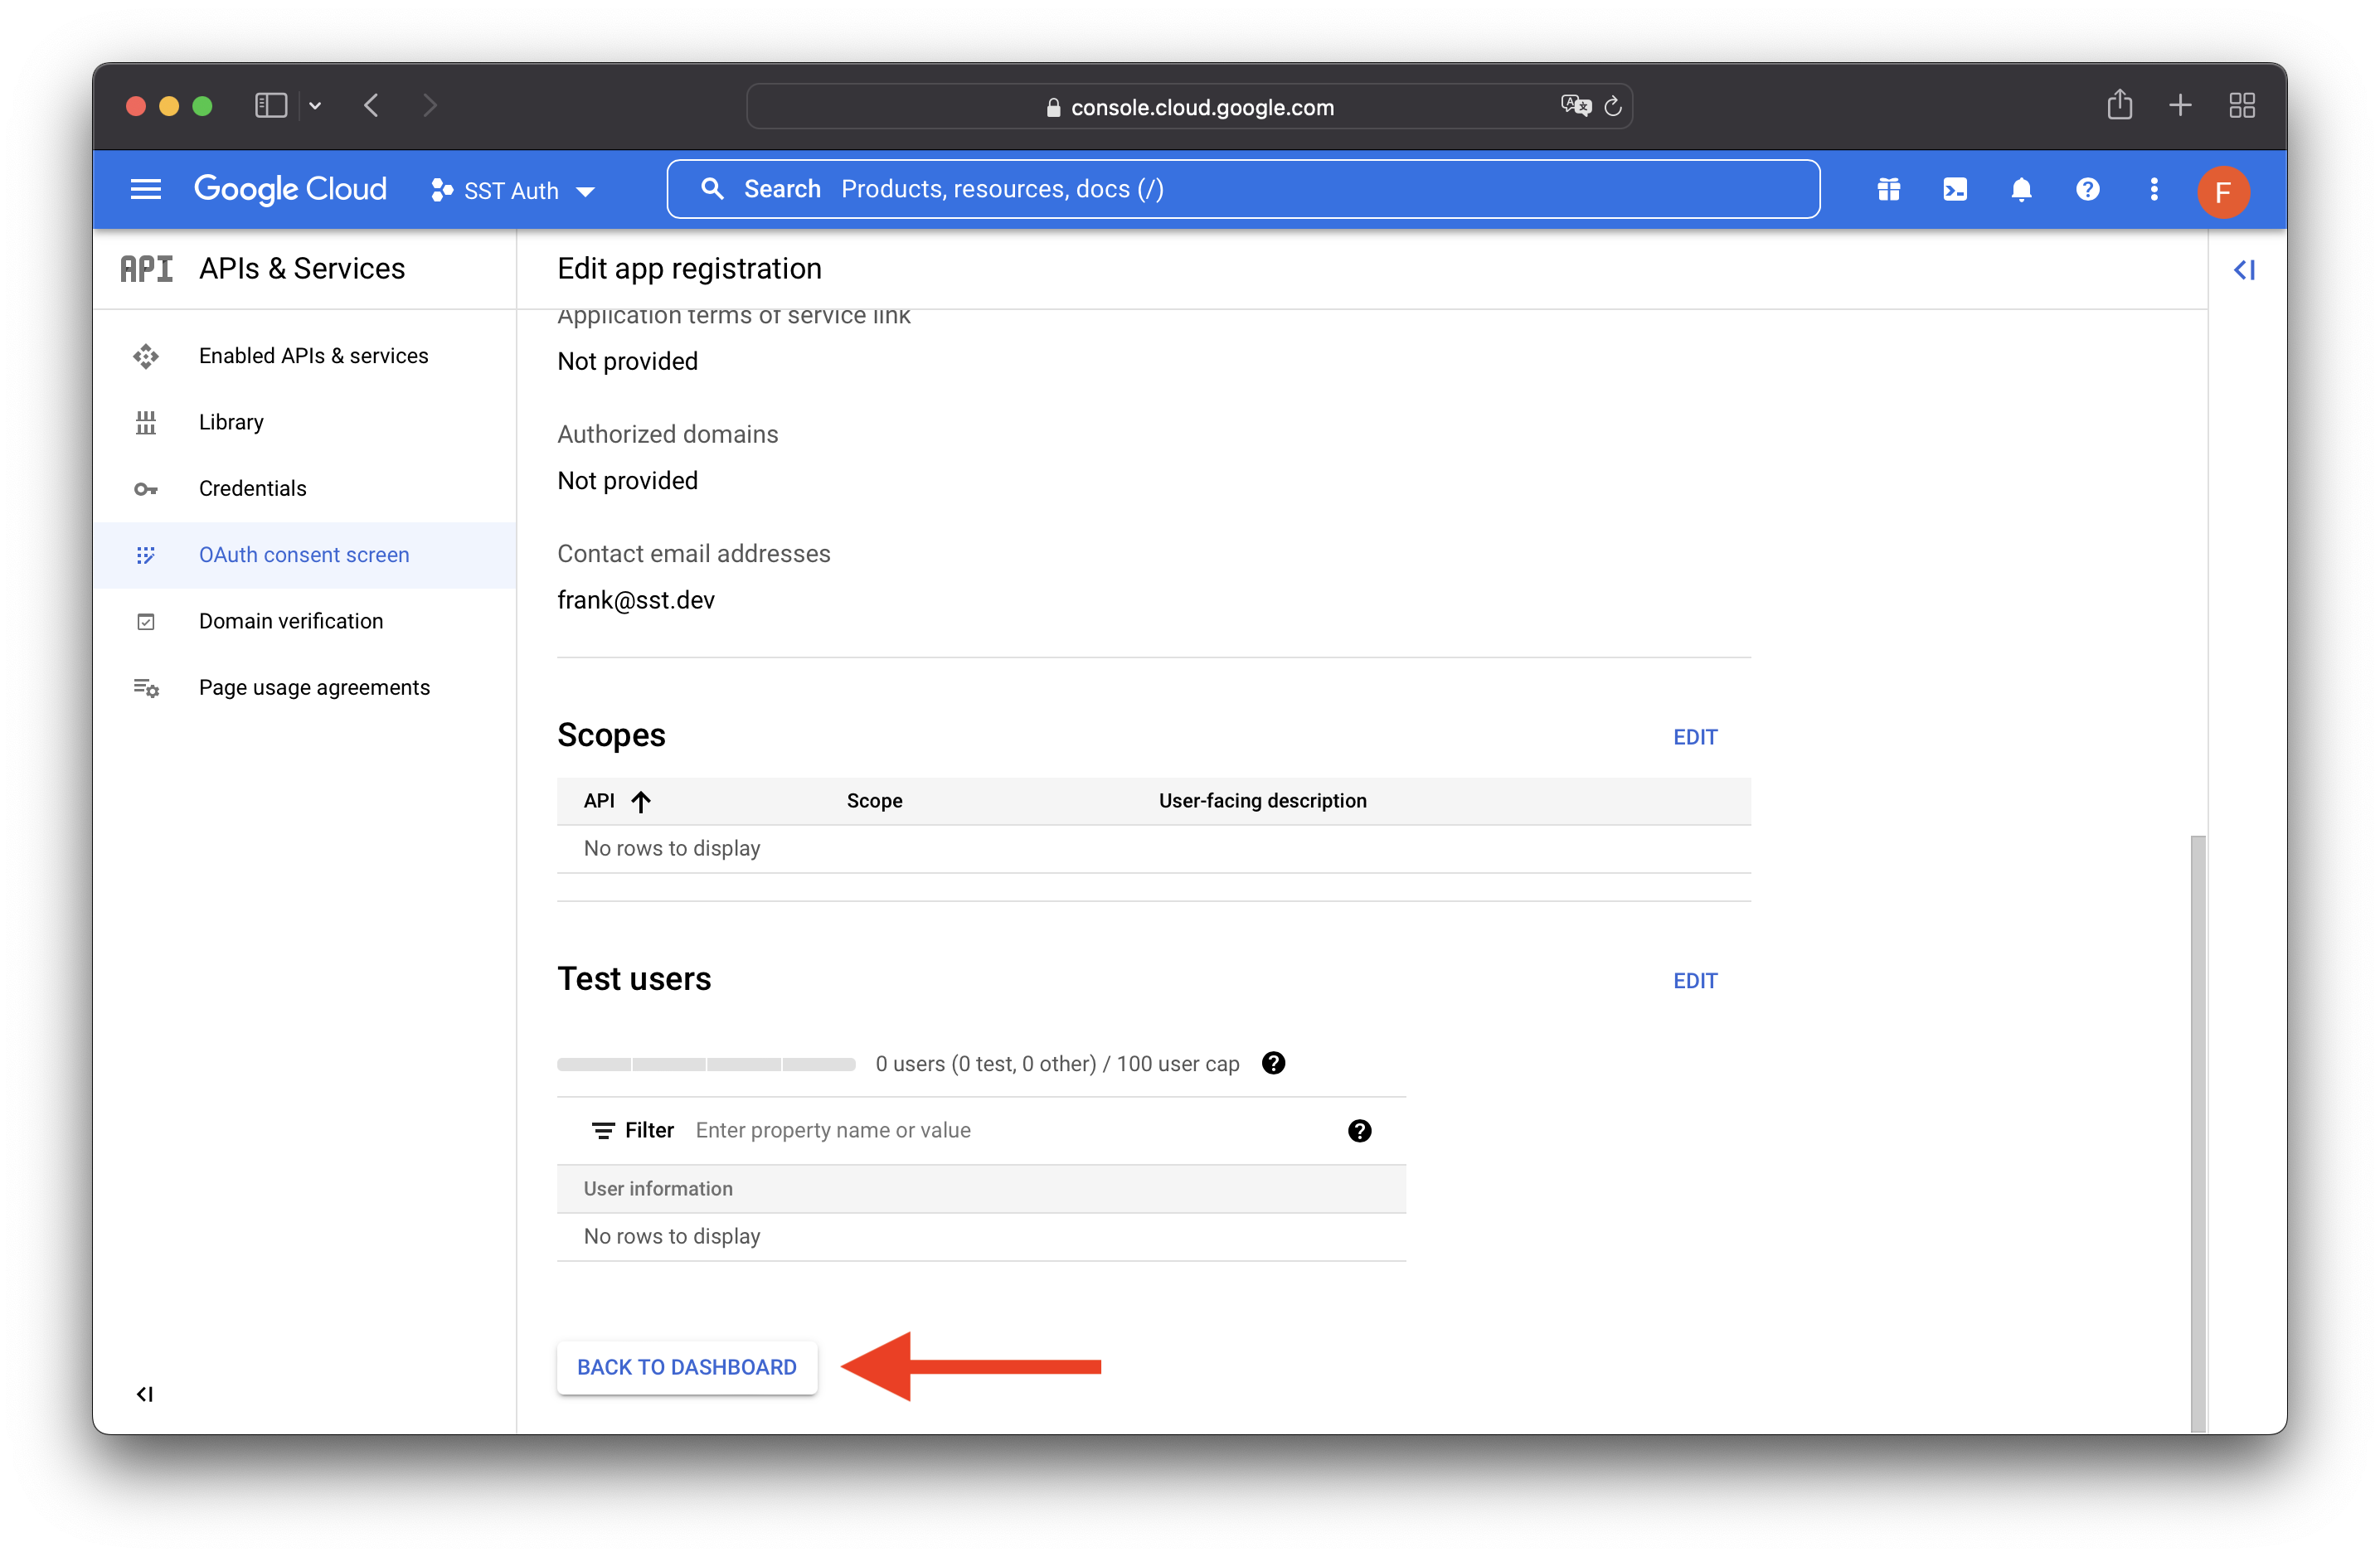
Select Credentials on the left. Then select CREATE CREDENTIALS, then OAuth client ID.
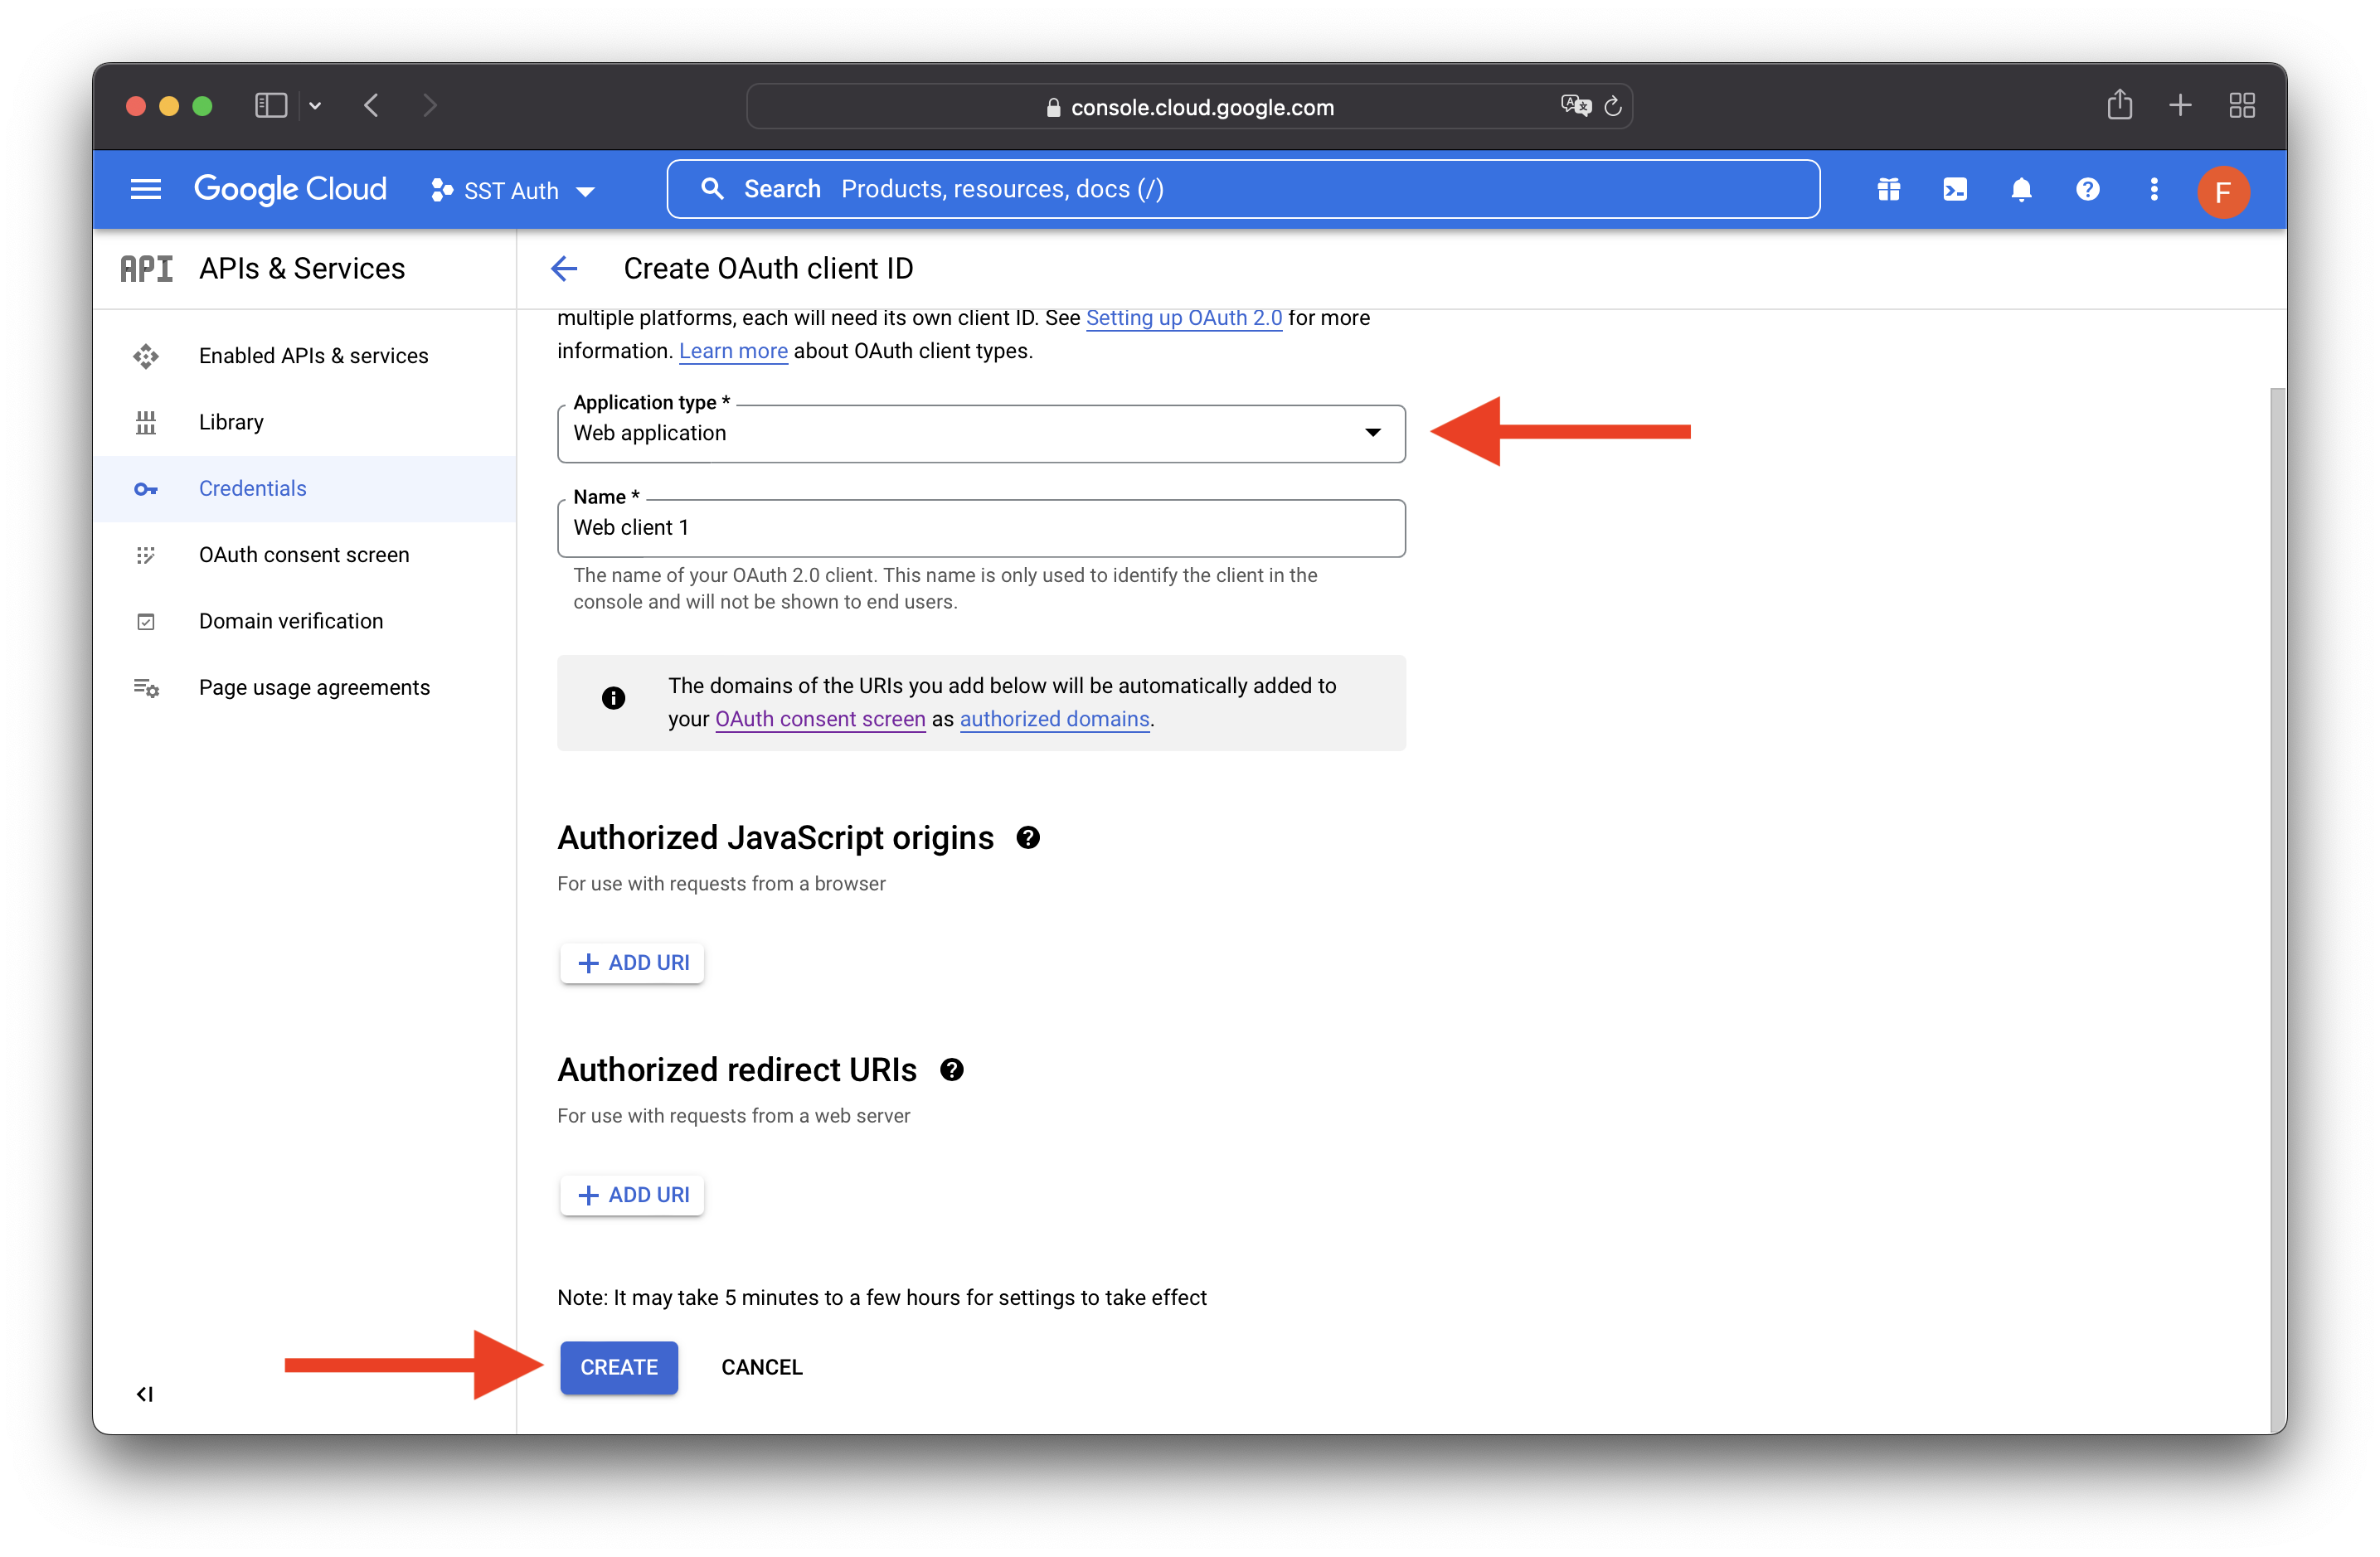
Select Web application type, then hit CREATE.
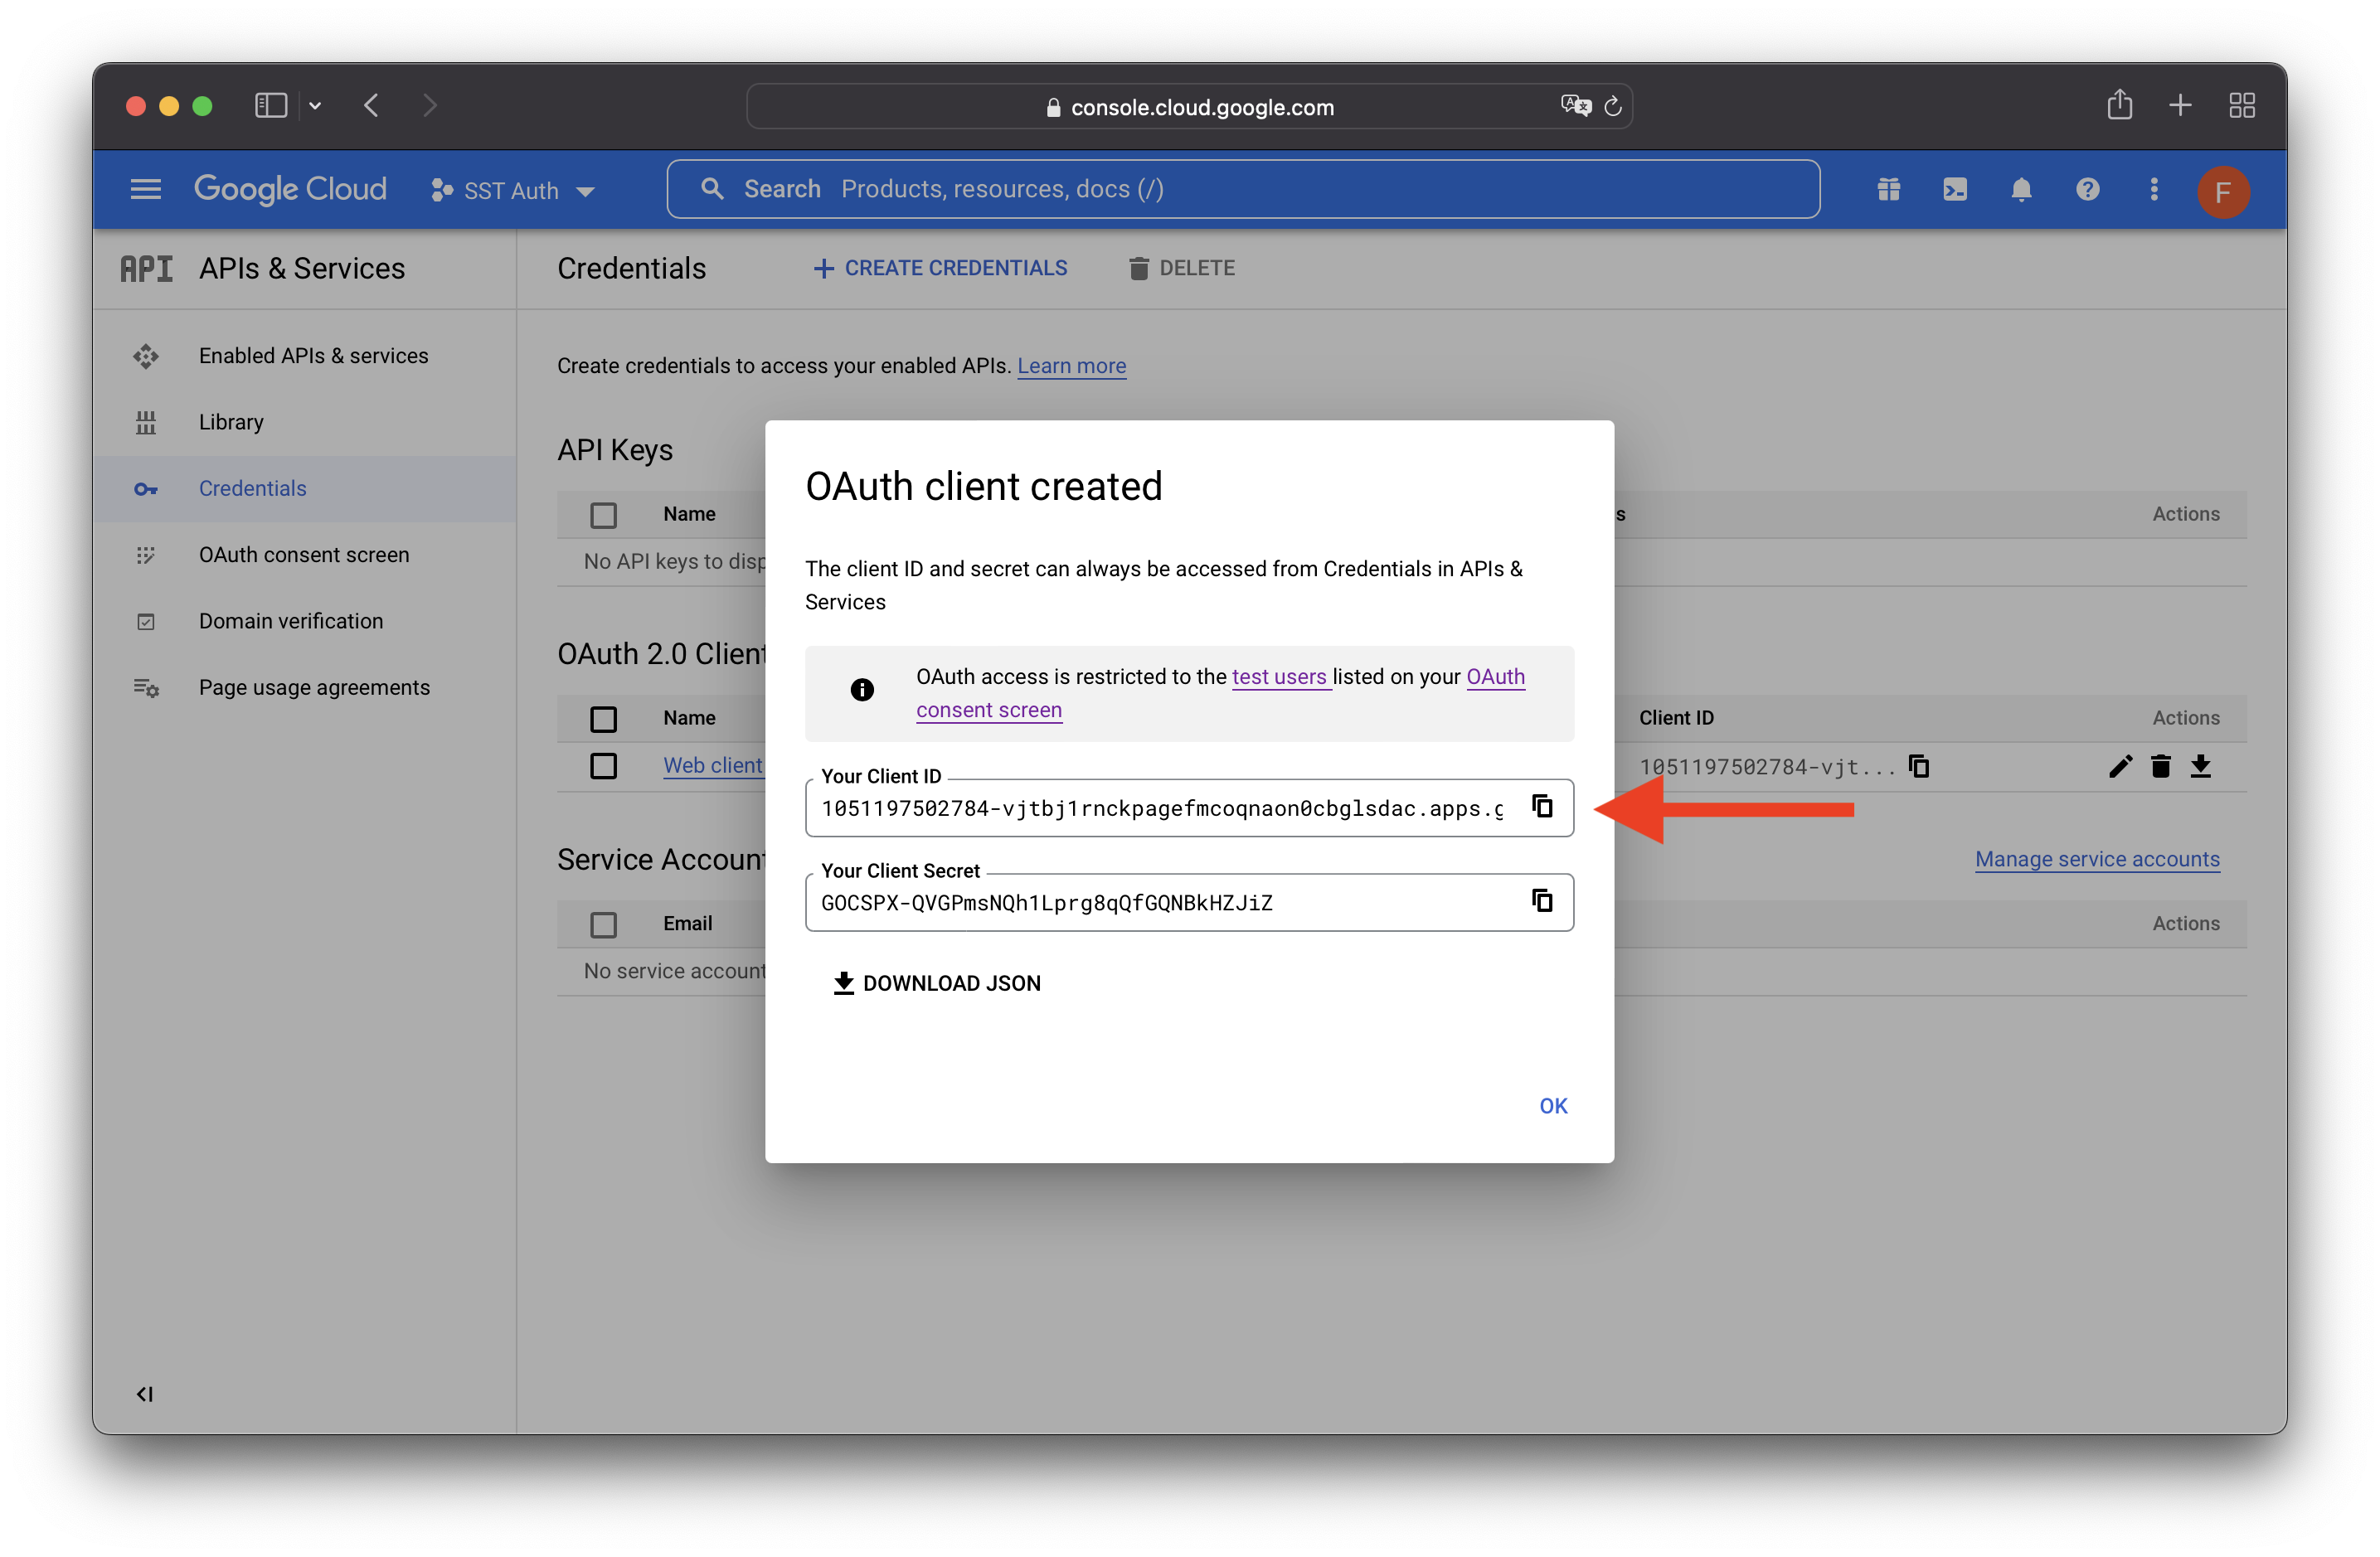
Make a note of the Client ID. We will need it in the following steps.
Add the authorize URL
Next, we need to create an Authorize URL to initiate the auth flow.
Configure the construct
We are going to use the Auth construct. It will help us create both the Authorize URL and the Callback URL.
Add the following below the Api construct in stacks/ExampleStack.ts.
const auth = new Auth(stack, "auth", {
authenticator: {
handler: "packages/functions/src/auth.handler",
},
});
auth.attach(stack, {
api,
prefix: "/auth",
});
Behind the scenes, the Auth construct creates a /auth/* catch-all route. Both the Authorize and Callback URLs will fall under this route.
Also remember to import the Auth construct up top.
- import { StackContext, Api } from "sst/constructs";
+ import { StackContext, Api, Auth } from "sst/constructs";
Add the auth handler
Now let’s implement the authenticator function.
Add a file in packages/functions/src/auth.ts with the following.
import { AuthHandler, GoogleAdapter } from "sst/node/auth";
const GOOGLE_CLIENT_ID =
"1051197502784-vjtbj1rnckpagefmcoqnaon0cbglsdac.apps.googleusercontent.com";
export const handler = AuthHandler({
providers: {
google: GoogleAdapter({
mode: "oidc",
clientID: GOOGLE_CLIENT_ID,
onSuccess: async (tokenset) => {
return {
statusCode: 200,
body: JSON.stringify(tokenset.claims(), null, 4),
};
},
}),
},
});
Make sure to replace GOOGLE_CLIENT_ID with the OAuth Client ID created in the previous section.
The sst/node package provides helper libraries used in Lambda functions. In the snippet above, we are using the package to create an AuthHandler with a GoogleAdapter named google. This creates two routes behind the scenes:
- Authorize URL at
/auth/google/authorize - Callback URL at
/auth/google/callback
When the Authorize URL is invoked, it will initialize the auth flow and redirects the user to Google.
Set up our React app
Next, we are going to add a Sign in with Google button to our frontend. And on click, we will redirect the user to the Authorize URL.
To deploy a React app to AWS, we’ll be using the SST StaticSite construct.
Add the following above the Auth construct in stacks/ExampleStack.ts.
const site = new StaticSite(stack, "Site", {
path: "web",
buildCommand: "npm run build",
buildOutput: "dist",
environment: {
VITE_APP_API_URL: api.url,
},
});
And add the site URL to stack.addOutputs.
stack.addOutputs({
ApiEndpoint: api.url,
+ SiteURL: site.url,
});
The construct is pointing to the directory where we are going to add our React.js app.
We are also setting up build time React environment variables with the endpoint of our API. The StaticSite allows us to set environment variables automatically from our backend, without having to hard code them in our frontend.
Also remember to import the StaticSite construct up top.
- import { StackContext, Api, Auth } from "sst/constructs";
+ import { StackContext, Api, Auth, StaticSite } from "sst/constructs";
Create the frontend
Run the below commands in our project root to create a basic react project.
$ npx create-vite@latest web --template react
$ cd web
$ npm install
For a react TypeScript project
npx create-vite@latest web --template react-ts
This sets up our React app in the web/ directory.
We also need to load the environment variables from our SST app. To do this, we’ll be using the sst bind command.
Replace the dev script in your web/package.json.
-"dev": "vite"
+"dev": "sst bind vite"
Start our dev environment
SST features a Live Lambda Development environment that allows you to work on your serverless apps live.
Run in the root.
$ npm run dev
The first time you run this command it’ll prompt you to enter a stage name.
Look like you’re running sst for the first time in this directory.
Please enter a stage name you’d like to use locally. Or hit enter
to use the one based on your AWS credentials (frank):
You can press enter to use the default stage, or manually enter a stage name. SST uses the stage to namespace all the resources in your application.
The first time sst dev runs, it can take a couple of minutes to deploy your app and a debug stack to power the Live Lambda Development environment.
After sst dev starts up, you will see the following output in your terminal.
Stack frank-api-sst-auth-google-ExampleStack
Status: deployed
Outputs:
ApiEndpoint: https://2wk0bl6b7i.execute-api.us-east-1.amazonaws.com
SiteURL: https://d54gkw8ds19md.cloudfront.net
==========================
Starting Live Lambda Dev
==========================
SST Console: https://console.sst.dev/api-sst-auth-google/frank/local
Debug session started. Listening for requests...
Update the Google redirect URI
The ApiEndpoint is the API we just created. That means our:
- Authorize URL is
https://2wk0bl6b7i.execute-api.us-east-1.amazonaws.com/auth/google/authorize - Callback URL is
https://2wk0bl6b7i.execute-api.us-east-1.amazonaws.com/auth/google/callback
And the SiteURL is where our React app will be hosted. While in development, it’s just a placeholder website.
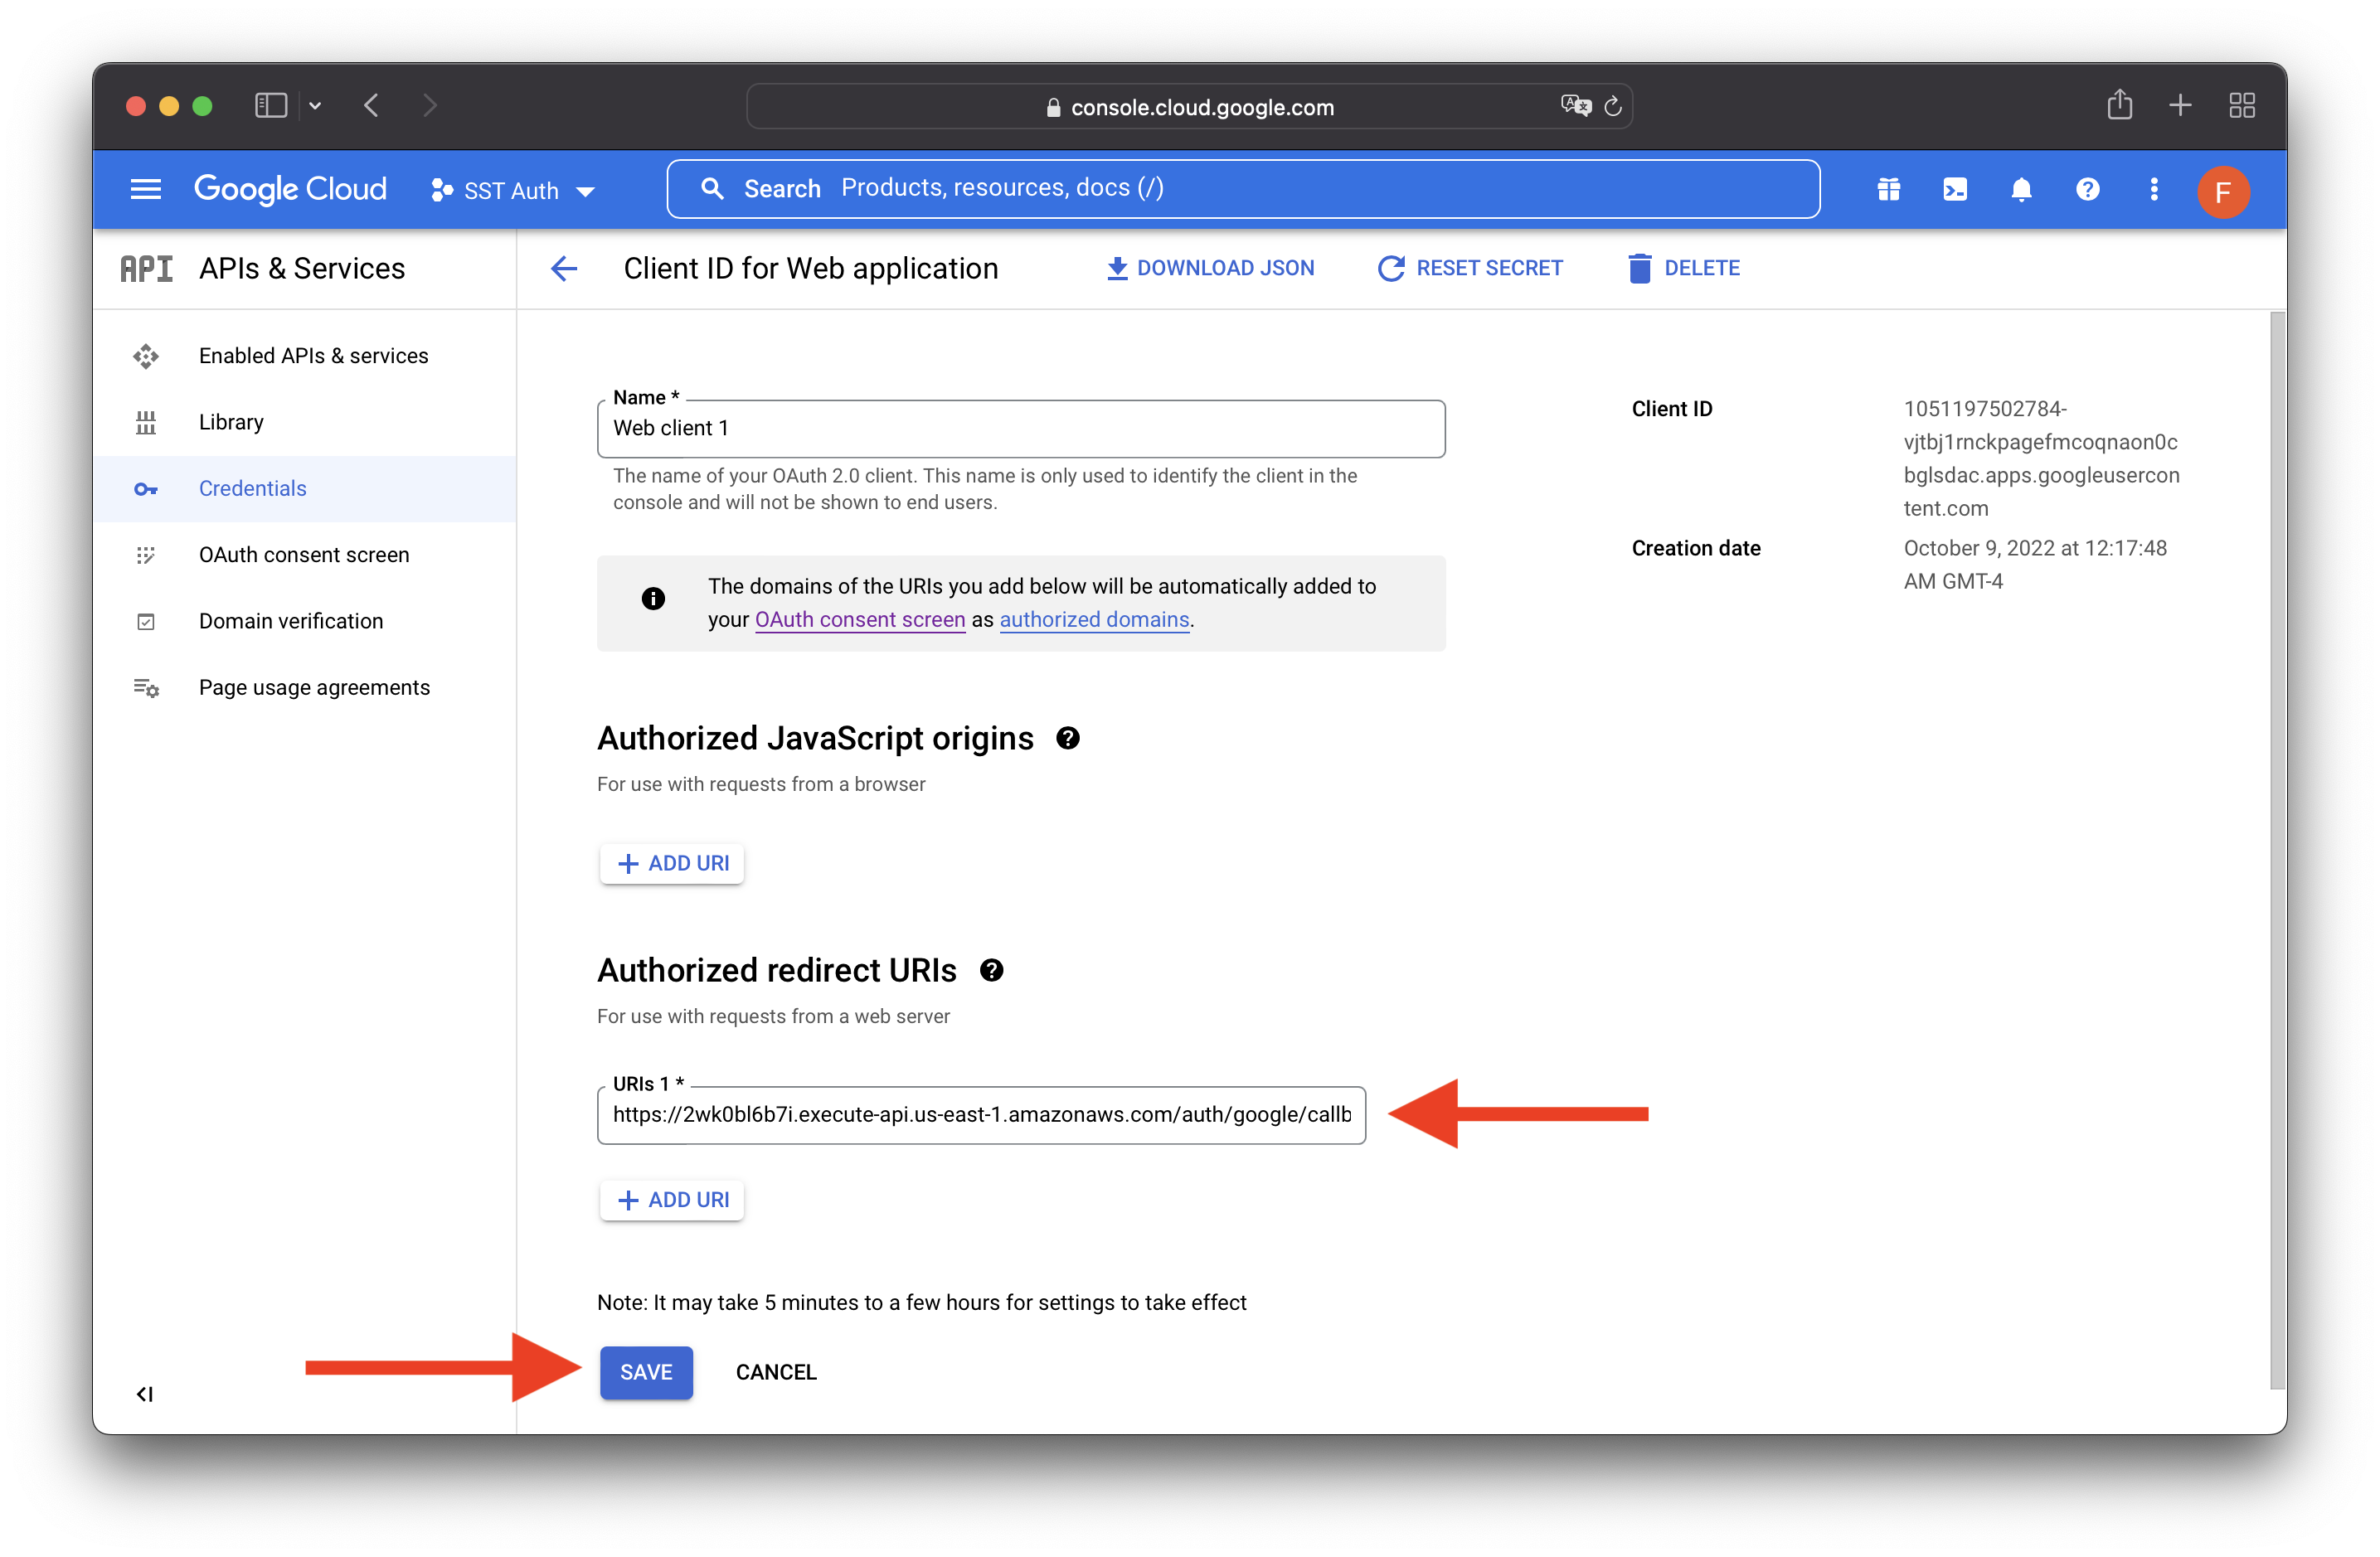
Add our Callback URL to the Authorized redirect URIs in our Google project’s GCP Console.
Add the login UI
Replace web/src/App.jsx with below code.
const App = () => {
return (
<div className="container">
<h2>SST Auth Example</h2>
<div>
<a
href={`${import.meta.env.VITE_APP_API_URL}/auth/google/authorize`}
rel="noreferrer"
>
<button>Sign in with Google</button>
</a>
</div>
</div>
);
};
export default App;
Let’s start our frontend in the development environment.
In the web/ directory run.
$ npm run dev
Open up your browser and go to the URL it shows. In our case it is: http://127.0.0.1:5173
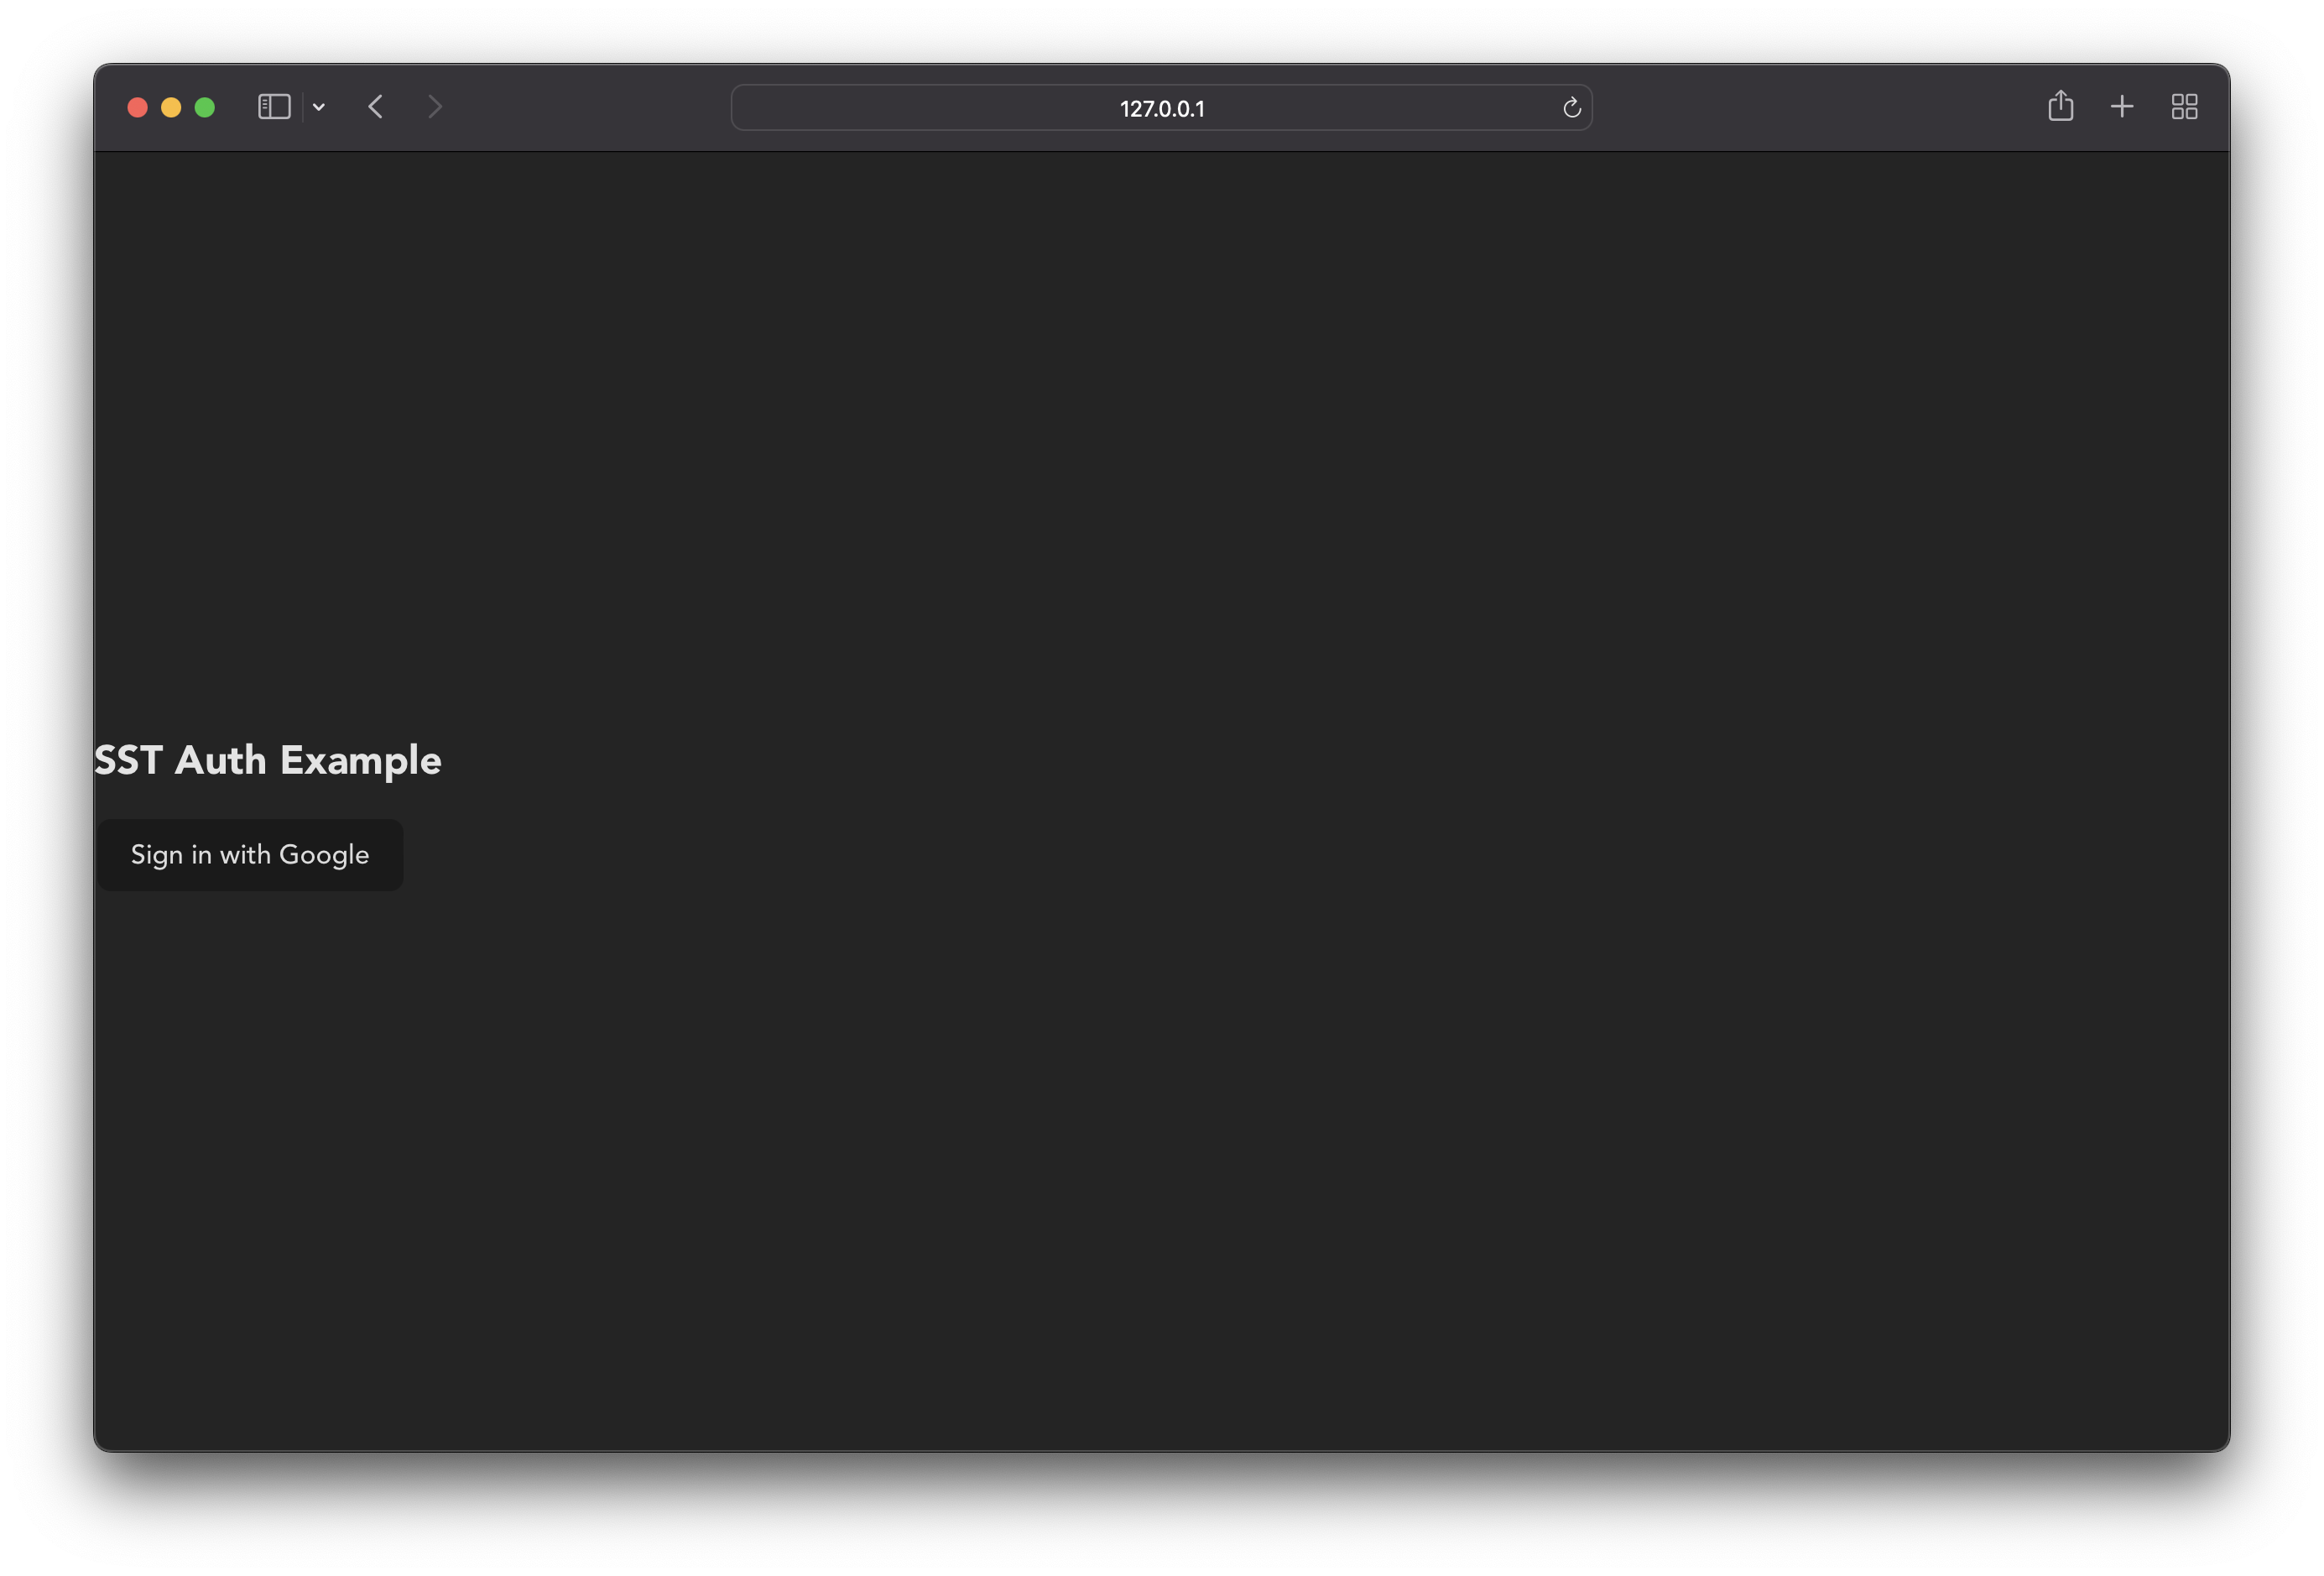
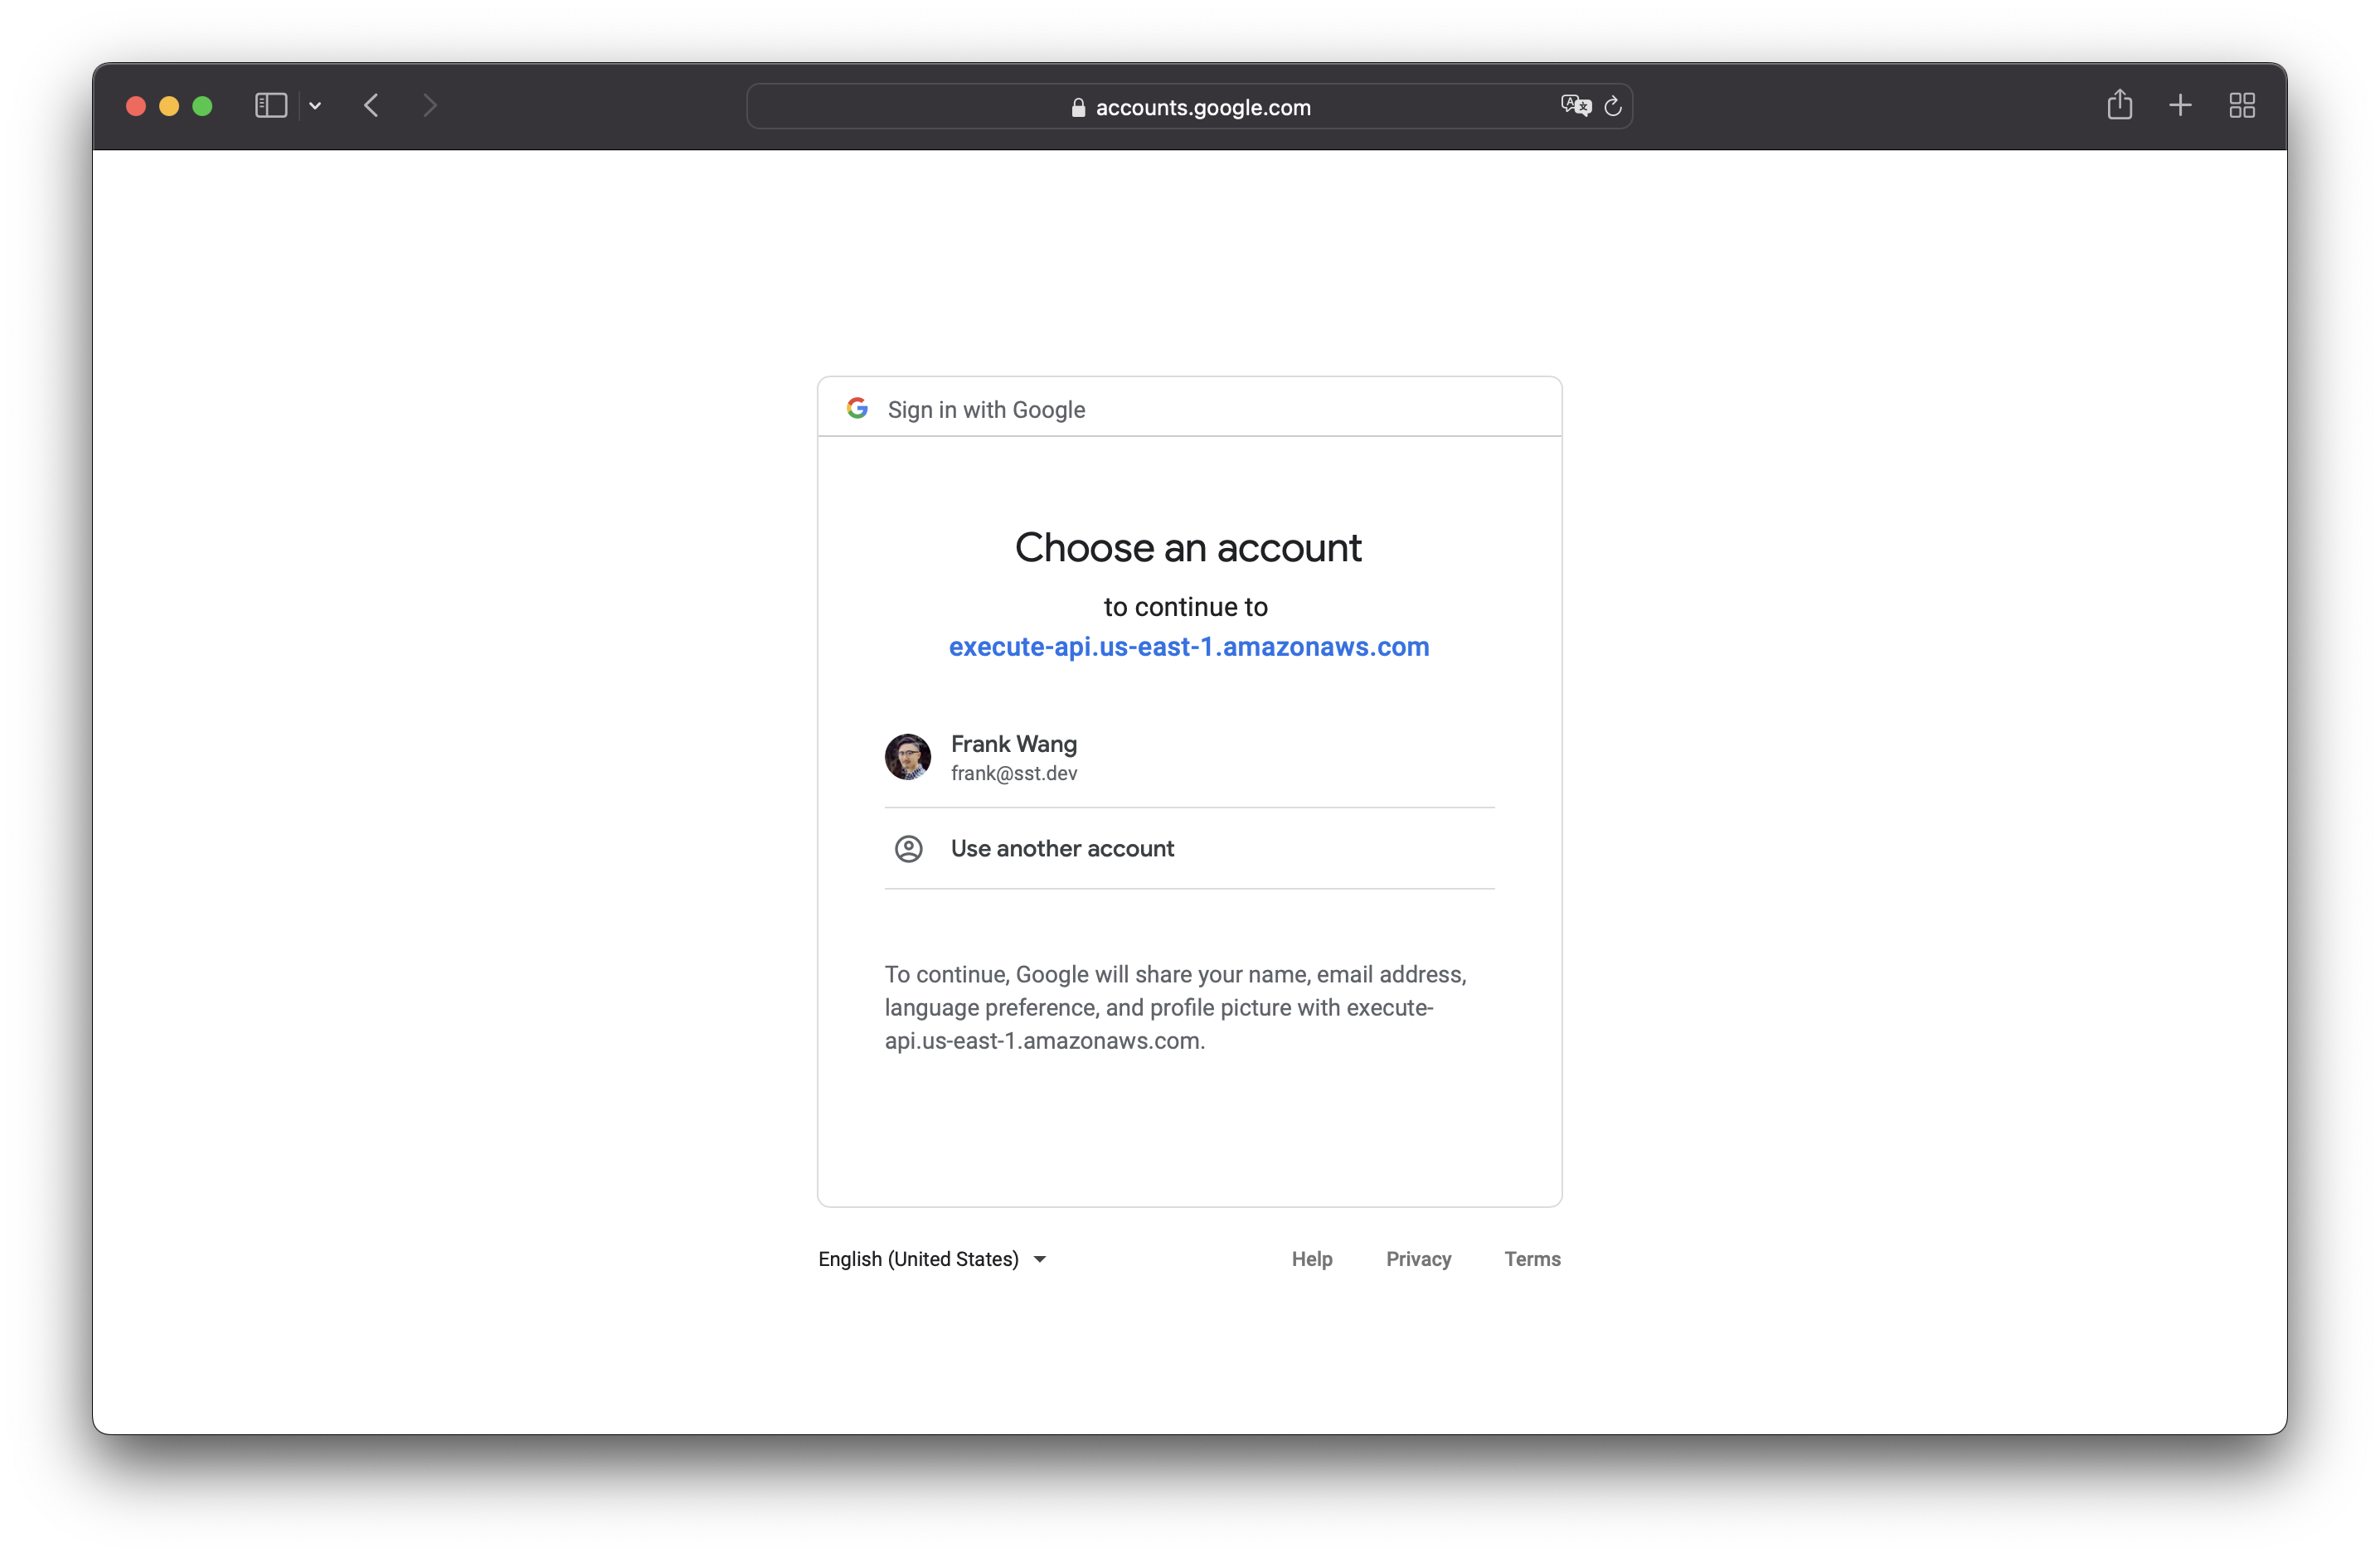
Click on Sign in with Google, and you will be redirected to Google to sign in.
Once you are signed in, you will be redirected to the Callback URL we created earlier with the user’s details. Recall in our authenticator handler function, that we are simply printing the user’s claims in the onSuccess callback.
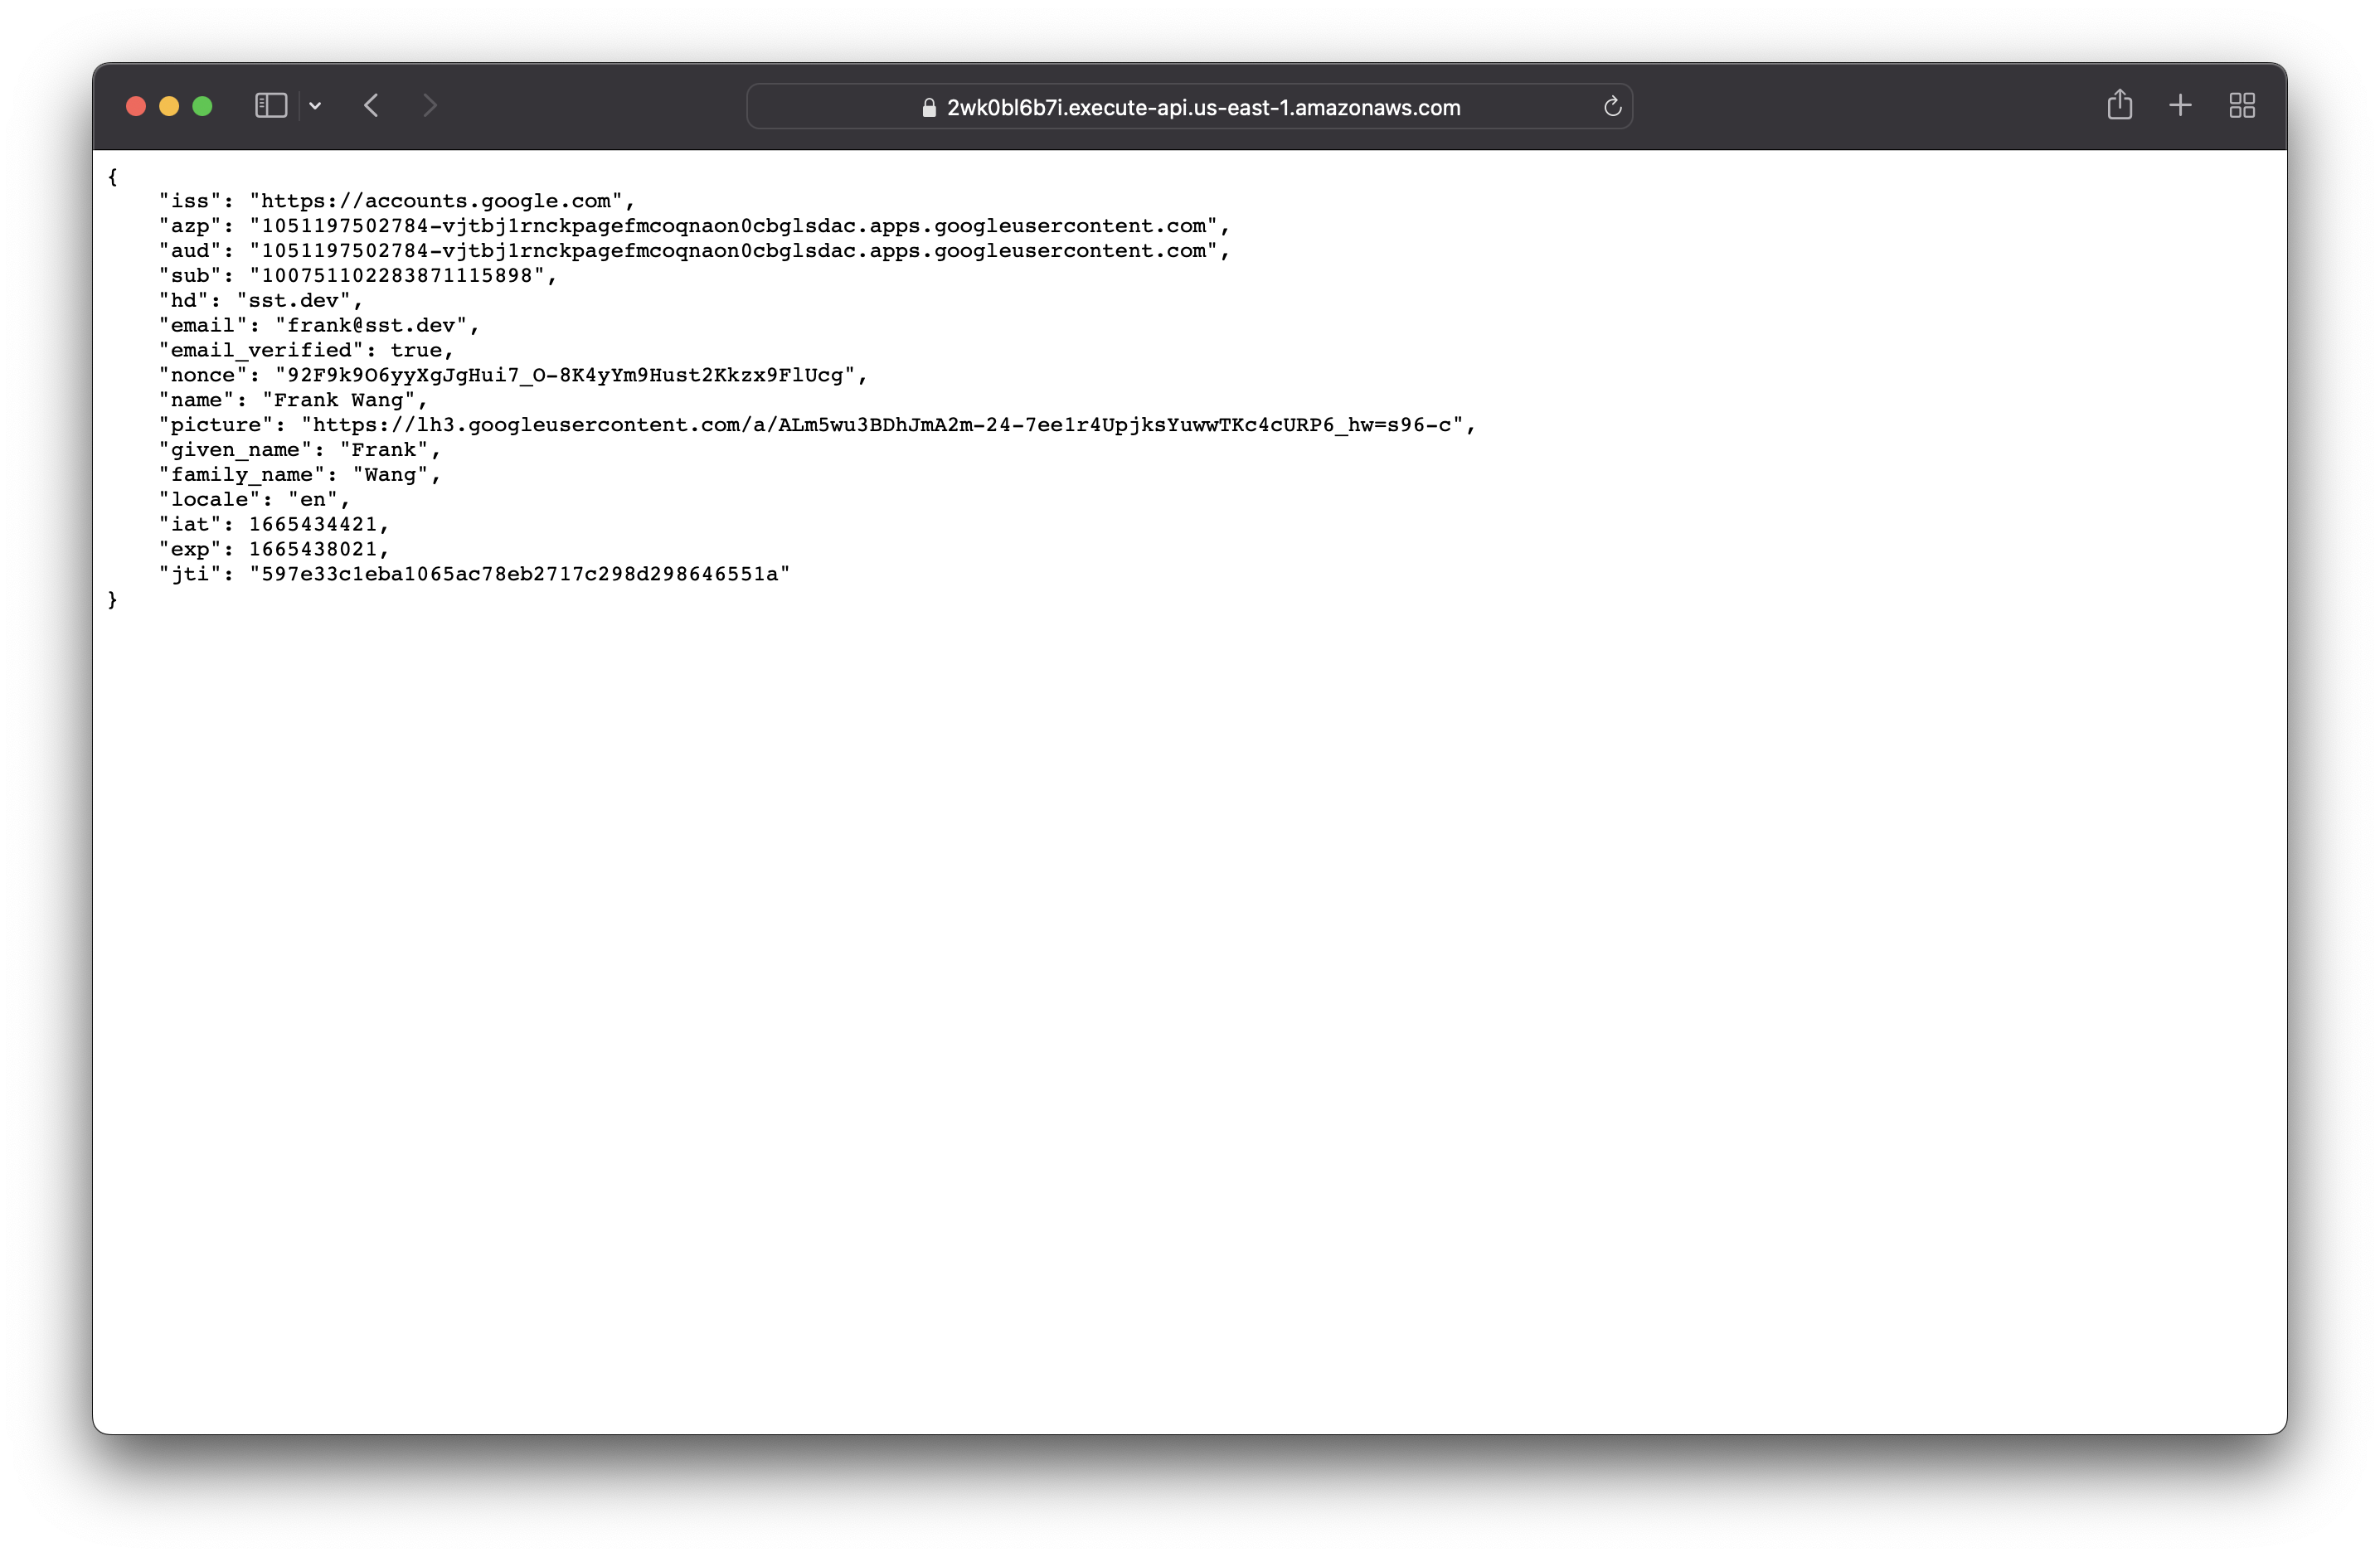
🎉 Sweet! We have just completed steps 1, 2, and 3 of our Auth Flow.
Create a session token
Now, let’s implement step 4. In the onSuccess callback, we will create a session token and pass that back to the frontend.
Define a session type
First, to make creating and retrieving session typesafe, we’ll start by defining our session types.
Add the following above the AuthHandler in packages/functions/src/auth.ts.
declare module "sst/node/auth" {
export interface SessionTypes {
user: {
userID: string;
};
}
}
We are going to keep it simple and create a user session type. And it contains a userId property. Note that if you have a multi-tenant app, you might want to add something like the tenantID as well.
Also note that as your app grows, you can define multiple session types like an api_key session type that represents any server-to-server requests.
Create a session
Now let’s create the session object.
Make the following changes to the onSuccess callback.
export const handler = AuthHandler({
providers: {
google: GoogleAdapter({
mode: "oidc",
clientID: GOOGLE_CLIENT_ID,
onSuccess: async (tokenset) => {
- return {
- statusCode: 200,
- body: JSON.stringify(tokenset.claims(), null, 4),
- };
+ const claims = tokenset.claims();
+ return Session.parameter({
+ redirect: "http://127.0.0.1:5173",
+ type: "user",
+ properties: {
+ userID: claims.sub,
+ },
+ });
},
}),
},
});
Remember to replace the redirect URL with the URL of your local React app.
The Session.parameter call encrypts the given session object to generate a token. It’ll then redirect to the given redirect URL with ?token=xxxx as the query string parameter.
Also import the Session up top.
- import { AuthHandler, GoogleAdapter } from "sst/node/auth";
+ import { AuthHandler, GoogleAdapter, Session } from "sst/node/auth";
Use the session
Now let’s use the session token in the frontend.
Store the session token
Then in the frontend, we will check if the URL contains the token query string when the page loads. If it is passed in, we will store it in the local storage, and then redirect the user to the root domain.
Add the following above the return in web/src/App.jsx.
useEffect(() => {
const search = window.location.search;
const params = new URLSearchParams(search);
const token = params.get("token");
if (token) {
localStorage.setItem("session", token);
window.location.replace(window.location.origin);
}
}, []);
Load the session
On page load, we will also check if the session token exists in the local storage. If it does, we want to display the user that is signed in, and have a button for the user to sign out.
Add this above the useEffect we just added.
const [session, setSession] = useState(null);
const getSession = async () => {
const token = localStorage.getItem("session");
if (token) {
setSession(token);
}
};
useEffect(() => {
getSession();
}, []);
Replace the return to conditionally render the page based on session.
return (
<div className="container">
<h2>SST Auth Example</h2>
+ {session ? (
+ <div>
+ <p>Yeah! You are signed in.</p>
+ <button onClick={signOut}>Sign out</button>
+ </div>
+ ) : (
<div>
<a
href={`${import.meta.env.VITE_APP_API_URL}/auth/google/authorize`}
rel="noreferrer"
>
<button>Sign in with Google</button>
</a>
</div>
+ )}
</div>
);
Clear the session on logout
And finally, when the user clicks on Sign out, we need to clear the session token from the local storage.
Add the following above the return.
const signOut = async () => {
localStorage.removeItem("session");
setSession(null);
};
Also, remember to add the imports up top.
import { useEffect, useState } from "react";
Let’s go back to our browser. Click on Sign in with Google again. After you authenticate with Google, you will be redirected back to the same page with the “Yeah! You are signed in.” message.
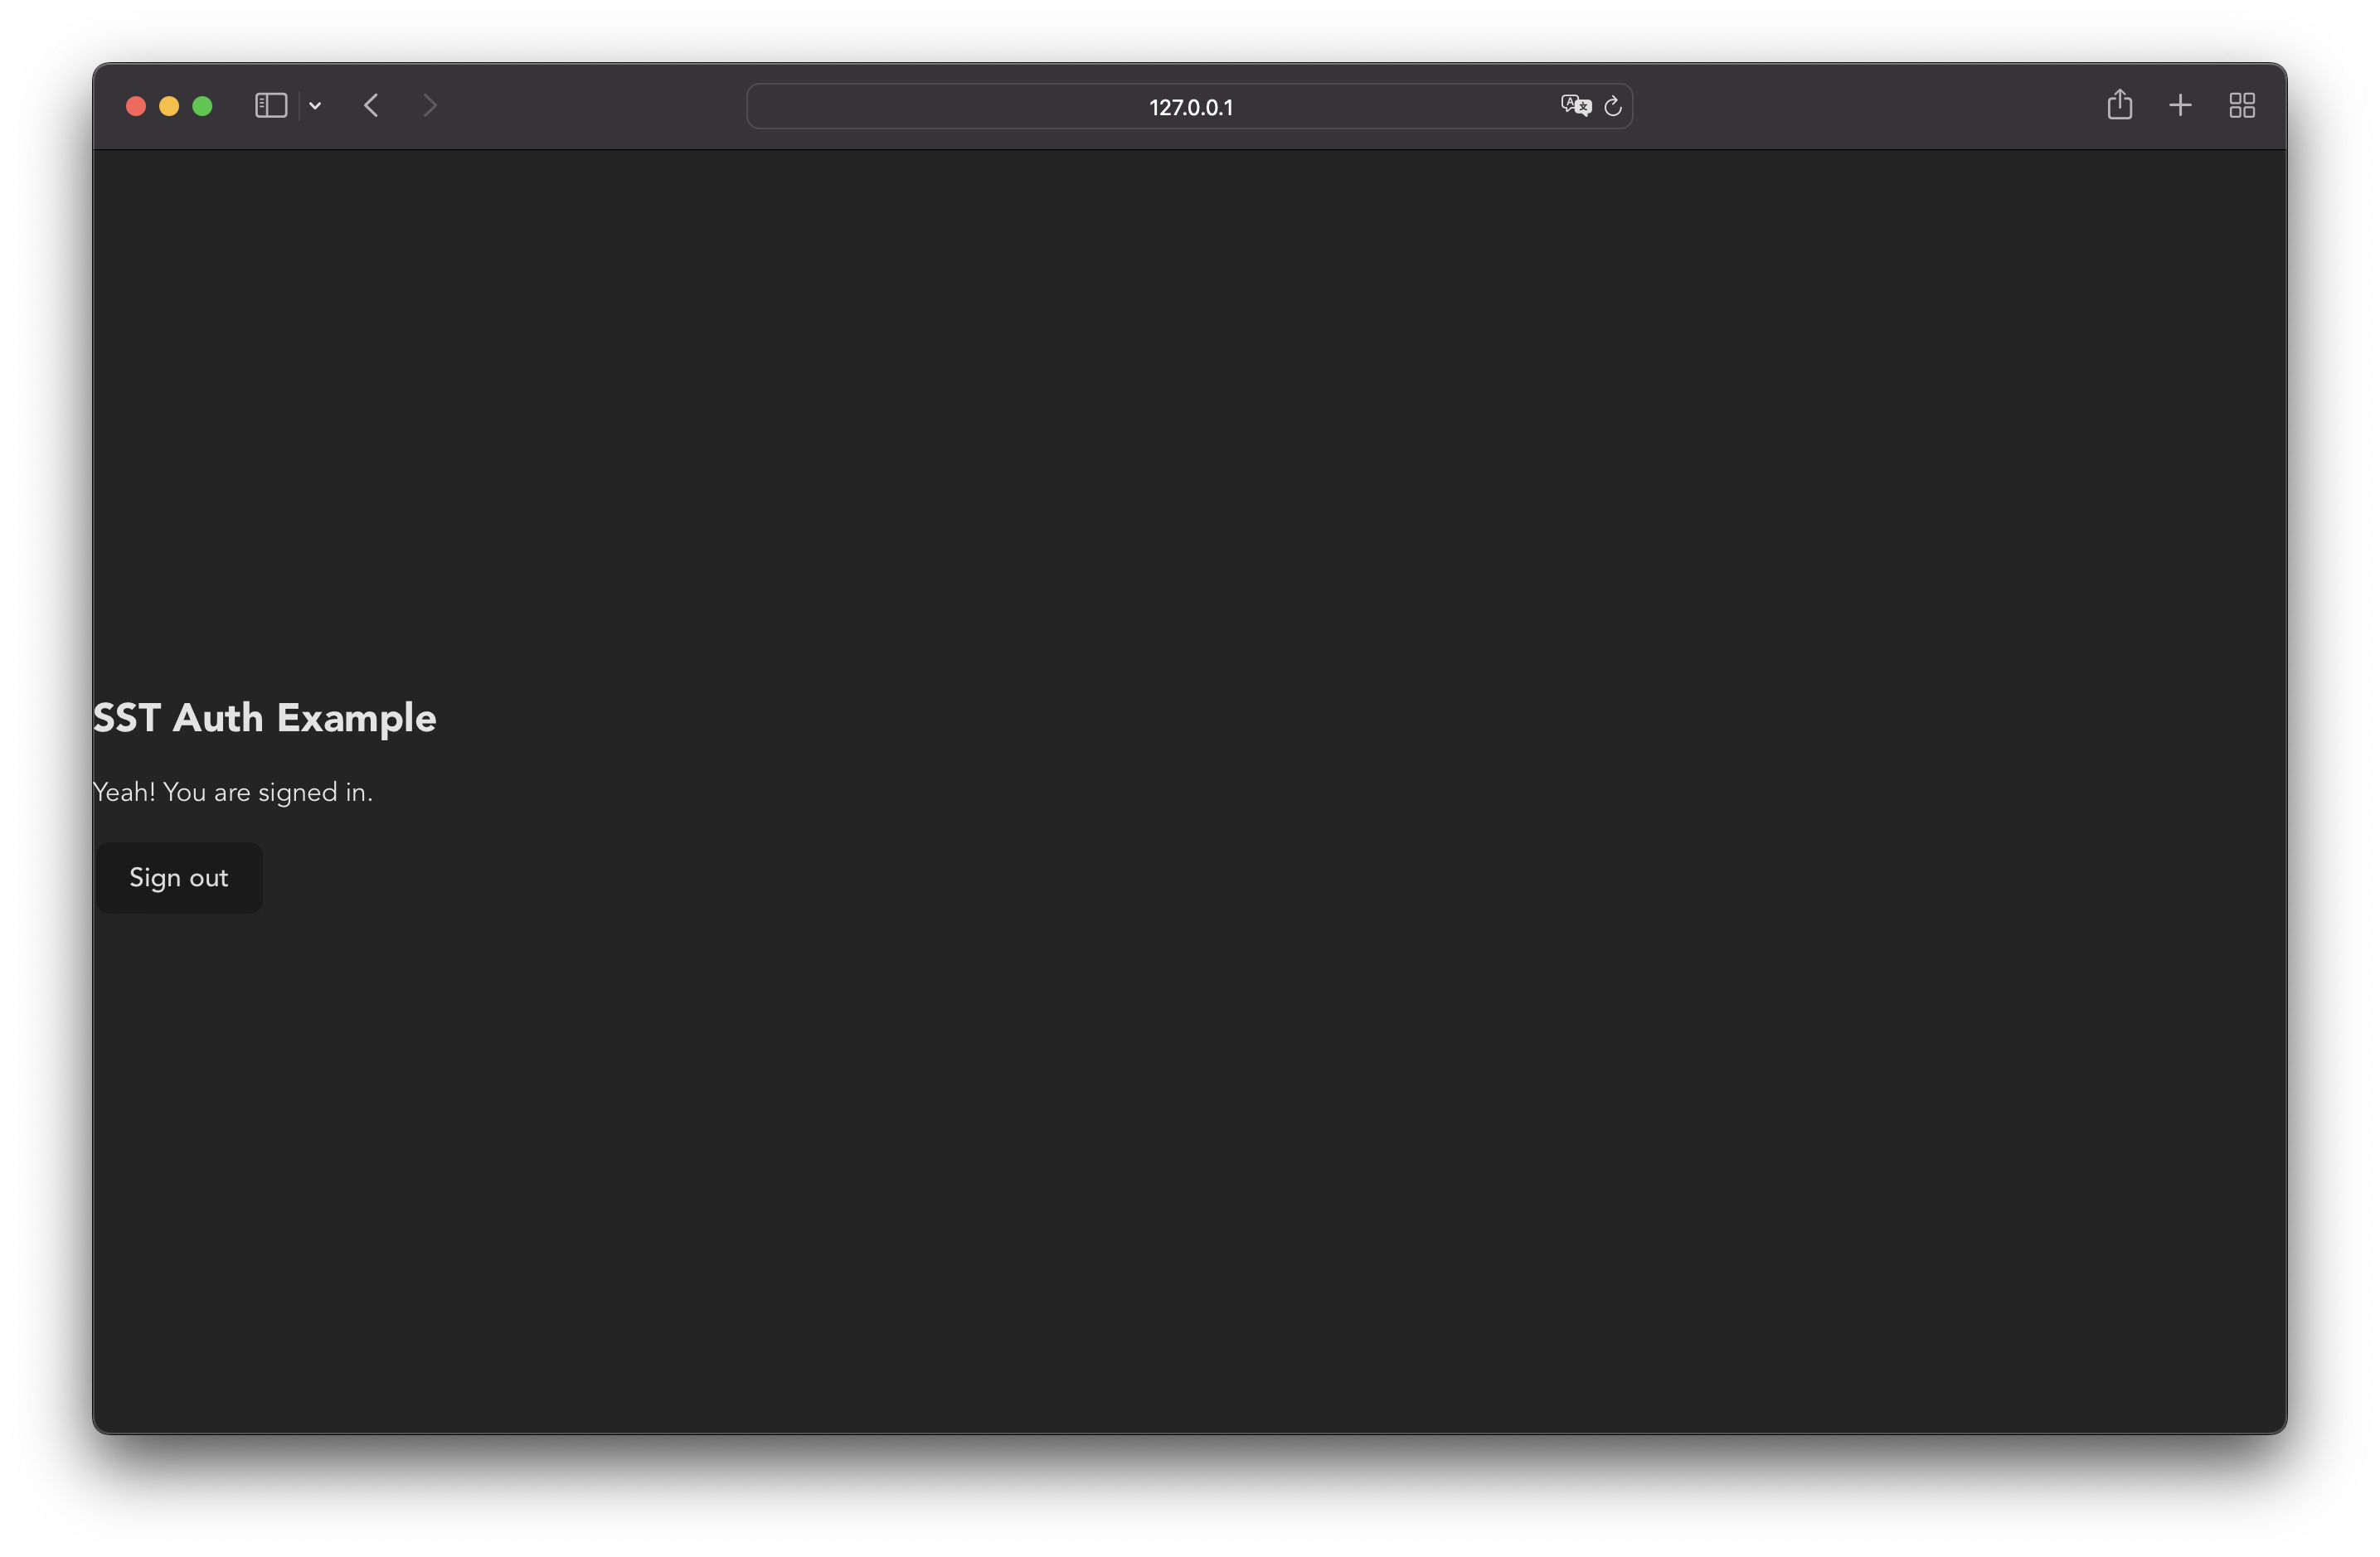
Try refreshing the page, you will remain signed in. This is because the session token is stored in the browser’s local storage.
Let’s sign out before continuing with the next section. Click on Sign out.
🎉 Awesome! We have now completed step 4 of our Auth Flow.
Let’s move on to steps 5 and 6. We will create a session API that will return the user data given the session token.
Store the user data
So far we haven’t been storing the data Google’s been returning through the Callback URL. Let’s create a database table to store this.
Create a DynamoDB table
We’ll be using the SST Table construct.
Add the following above the Api construct in stacks/ExampleStack.ts.
const table = new Table(stack, "users", {
fields: {
userId: "string",
},
primaryIndex: { partitionKey: "userId" },
});
Then let’s bind the table to the api. Make the following changes to the Api construct.
const api = new Api(stack, "api", {
+ defaults: {
+ function: {
+ bind: [table],
+ },
+ },
routes: {
"GET /": "packages/functions/src/lambda.handler",
},
});
Import the Table construct up top.
- import { StackContext, Api, Auth, StaticSite } from "sst/constructs";
+ import { StackContext, Api, Auth, StaticSite, Table } from "sst/constructs";
Store the claims
Now let’s update our authenticator function to store the user data in the onSuccess callback.
Update the onSuccess callback.
export const handler = AuthHandler({
providers: {
google: GoogleAdapter({
mode: "oidc",
clientID: GOOGLE_CLIENT_ID,
onSuccess: async (tokenset) => {
const claims = tokenset.claims();
+ const ddb = new DynamoDBClient({});
+ await ddb.send(new PutItemCommand({
+ TableName: Table.users.tableName,
+ Item: marshall({
+ userId: claims.sub,
+ email: claims.email,
+ picture: claims.picture,
+ name: claims.given_name,
+ }),
+ }));
return Session.parameter({
redirect: "http://127.0.0.1:5173",
type: "user",
properties: {
userID: claims.sub,
},
});
},
}),
},
});
This is saving the claims we get from Google in our DynamoDB table.
Also add these imports up top.
import { DynamoDBClient, PutItemCommand } from "@aws-sdk/client-dynamodb";
import { marshall } from "@aws-sdk/util-dynamodb";
import { Table } from "sst/node/table";
And finally install these packages inside the packages/functions directory.
npm install --save @aws-sdk/client-dynamodb @aws-sdk/util-dynamodb
Fetch the user data
Now that the user data is stored in the database; let’s create an API endpoint that returns the user details given a session token.
Create a session API
Add a /session route in the Api construct’s routes definition in stacks/ExampleStacks.ts.
routes: {
"GET /": "packages/functions/src/lambda.handler",
+ "GET /session": "packages/functions/src/session.handler",
},
Add a file at packages/functions/src/session.ts.
import { Table } from "sst/node/table";
import { ApiHandler } from "sst/node/api";
import { useSession } from "sst/node/auth";
import { DynamoDBClient, GetItemCommand } from "@aws-sdk/client-dynamodb";
import { marshall, unmarshall } from "@aws-sdk/util-dynamodb";
export const handler = ApiHandler(async () => {
const session = useSession();
// Check user is authenticated
if (session.type !== "user") {
throw new Error("Not authenticated");
}
const ddb = new DynamoDBClient({});
const data = await ddb.send(
new GetItemCommand({
TableName: Table.users.tableName,
Key: marshall({
userId: session.properties.userID,
}),
})
);
return {
statusCode: 200,
body: JSON.stringify(unmarshall(data.Item!)),
};
});
The handler calls a useSession() hook to decode the session token and retrieve the user’s userID from the session data. Note that, useSession can be called anywhere in your Lambda handler. This works because we are using the ApiHandler to wrap our Lambda function.
We then fetch the user’s data from our database table with userID being the key.
Save the changes. And then open up the sst dev terminal window. You will be prompted with:
Stacks: There are new infrastructure changes. Press ENTER to redeploy.
Press ENTER to deploy the infrastructure changes.
As we wait, let’s update our frontend to make a request to the /session API to fetch the user data.
Call the session API
Add the following above the signOut function in web/src/App.jsx.
const getUserInfo = async (session) => {
try {
const response = await fetch(
`${import.meta.env.VITE_APP_API_URL}/session`,
{
method: "GET",
headers: {
Authorization: `Bearer ${session}`,
},
}
);
return response.json();
} catch (error) {
alert(error);
}
};
Update the getSession function to fetch from the new session API.
const getSession = async () => {
const token = localStorage.getItem("session");
if (token) {
- setSession(token);
+ const user = await getUserInfo(token);
+ if (user) setSession(user);
}
+ setLoading(false);
};
And finally, add a loading state to indicate the API is being called.
Add the following below the session useState hook.
const [session, setSession] = useState(null);
+ const [loading, setLoading] = useState(true);
Render the user data
Let’s render the user info.
Update our return statement with.
- <div>
- <p>Yeah! You are signed in.</p>
- <button onClick={signOut}>Sign out</button>
- </div>
+ <div className="profile">
+ <p>Welcome {session.name}!</p>
+ <img
+ src={session.picture}
+ style={{ borderRadius: "50%" }}
+ width={100}
+ height={100}
+ alt=""
+ />
+ <p>{session.email}</p>
+ <button onClick={signOut}>Sign out</button>
+ </div>
Also, let’s display a loading sign while waiting for the /session API to return.
Add the following above the return.
+ if (loading) return <div className="container">Loading...</div>;
return (
<div className="container">
...
Finally, let’s add some basic styles to the page.
Replace web/src/index.css with the following.
body {
margin: 0;
font-family: -apple-system, BlinkMacSystemFont, "Segoe UI", "Roboto",
"Oxygen", "Ubuntu", "Cantarell", "Fira Sans", "Droid Sans",
"Helvetica Neue", sans-serif;
-webkit-font-smoothing: antialiased;
-moz-osx-font-smoothing: grayscale;
}
.container {
width: 100%;
height: 100vh;
display: flex;
flex-direction: column;
align-items: center;
text-align: center;
}
button {
width: 100%;
padding: 10px;
border: none;
border-radius: 4px;
background-color: #000;
color: #fff;
font-size: 16px;
cursor: pointer;
}
.profile {
border: 1px solid #ccc;
padding: 20px;
border-radius: 4px;
}
Let’s go back to our browser. Make sure you are signed out.
Click on Sign in with Google again. After you authenticate with Google, you will be redirected back to the same page with your details.
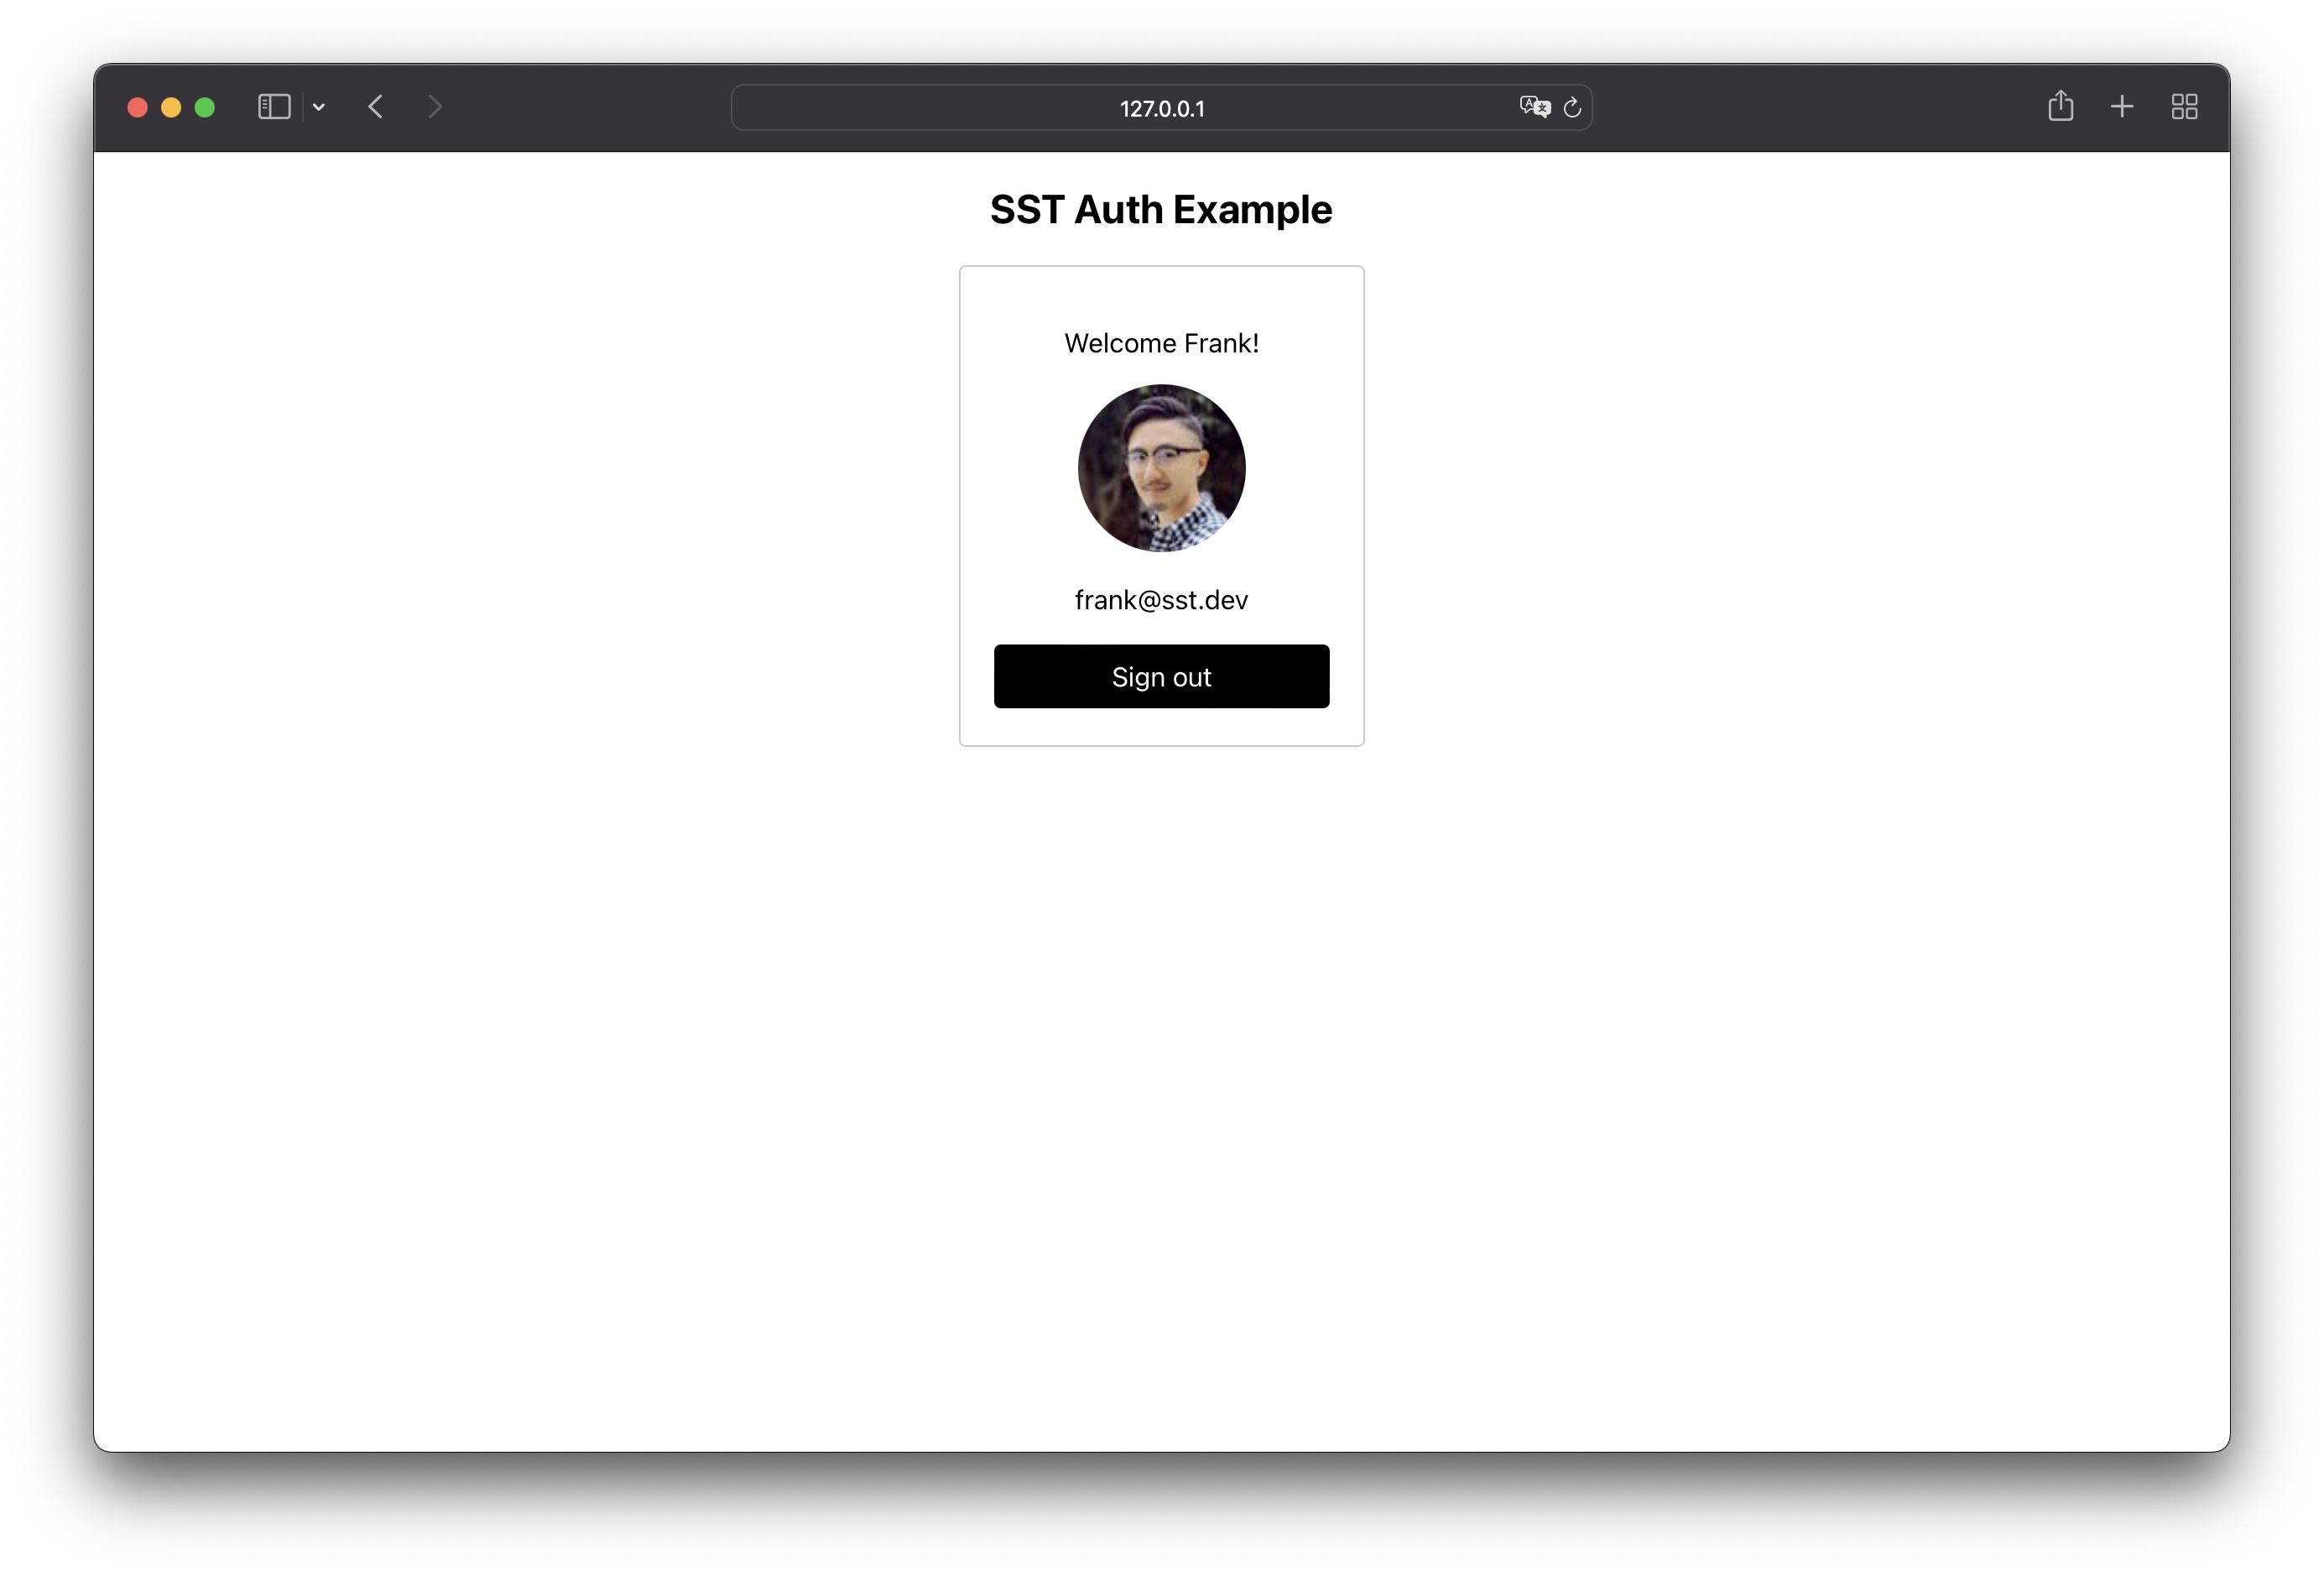
🎉 Congratulations! We have completed the entire Auth Flow.
Deploy your API
When deploying to prod, we need to change our authenticator to redirect to the deployed frontend URL instead of 127.0.0.1.
In stacks/ExampleStack.ts, make this change to the Auth construct.
const auth = new Auth(stack, "auth", {
authenticator: {
handler: "packages/functions/src/auth.handler",
+ bind: [site],
},
});
In packages/functions/src/auth.ts, change redirect to:
-redirect: "http://127.0.0.1:5173",
+redirect: process.env.IS_LOCAL ? "http://127.0.0.1:5173" : StaticSite.site.url,
Note that when we are developing locally via sst dev, the IS_LOCAL environment variable is set. We will conditionally redirect to 127.0.0.1 or the site’s URL depending on IS_LOCAL.
Also remember to import the StaticSite construct up top.
import { StaticSite } from "sst/node/site";
To wrap things up we’ll deploy our app to prod.
$ npx sst deploy --stage prod
This allows us to separate our environments, so that when we are developing locally, it doesn’t break the app for our users.
Once deployed, you should see something like this.
Stack prod-api-sst-auth-google-ExampleStack
Status: deployed
Outputs:
ApiEndpoint: https://jd8jpfjue6.execute-api.us-east-1.amazonaws.com
SiteURL: https://d36g0g26jff9tr.cloudfront.net
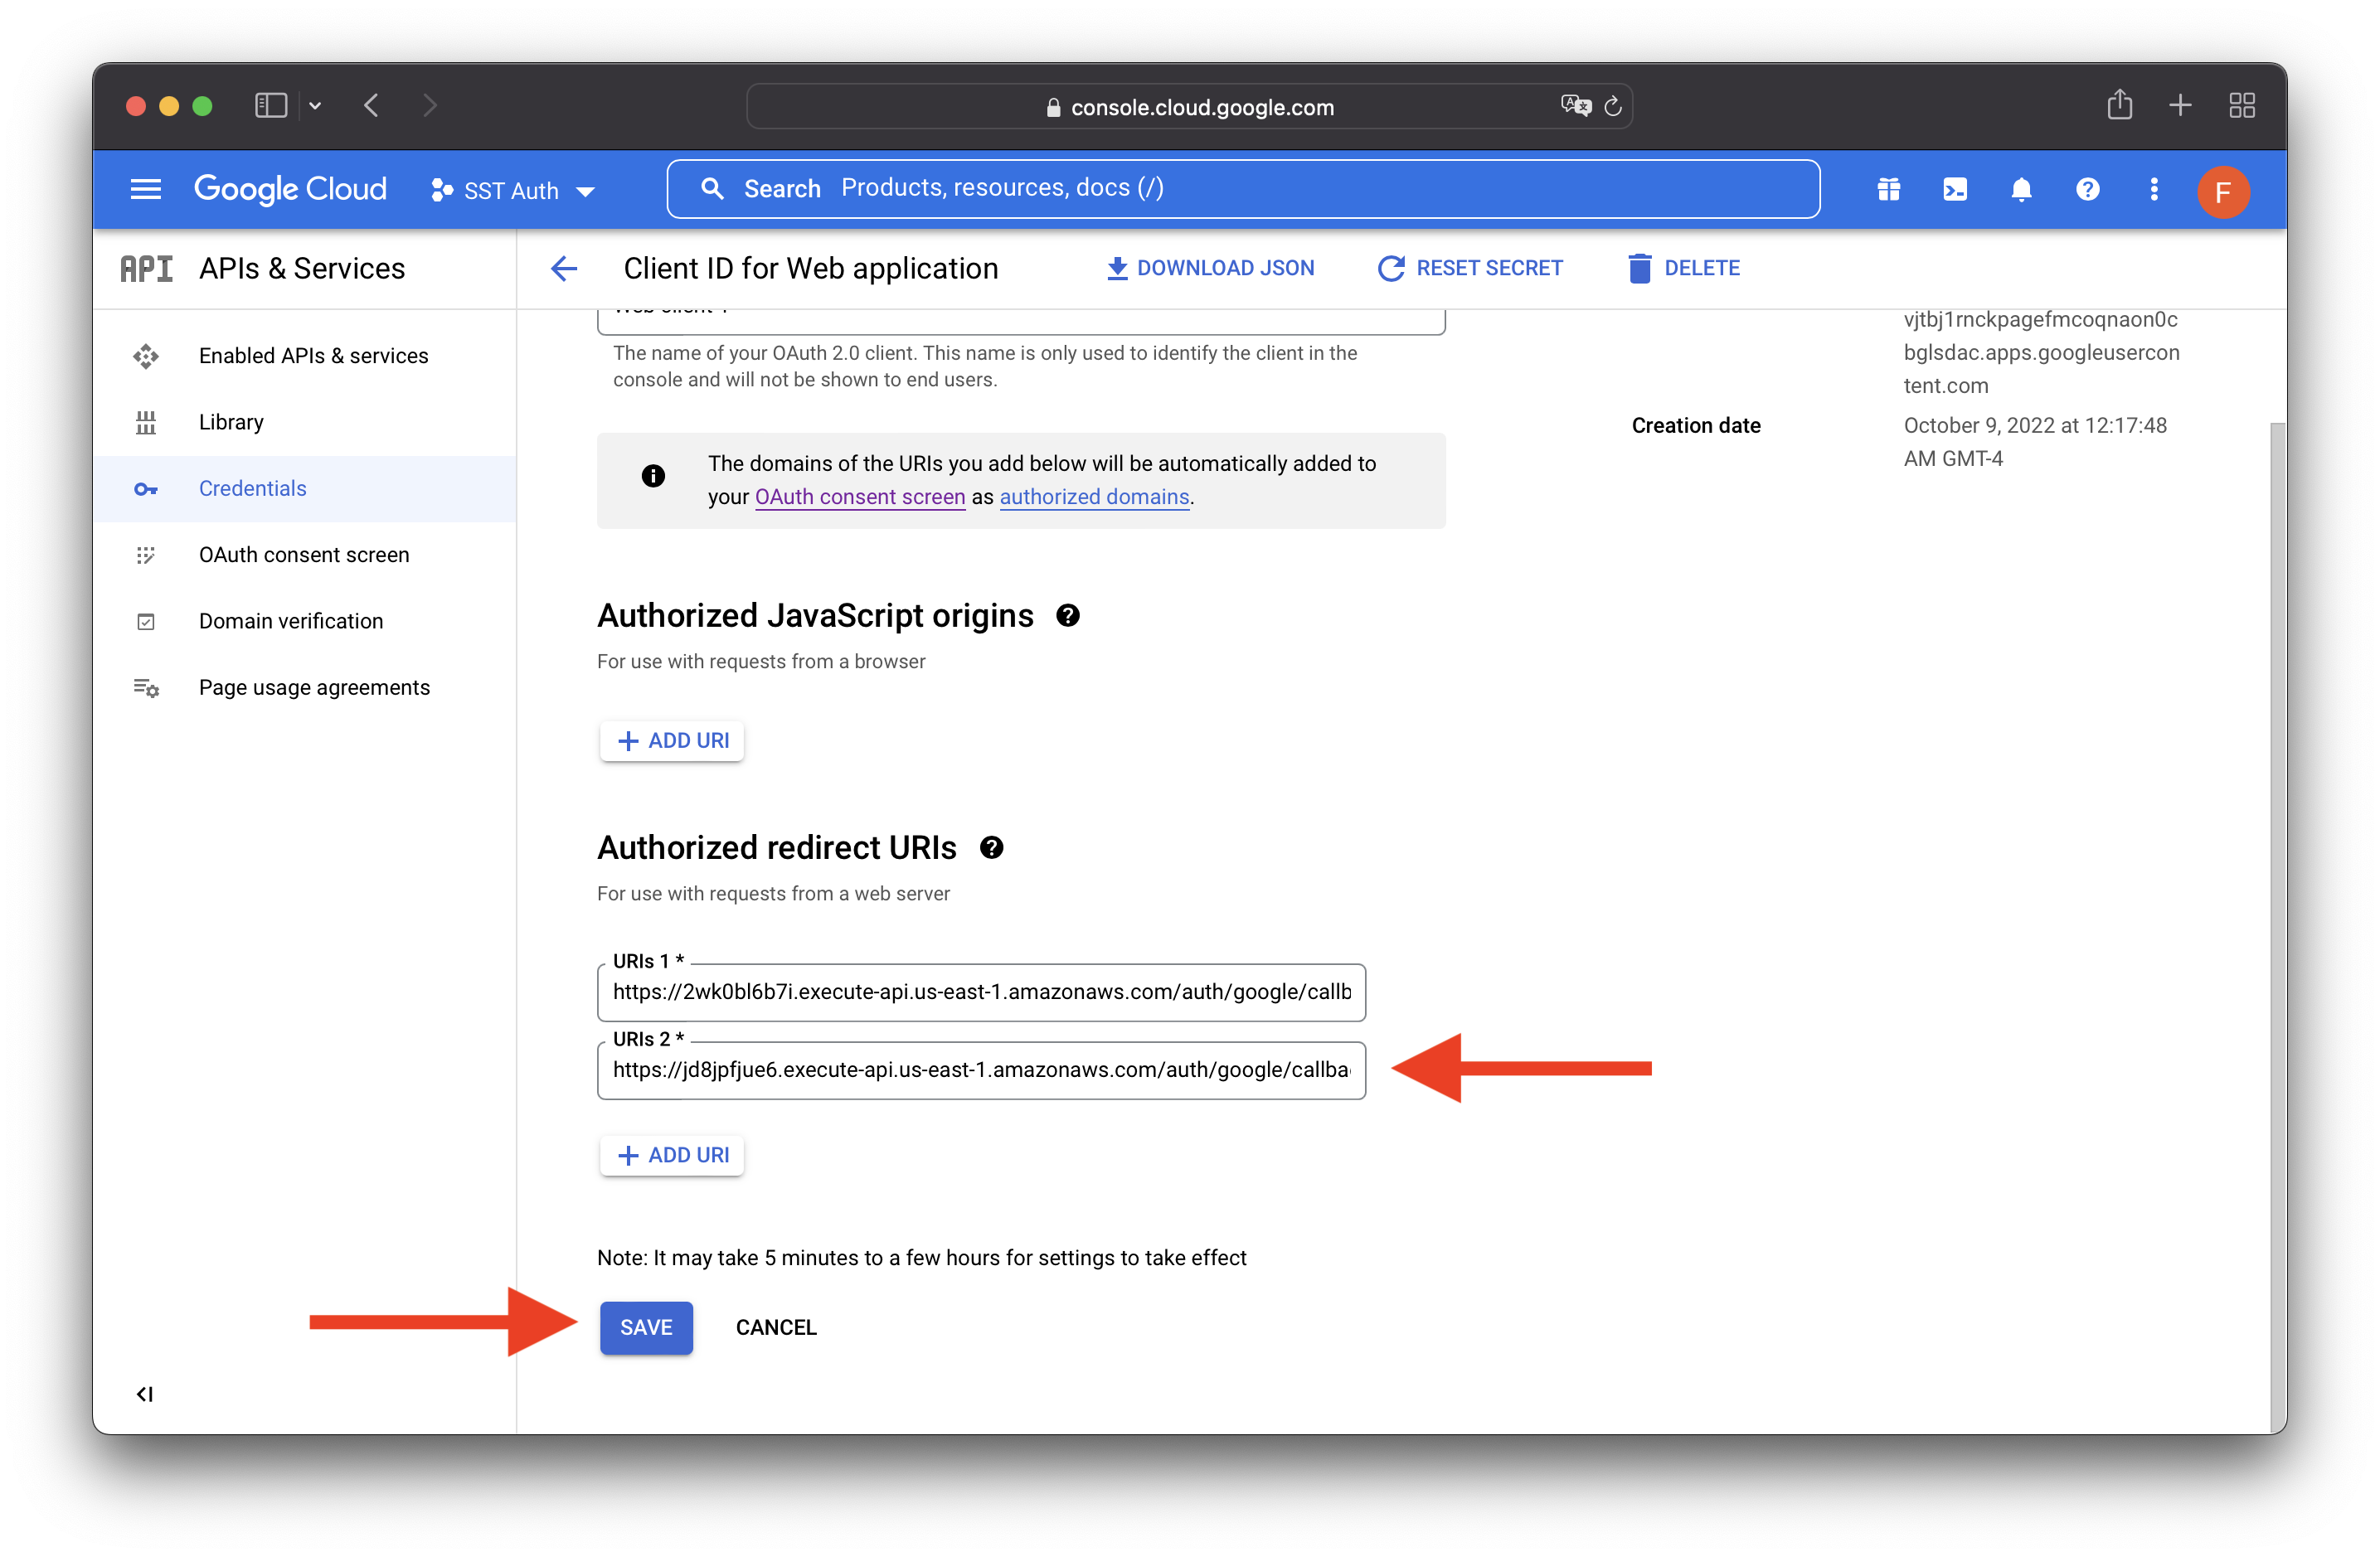
Add the prod redirect URI
Like we did when we ran sst dev; add the prod Callback URL to the Authorized redirect URIs in the GCP Console. In our case this is — https://jd8jpfjue6.execute-api.us-east-1.amazonaws.com/auth/google/callback
Conclusion
And that’s it! You’ve got a brand new serverless full-stack app that supports Sign in with Google. With a local development environment, to test. And it’s deployed to production as well, so you can share it with your users. Check out the repo below for the code we used in this example. And leave a comment if you have any questions!
Clean up
Optionally, you can remove the resources created in this example using the following command.
$ npx sst remove
And to remove the prod environment.
$ npx sst remove --stage prod
For help and discussion
Comments on this example