


How to create a REST API in Golang with serverless
In this example we’ll look at how to create a serverless REST API with Golang on AWS using SST.
Requirements
- Node.js 16 or later for our CDK code
- Golang 1.16 or similar for our Lambda code
- An AWS account with the AWS CLI configured locally
Create an SST app
 Let’s start by creating an SST app.
$ npx create-sst@latest --template=other/go rest-api-go
$ cd rest-api-go
$ npm install
By default, our app will be deployed to the us-east-1 AWS region. This can be changed in the sst.config.ts in your project root.
import { SSTConfig } from "sst";

export default {
  config(_input) {
    return {
      name: "rest-api-go",
      region: "us-east-1",
    };
  },
} satisfies SSTConfig;
Setting up our routes
Let’s start by setting up the routes for our API.
Add the following below the config function in the sst.config.ts.
stacks(app) {
	app.setDefaultFunctionProps({
		runtime: "go1.x",
	});
	app.stack(function Stack({ stack }) {
		const api = new Api(stack, "api", {
			routes: {
				"GET /notes": "functions/lambda/list.go",
				"GET /notes/{id}": "functions/lambda/get.go",
				"PUT /notes/{id}": "functions/lambda/update.go",
			},
		});
		stack.addOutputs({
			ApiEndpoint: api.url,
		});
	});
},
We are creating an API here using the Api construct. And we are adding three routes to it.
GET /notes
GET /notes/{id}
PUT /notes/{id}
The first is getting a list of notes. The second is getting a specific note given an id. And the third is updating a note.
Adding function code
For this example, we are not using a database. We’ll look at that in detail in another example. So internally we are just going to get the list of notes from a file.
Let’s add a file that contains our notes in db/notes.go.
package db

import (
	"strconv"
	"time"
)

func Notes() map[string]map[string]string {
	return map[string]map[string]string{
		"id1": {
			"noteId":    "id1",
			"userId":    "user1",
			"content":   "Hello World!",
			"createdAt": strconv.FormatInt(time.Now().Unix(), 10),
		},
		"id2": {
			"noteId":    "id2",
			"userId":    "user2",
			"content":   "Hello Old World!",
			"createdAt": strconv.FormatInt(time.Now().Unix()-1000, 10),
		},
	}
}
Now add the code for our first endpoint.
Getting a list of notes
Add a functions/lambda/list.go.
package main

import (
	"encoding/json"
	"github.com/aws/aws-lambda-go/events"
	"github.com/aws/aws-lambda-go/lambda"
	"github.com/sst/examples/rest-api-go/db"
)

func Handler(request events.APIGatewayV2HTTPRequest) (events.APIGatewayProxyResponse, error) {
	response, _ := json.Marshal(db.Notes())

	return events.APIGatewayProxyResponse{
		Body:       string(response),
		StatusCode: 200,
	}, nil
}

func main() {
	lambda.Start(Handler)
}
Here we are simply converting a list of notes to string, and responding with that in the request body.
Getting a specific note
Add the following to functions/lambda/get.go.
package main

import (
	"encoding/json"
	"github.com/aws/aws-lambda-go/events"
	"github.com/aws/aws-lambda-go/lambda"
	"github.com/sst/examples/rest-api-go/db"
)

func Handler(request events.APIGatewayV2HTTPRequest) (events.APIGatewayProxyResponse, error) {
	var notes = db.Notes()
	var note = notes[request.PathParameters["id"]]

	if note == nil {
		return events.APIGatewayProxyResponse{
			Body:       `{"error":true}`,
			StatusCode: 404,
		}, nil
	}

	response, _ := json.Marshal(note)

	return events.APIGatewayProxyResponse{
		Body:       string(response),
		StatusCode: 200,
	}, nil
}

func main() {
	lambda.Start(Handler)
}
Here we are checking if we have the requested note. If we do, we respond with it. If we don’t, then we respond with a 404 error.
Updating a note
Add the following to functions/lambda/update.go.
package main

import (
	"encoding/json"
	"github.com/aws/aws-lambda-go/events"
	"github.com/aws/aws-lambda-go/lambda"
	"github.com/sst/examples/rest-api-go/db"
)

func Handler(request events.APIGatewayV2HTTPRequest) (events.APIGatewayProxyResponse, error) {
	var notes = db.Notes()
	var note = notes[request.PathParameters["id"]]

	if note == nil {
		return events.APIGatewayProxyResponse{
			Body:       `{"error":true}`,
			StatusCode: 404,
		}, nil
	}

	var body map[string]string
	_ = json.Unmarshal([]byte(request.Body), &body)

	note["content"] = body["content"]

	response, _ := json.Marshal(note)

	return events.APIGatewayProxyResponse{
		Body:       string(response),
		StatusCode: 200,
	}, nil
}

func main() {
	lambda.Start(Handler)
}
We first check if the note with the requested id exists. And then we update the content of the note and return it. Of course, we aren’t really saving our changes because we don’t have a database!
Now let’s test our new API.
Starting your dev environment
SST features a Live Lambda Development environment that allows you to work on your serverless apps live.
$ npm run dev
The first time you run this command it’ll take a couple of minutes to deploy your app and a debug stack to power the Live Lambda Development environment.
===============
 Deploying app
===============

Preparing your SST app
Transpiling source
Linting source
Deploying stacks
dev-rest-api-go-ExampleStack: deploying...

 ✅  dev-rest-api-go-ExampleStack


Stack dev-rest-api-go-ExampleStack
  Status: deployed
  Outputs:
    ApiEndpoint: https://rxk5buowgi.execute-api.us-east-1.amazonaws.com
The ApiEndpoint is the API we just created.
Let’s test our endpoint using the integrated SST Console. The SST Console is a web based dashboard to manage your SST apps Learn more about it in our docs.
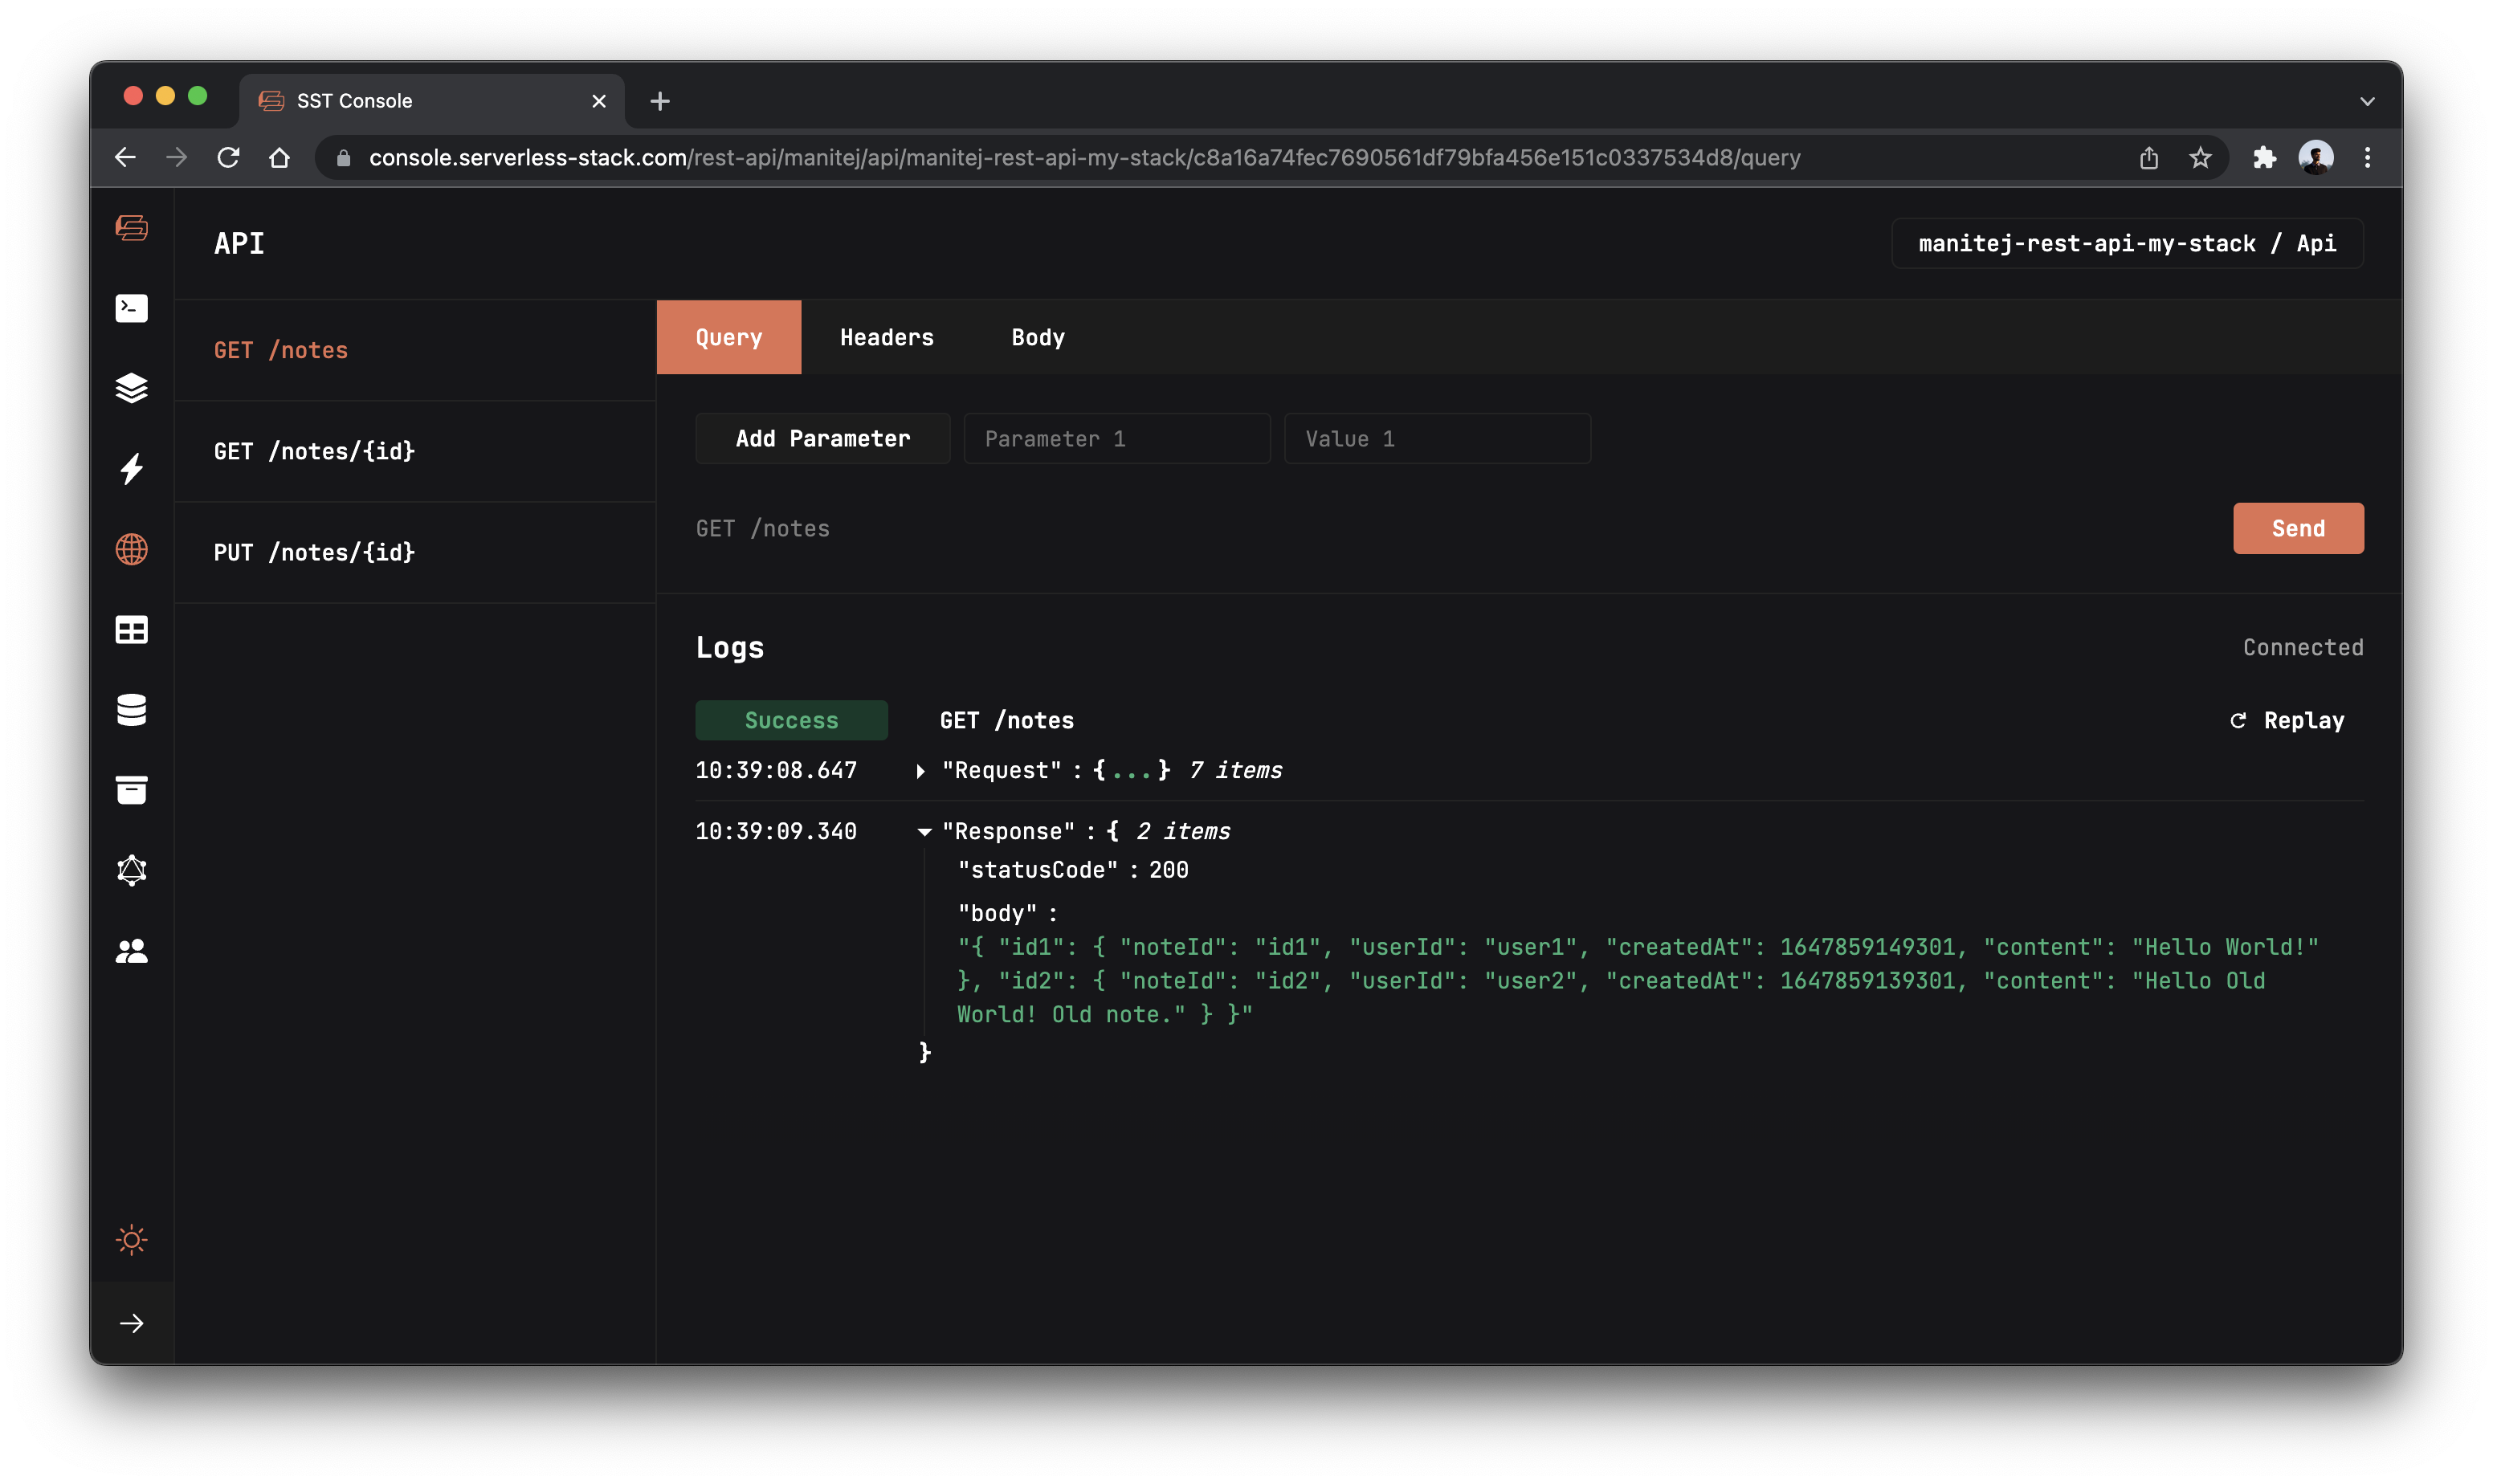
Go to the API explorer and click the Send button of the GET /notes route to get a list of notes.
Note, The API explorer lets you make HTTP requests to any of the routes in your Api construct. Set the headers, query params, request body, and view the function logs with the response.

You should see the list of notes as a JSON string.
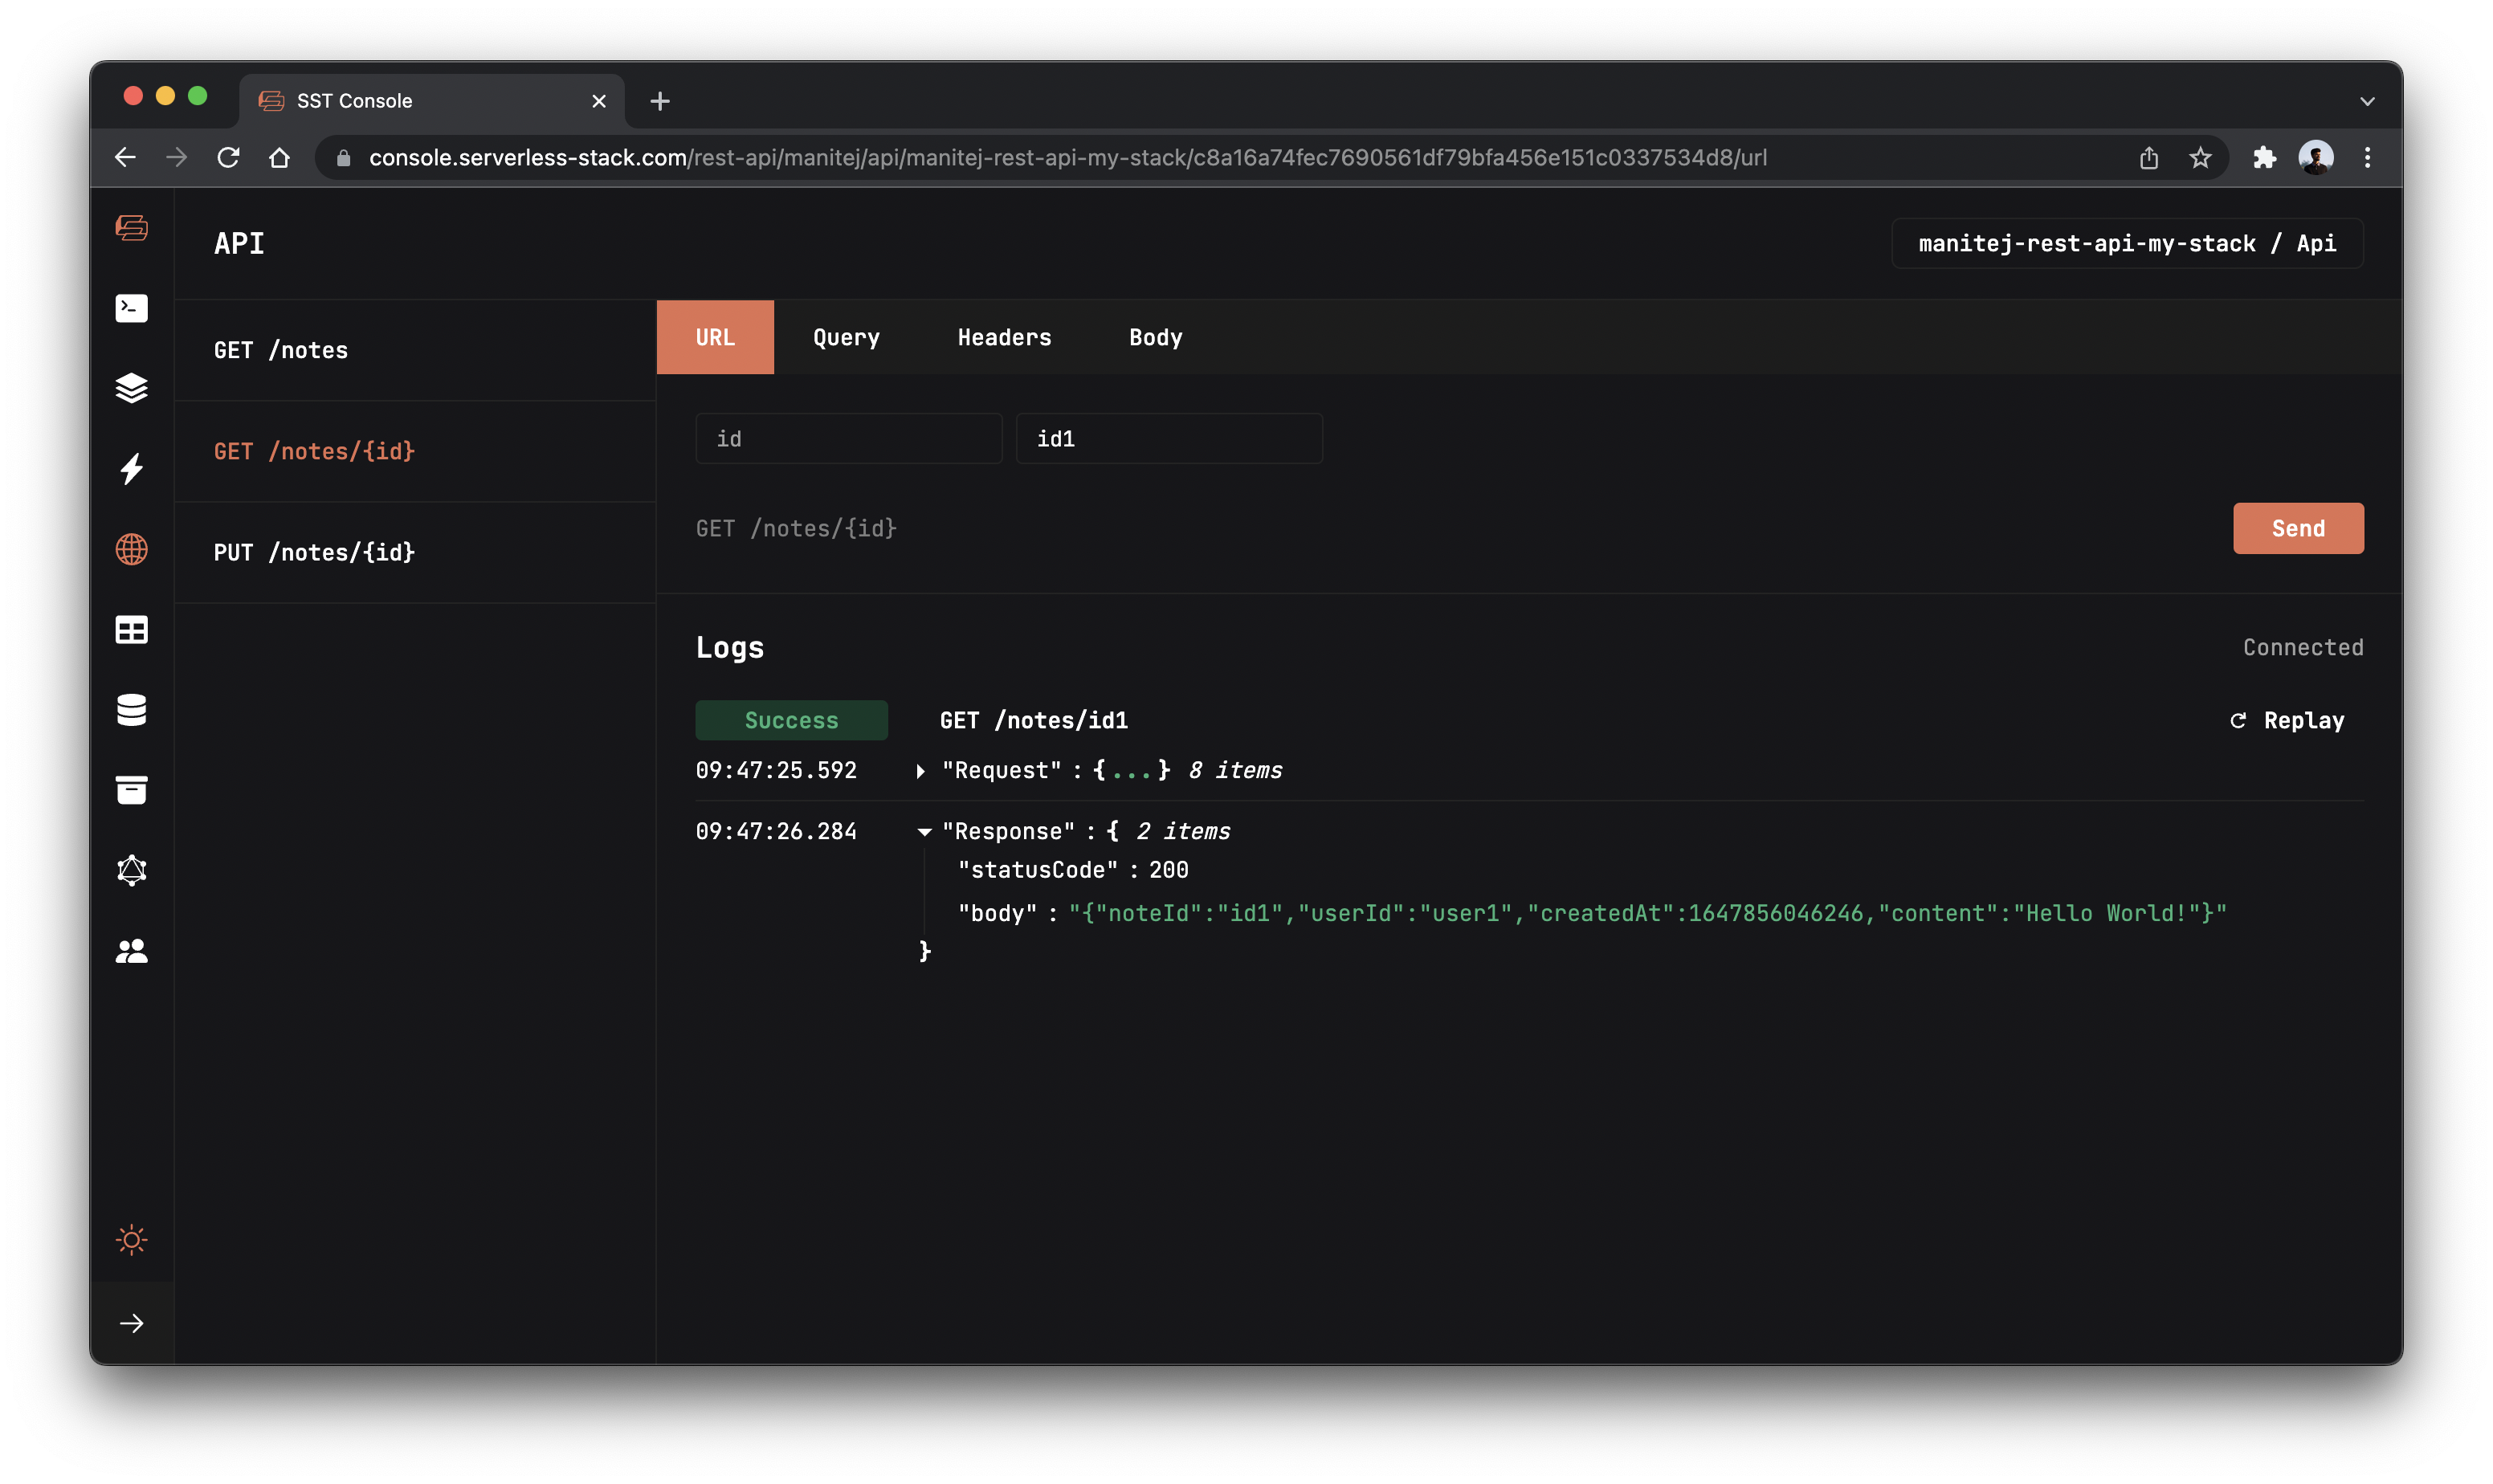
To retrieve a specific note, Go to GET /notes/{id} route and in the URL tab enter the id of the note you want to get in the id field and click the Send button to get that note.
Now to update our note, we need to make a PUT request, go to PUT /notes/{id} route.
In the URL tab, enter the id of the note you want to update and in the body tab and enter the below json value and hit Send.
{ "content": "Updating my note" }
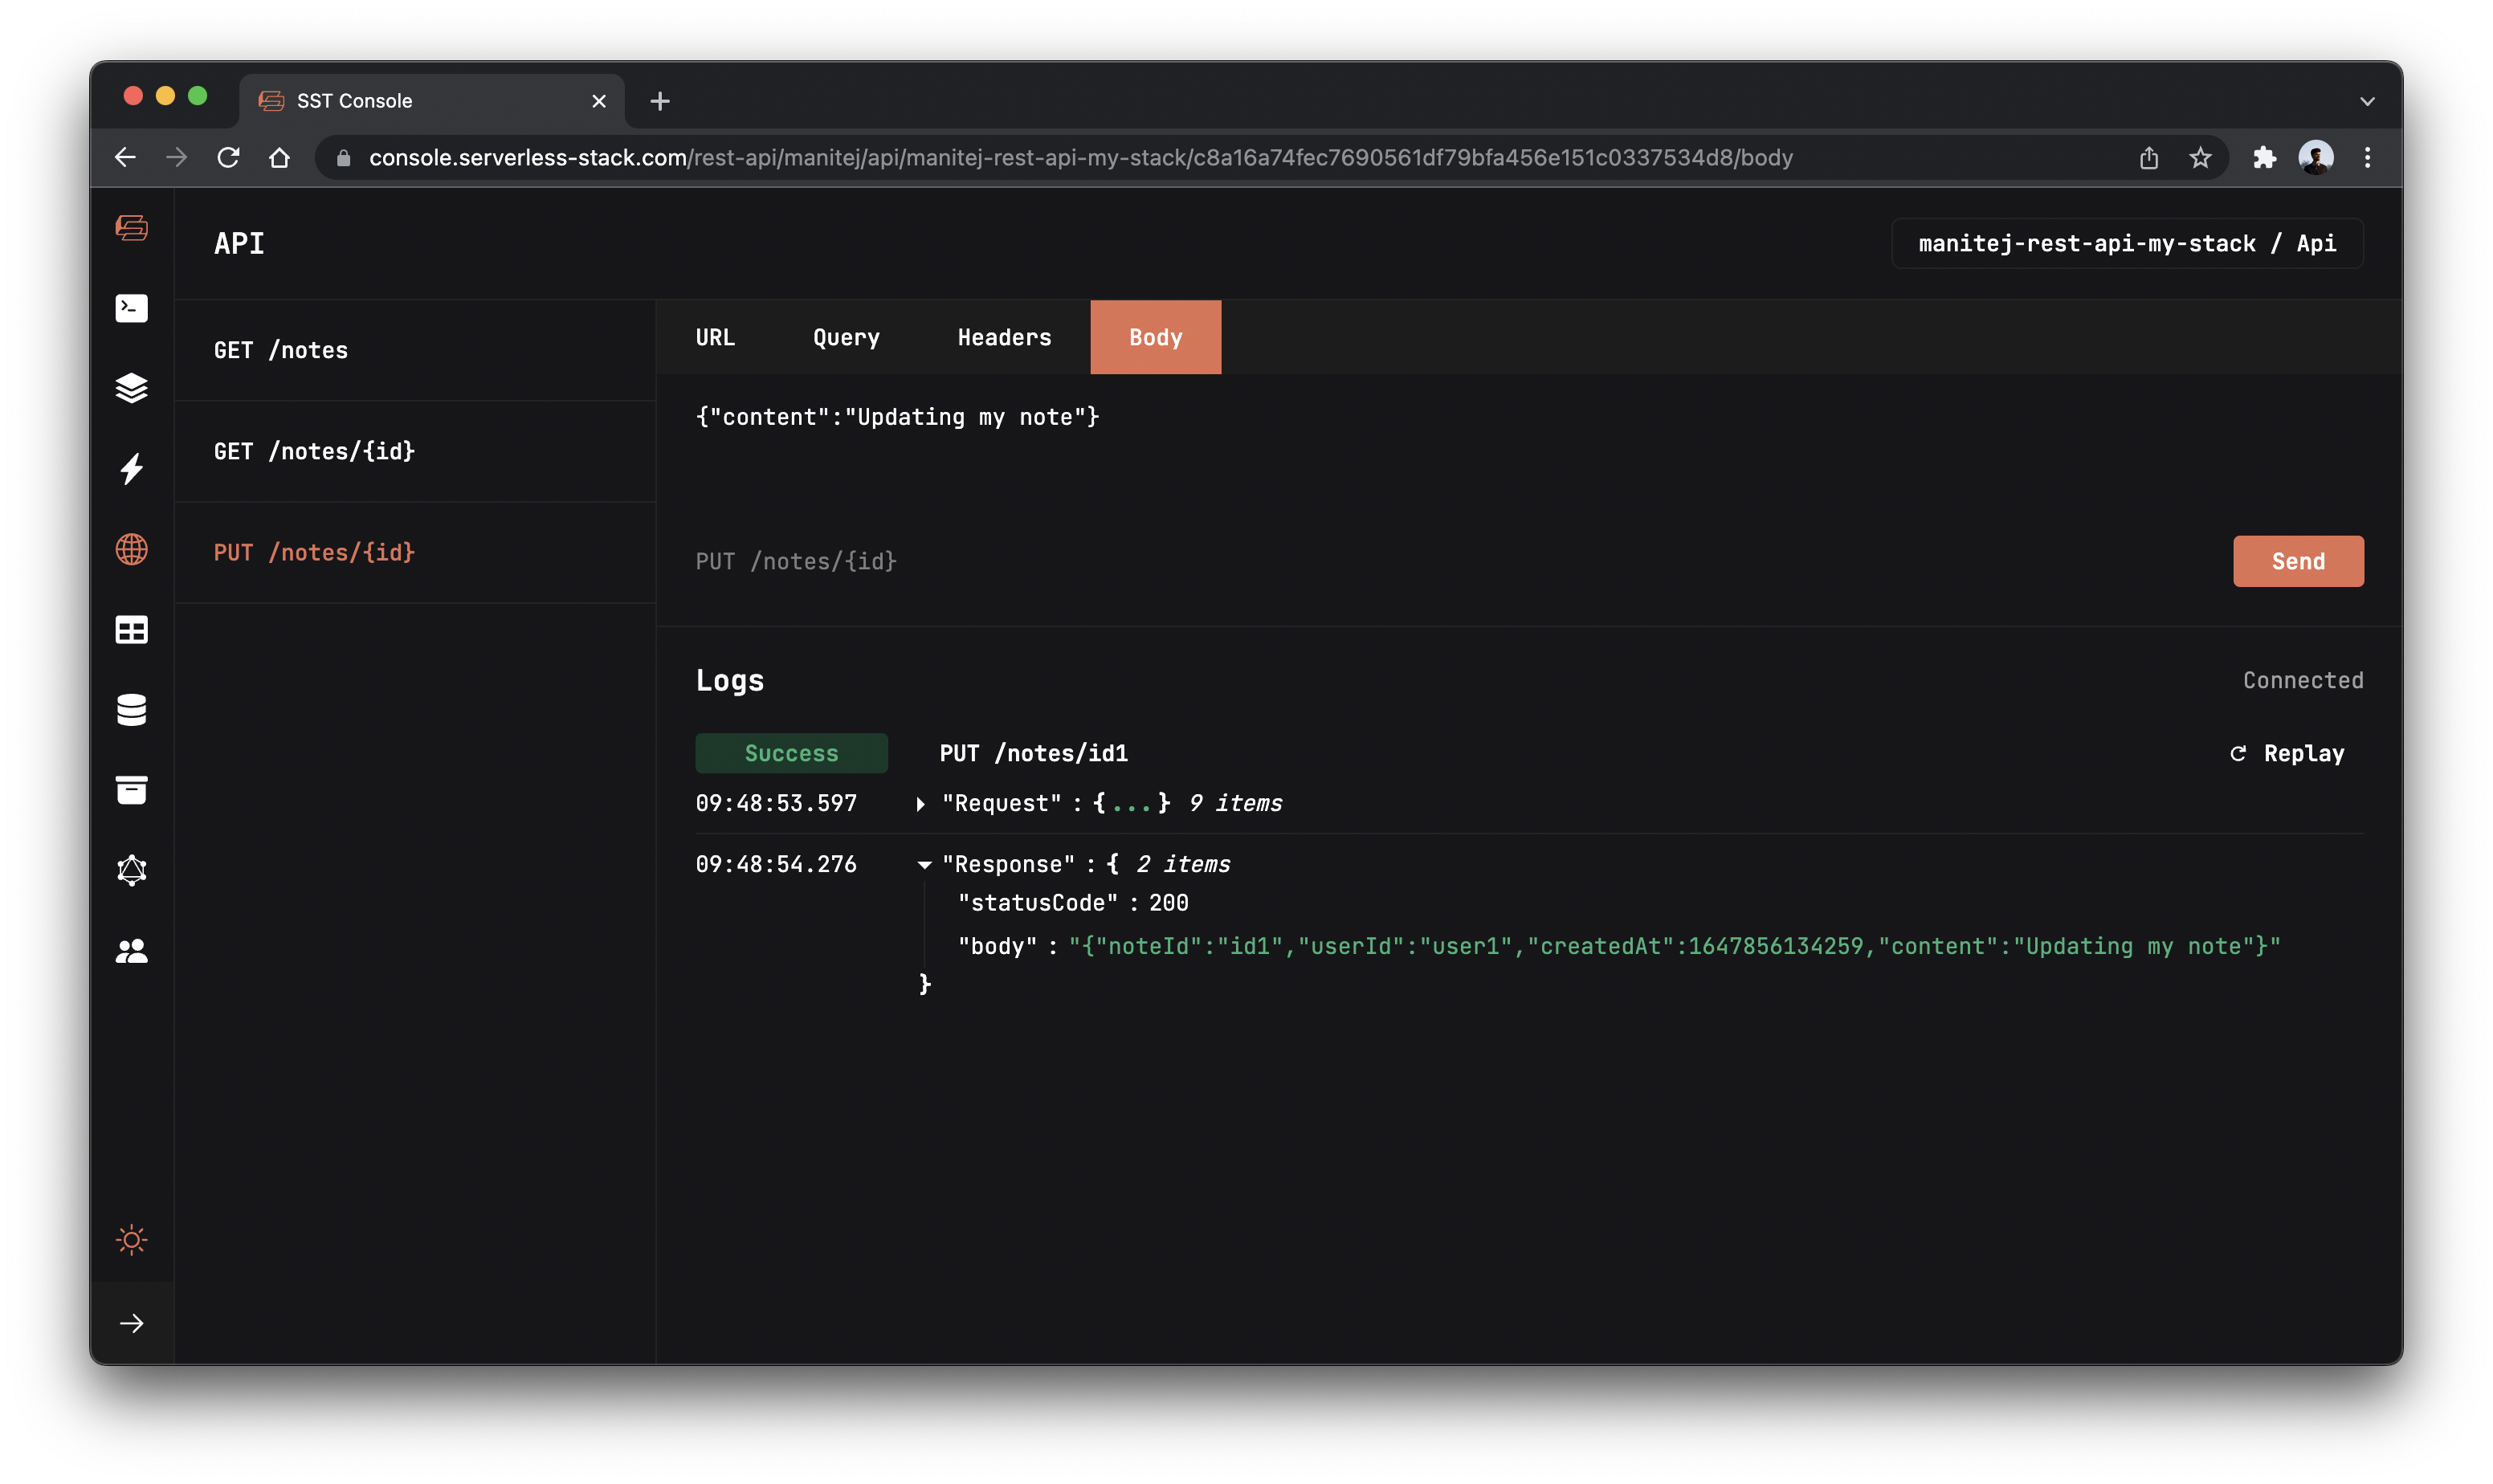
This should respond with the updated note.
Making changes
Let’s make a quick change to our API. It would be good if the JSON strings are pretty printed to make them more readable.
Replace Handler function in functions/lambda/list.go with the following.
func Handler(request events.APIGatewayV2HTTPRequest) (events.APIGatewayProxyResponse, error) {
	response, _ := json.MarshalIndent(db.Notes(), "", "  ")

	return events.APIGatewayProxyResponse{
		Body:       string(response),
		StatusCode: 200,
	}, nil
}
Here we are just adding some spaces to pretty print the JSON.
If you head back to the GET /notes route and hit Send again.
 You should see your list of notes in a more readable format.
Deploying your API
To wrap things up we’ll deploy our app to prod.
$ npx sst deploy --stage prod
This allows us to separate our environments, so when we are working in dev, it doesn’t break the app for our users.
Once deployed, you should see something like this.
 ✅  prod-rest-api-go-ExampleStack


Stack prod-rest-api-go-ExampleStack
  Status: deployed
  Outputs:
    ApiEndpoint: https://ck198mfop1.execute-api.us-east-1.amazonaws.com
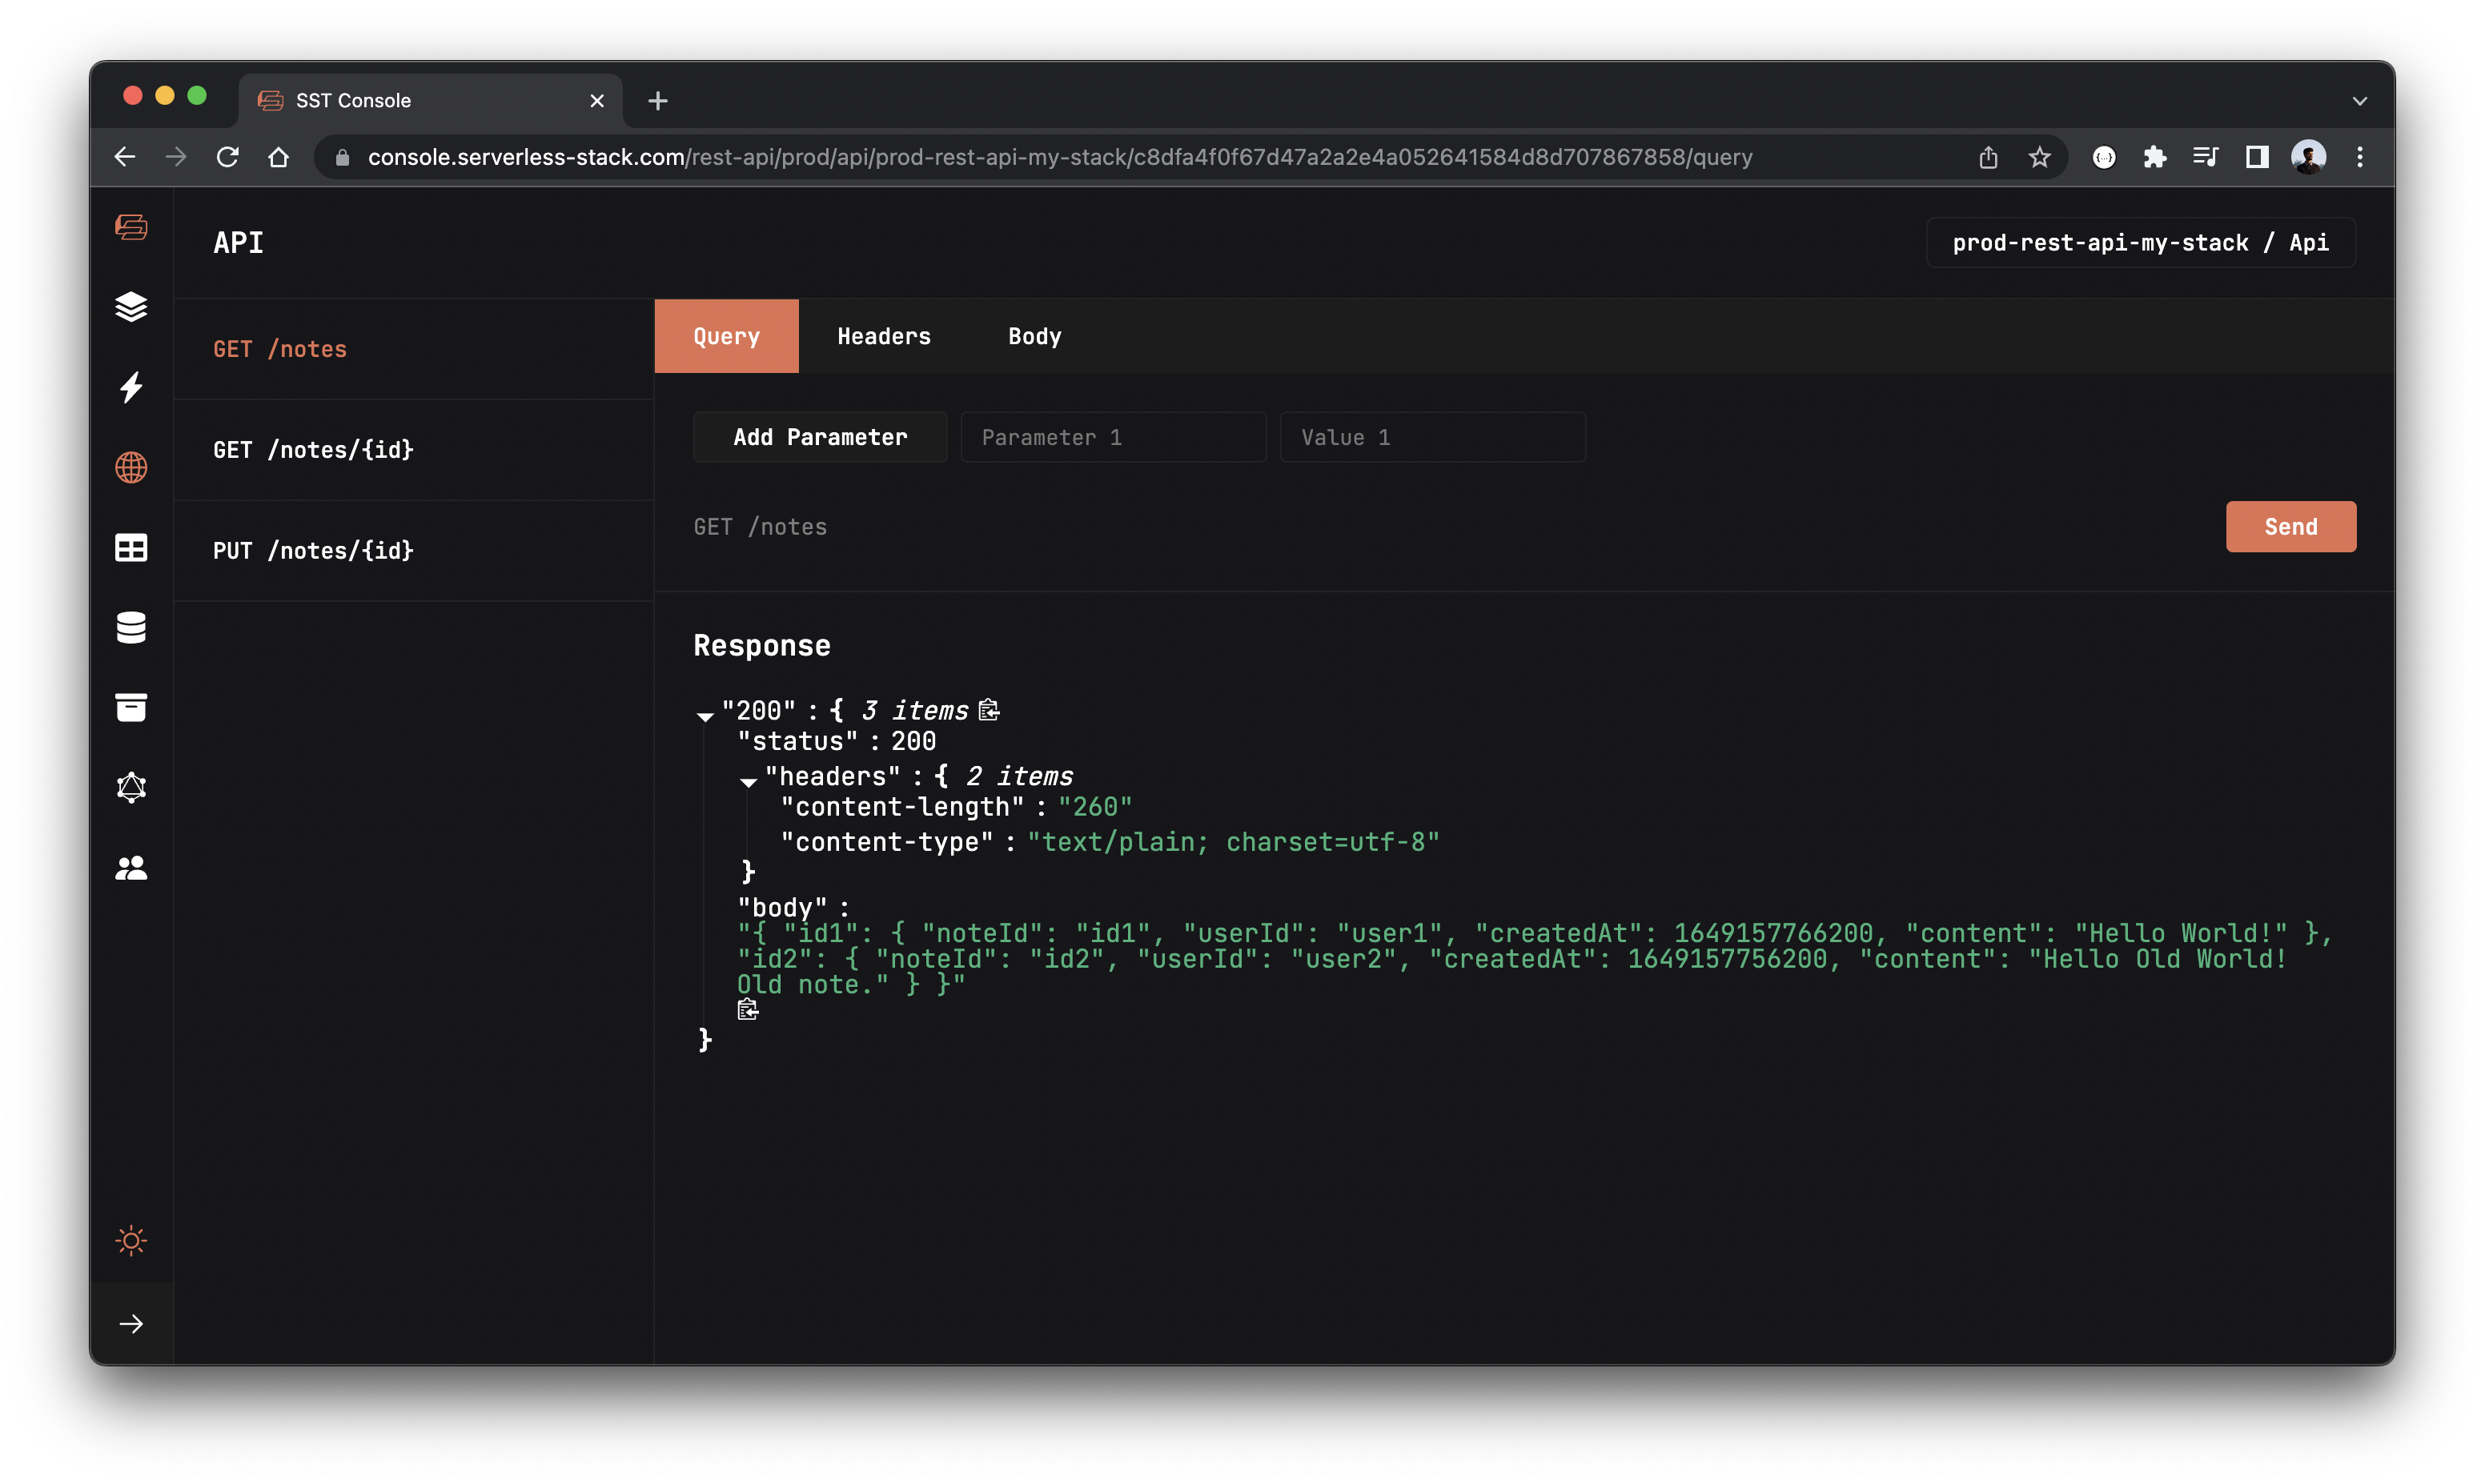
Run the below command to open the SST Console in prod stage to test the production endpoint.
npx sst console --stage prod
Go to the API explorer and click Send button of the GET /notes route, to send a GET request.
Cleaning up
Finally, you can remove the resources created in this example using the following commands.
$ npx sst remove
$ npx sst remove --stage prod
Conclusion
And that’s it! You’ve got a brand new serverless API. A local development environment, to test and make changes. And it’s deployed to production as well, so you can share it with your users. Check out the repo below for the code we used in this example. And leave a comment if you have any questions!
Example repo for reference
github.com/sst/sst/tree/master/examples/rest-api-goFor help and discussion
Comments on this exampleMore Examples
APIs
-
REST API
Building a simple REST API.
-
WebSocket API
Building a simple WebSocket API.
-
Custom Domains
Using a custom domain in an API.
Web Apps
-
React.js
Full-stack React app with a serverless API.
-
Next.js
Full-stack Next.js app with DynamoDB.
-
Vue.js
Full-stack Vue.js app with a serverless API.
-
Svelte
Full-stack SvelteKit app with a serverless API.
-
Gatsby
Full-stack Gatsby app with a serverless API.
-
Angular
Full-stack Angular app with a serverless API.
Mobile Apps
GraphQL
Databases
-
DynamoDB
Using DynamoDB in a serverless API.
-
MongoDB Atlas
Using MongoDB Atlas in a serverless API.
-
PostgreSQL
Using PostgreSQL and Aurora in a serverless API.
-
CRUD DynamoDB
Building a CRUD API with DynamoDB.
-
PlanetScale
Using PlanetScale in a serverless API.
Authentication
Using SST Auth
-
Facebook Auth
Adding Facebook auth to a full-stack serverless app.
-
Google Auth
Adding Google auth to a full-stack serverless app.
Using Cognito Identity Pools
-
Cognito IAM
Authenticating with Cognito User Pool and Identity Pool.
-
Facebook Auth
Authenticating a serverless API with Facebook.
-
Twitter Auth
Authenticating a serverless API with Twitter.
-
Auth0 IAM
Authenticating a serverless API with Auth0.
Using Cognito User Pools
-
Cognito JWT
Adding JWT authentication with Cognito.
-
Auth0 JWT
Adding JWT authentication with Auth0.
-
Google Auth
Authenticating a full-stack serverless app with Google.
-
GitHub Auth
Authenticating a full-stack serverless app with GitHub.
-
Facebook Auth
Authenticating a full-stack serverless app with Facebook.
Async Tasks
-
Cron
A simple serverless Cron job.
-
Queues
A simple queue system with SQS.
-
Pub/Sub
A simple pub/sub system with SNS.
-
Resize Images
Automatically resize images uploaded to S3.
-
Kinesis data streams
A simple Kinesis Data Stream system.
-
EventBus
A simple EventBridge system with EventBus.
Editors
-
Debug With VS Code
Using VS Code to debug serverless apps.
-
Debug With WebStorm
Using WebStorm to debug serverless apps.
-
Debug With IntelliJ
Using IntelliJ IDEA to debug serverless apps.
Monitoring
Miscellaneous
-
Lambda Layers
Using the @sparticuz/chromium layer to take screenshots.
-
Middy Validator
Use Middy to validate API request and responses.